| Page actions | |
|---|---|
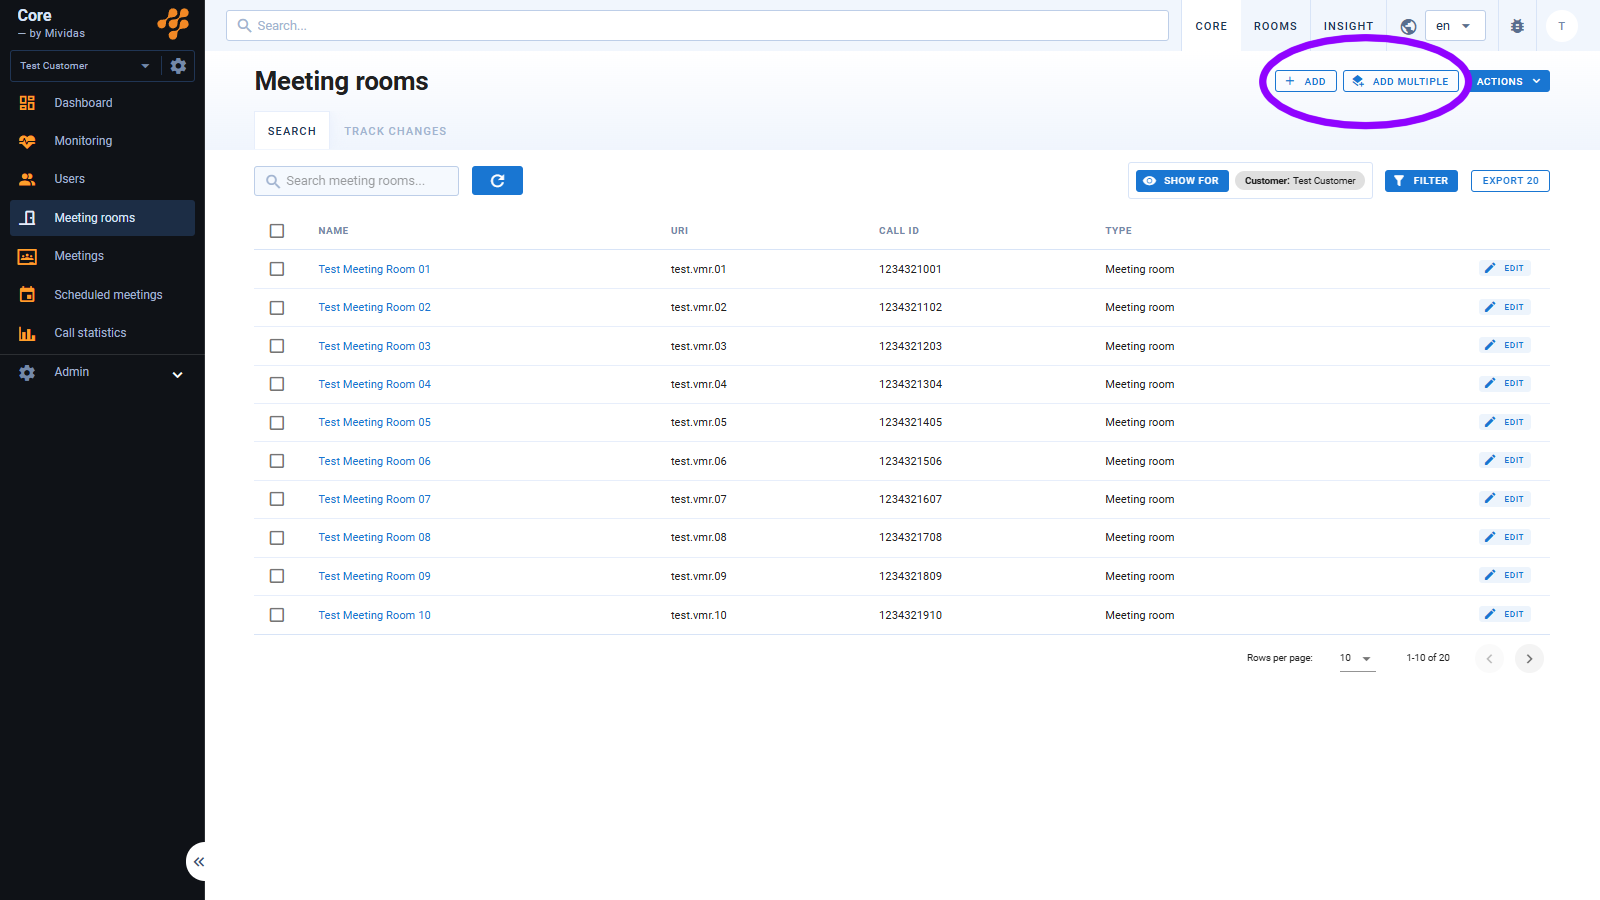
| Allows you to manually add a new meeting room. | |
| Allows you to add several meeting rooms, either manually or imported via an Excel file. | |
| 1. (
) – Allows you to manually refresh the dashboard 2. ( ) – Access relevant documentation. |
Add a single meeting room
Start by clicking the button.
Cisco Meeting Server
| Option | Description |
|---|---|
| Name | The name of the meeting room in plain text. |
| Type of room | Select the type of meeting room you would like to create. By default, your options are: Meeting room and Webinar. Settings below may change depending on the chosen meeting type. Below, we will show the details for the meeting type Meeting room.NOTE: For detailed information about creating meeting types and access methods, please see Configure and use custom meeting types and access methods. |
| URI | The meeting room’s URI is usually generated automatically but can also be specified manually if desired. |
| Generate numeric room number | When enabled, the room number is automatically assigned using one of the following options: Random numeric ID – Automatically generates a random numeric ID from within the configured number series. Next numeric ID in numerical order – Generates a numeric ID by selecting the next available number in sequential order. By disabling automation, you can assign a custom numeric ID. |
| Use PIN code | Used if the meeting room should be protected by a PIN code. The code can be generated randomly by clicking ( ) or entered manually. |
| Separate moderator PIN | When enabled, a separate PIN code is created for the meeting room host/moderator, who will have higher privileges in the meeting than regular guest participants. Generate a new PIN by clicking ( ) or enter one manually. |
| Use lobby for guest users | If enabled, guest users will be placed in a lobby until the first moderator/host connects to the meeting. |
| Lock lobby | If enabled, the moderator/host must manually admit participants to the meeting from the lobby. Only visible if lobby is enabled for guest users. |
| Layout | Choose your preferred layout for the meeting room; Automatic, Share space between participants, Speaker only, Speaker with other participants on overlay or Speaker with other participants below, Divided 2x2, Divided 3x3, Split 4x4, Split 5x5, Speaker + 5, Speaker + 7, Speaker + 9, Speaker + auto. |
| Organization unit | Select the organizational affiliation of the meeting room. This affects how statistics are displayed and how meeting rooms are filtered. |
| Owner | Specify whether the meeting room should be associated with a user. Additionally, you can choose to make the owner a member, which can affect rights assignment and visibility in booking tools. |
| Also add owner as member | Adds the owner of the meeting room as a member. This option is filled in by default. |
| Connect to email address | Normally, it is the same as the meeting room’s owner’s email address, but it can also be associated with another email address. |
| Require encryption | Enforces encryption for all connecting participants. |
| Enable chat | Choose if chat should be enabled. Global setting – Uses your global setting from within Cisco Meeting Server. Yes – Chat will be enabled. No – Chat will be disabled. |
| Access to meeting room members only | When enabled, only meeting room members can join, enhancing security. |
| Mute microphone for new participants | When enabled, participants will have their microphones muted upon joining the meeting. |
| Delete by time | A security feature that causes the meeting room to cease to exist at the specified date and time. |
Finish by clicking to create the room or to discard the configuration.
Pexip Infinity
| Option | Description |
|---|---|
| Name | The name of the meeting room in plain text. |
| Description | Give the meeting room a suitable description. |
| Type of room | Select the type of meeting room you would like to create. By default, your options are: Meeting room, Webinar and Test meeting. Settings below may change depending on the chosen meeting type. Below, we will show the details for the meeting type Meeting room.NOTE: For detailed information about creating meeting types and access methods, please see Configure and use custom meeting types and access methods. |
| Host PIN | Set a host PIN code for the meeting room. |
| Moderator layout | Choose the layout for the meeting. If it is a Meeting room, the layout choice applies to all participants. If it is a Webinar, the choice only applies to moderators. |
| Guest connection | Allow guests in the meeting room. |
| Guest PIN | Set a PIN code for guests. The code can be generated randomly by clicking ( ) or entered manually. |
| Guest layout | Choose the layout for guests. Only applies if the meeting type is Webinar. |
| Email address | Choose an email address to be associated with the meeting room. |
| Enable chat | Choose if chat should be enabled. Global setting – Uses your global setting from within Pexip. Yes – Chat will be enabled. No – Chat will be disabled. |
| Organization unit | Choose to associate the meeting rooms to a organizational unit. |
| Delete by time | A security feature where the meeting room ceases to exist at the specified date and time. |
| Alias | Choose how the numeric ID is assigned: Random numeric ID – Automatically generates a random numeric ID from within the configured number series. Next numeric ID in numerical order – Generates a numeric ID by selecting the next available number in sequential order. You can also add more aliases below by typing the chosen alias and an optional description. |
Finish by clicking to create the room or to discard the configuration.
Add/import multiple meeting rooms
Start by clicking the button.
Cisco Meeting Server
| Option | Description |
|---|---|
| Choose some default settings that will apply to all the meeting rooms you are about to create. The options are: Send email – Send a notification email to the provided email address. Number generation: Choose how the room numbers are assigned: either randomly based on the selected number series or as the next available numeric ID after the last added room. Add owner as a member: Automatically adds the owner as a member of that meeting room. |
Each meeting room has the following fields to configure:
- Name – The name of the meeting room.
- Type of room – Select the type of meeting room you would like to create. By default, your options are:
Meeting roomandWebinar.
NOTE: For detailed information about creating meeting types and access methods, please see Configure and use custom meeting types and access methods. - URI – Set the URI for the meeting room. Leave blank to generate automatically, based on your default setting.
- Call ID – Set the Call ID for the meeting room. Leave blank to generate automatically, based on your default setting.
- PIN – Set the PIN code for guests. Click ( ) to generate a random one.
- PIN moderator – Set the PIN code for moderators. Click ( ) to generate a random one.
- Owner (JID) – The owner of the meeting room.
- Email address – Choose an email address to be associated with the meeting room.
- Organization unit – Choose to associate the meeting rooms to a organizational unit.
- Members – Choose member(s) to be added to the meeting room.
Import from Excel
Choose an Excel file to import. The file table does not need to match the form precisely; instead, you map each column in the file to the corresponding column.
Pexip Infinity
| Option | Description |
|---|---|
| Choose some default settings that will apply to all the meeting rooms you are about to create. The options are: Type of meeting room: Virtual meeting room or WebinarSend email: Send a notification email to the provided email address. Number generation: Choose how the room numbers are assigned: either randomly based on the selected number series or as the next available numeric ID after the last added room. |
Each meeting room has the following fields to configure:
- Name – The name of the meeting room.
- Type of room – Select the type of meeting room you would like to create. By default, your options are:
Meeting room,WebinarandTest meeting.
NOTE: For detailed information about creating meeting types and access methods, please see Configure and use custom meeting types and access methods. - Description – Set the URI for the meeting room. Leave blank to generate automatically.
- PIN – Set the moderator PIN code for the meeting room. Click to generate a random one.
- Layout moderators – Choose the type of layout that the moderator(s) should have in the meeting.
- Allow guests – Choose if guests should be allowed.
- Guest PIN – Set the guest PIN code for the meeting room. Click to generate a random one.
- Layout guests – Choose the type of layout that the guests should have in the meeting.
- Primary number alias – Set the Primary number alias for the meeting room. Leave blank to generate automatically.
- Other aliases – Set any other aliases for the meeting room. Leave blank to generate automatically.
- Email address – Choose an email address to be associated with the meeting room.
- Organization unit – Choose to associate the meeting rooms to a organizational unit.
Import from Excel
Choose an Excel file to import. The file table does not need to match the form precisely; instead, you map each column in the file to the corresponding column.