Upon initial login to your Mividas Core installation, the onboarding wizard will guide you through setup steps to configure the installation’s essential features. The wizard covers setting up an organization, configuring video clusters, and securing access.
Prerequisites
Before beginning your Mividas Core onboarding, confirm that:
- Mividas Installer installation: Ensure your Mividas Installer is up and running; refer to VM Deployment if needed.
- Mividas Core installation: Ensure that your Mividas Core installation is up an running, refer to Mividas Core Installation and Upgrade if needed.
- Check network functionality: Ensure the firewall(s) allow communication between Mividas Core and the video components you want to install. For more information, check the Network port requirement.
- Accounts to video components: Ensure you have access to accounts with the correct access within the video components that you wish to add.
- Cisco Meetings Server: API or Administrator. Must be Administrator to activate automatic backups.
- Pexip Infinity: API user with read and write privileges.
- Expressway/VCS: Administrator account with API access and both read and write privileges.
Onboarding wizard
1. Organization setup

| Option | Description |
|---|---|
| Organization | Enter the name of the default organization that will represent your Mividas Core installation. |
Click to proceed.
2. Configure video cluster

| Option | Description |
|---|---|
| Description | Enter a description for the video cluster . |
| Type | Choose the cluster type, either CMS Cluster, Pexip Cluster or Webex. |
| Primary SIP domain | Enter the primary SIP domain that is beeing used in your video cluster. E.g. video.example.com |
| WebRTC/Web access hostname | Enter the Hostname/FQDN that is used for WebRTC in your video cluster. E.g. webrtc.example.com |
| IVR phone number | Enter the phone number that sends you to your video cluster IVR. |
| Static rooms number series | Enter the start and end of the range that should be used to create your static meeting rooms, e.g. 150000-159999. |
| Booked rooms number series | Enter the start and end of the range that should be used to create your booked meeting rooms, e.g. 160000-169999. |
Press to proceed. If you want to finish this later instead, press Skip.
Cisco Meeting Server

| Option | Description |
|---|---|
| Description | Enter a description for the CMS server . |
| IP address | Enter the IP address of the CMS server, e.g. 192.168.0.1 or add a DNS name below. |
| Opt. separate IP/host for API calls | If you have network separation for API calls, so that traffic will go through a separate hostname if you want to add firewall rules or the like. Enter the IP or Hostname including custom port. E.g. api.example.com:445 |
| DNS Name | Enter the full DNS Name of the CMS server, including custom port if needed. E.g. cms01.example.com:444 |
| Verify SSL certificates | Verifies the trust between servers with SSL certificates. |
| Username | Enter the Username of an API or Administrator account. Must be Administrator to activate automatic backups. |
| Password | Enter the password of the username above. |
| Synchronize tenants from CMS | If checked Mividas Core will synchronize available tenants from the CMS node. |
| Set CDR Receiver for statistics | Option for retrieving call statistics from the connected CDR receiver and storing these within Mividas Core. This allows for local state on active calls and to speed up meeting views in bigger installations. |
Press to add the CMS server or press Skip to finish later.
The installer will find the other servers in the cluster and automatically fill in the information needed to add those as well. Continue to add all CMS Servers to the CMS Cluster until all of them have been added.

When the CMS cluster has been fully added, you will automatically proceed to a summary of the CMS cluster. Click to proceed to the next step.
Pexip Infinity

| Option | Description |
|---|---|
| Description | Is already filled in with what your wrote on the first step, here you can change it if you wish. |
| IP address | Enter the IP address of the Pexip Infinity management node, e.g. 192.168.0.1 or: |
| DNS Name | Enter the full DNS Name of the Pexip Infinity management node, including custom port if needed. E.g. pexip.example.com:444 |
| Opt. separate IP/host for API calls | If you have network separation for API calls, so that traffic will go through a separate hostname if you want to add firewall rules or the like. Enter the IP or Hostname including custom port. E.g. api.example.com:445 |
| Verify SSL certificates | Verifies the trust between servers with SSL certificates. |
| Username | Enter the Username of an API account with read-write permissions in Pexip. |
| Password | Enter the password of the username above. |
| Dial-out location for new participants | Type the default location in Pexip to be used when dialing out to new participants. |
| Prepare event sink and external policy | It adds objects to Pexip for event sink and external policy, which you can then add to the relevant system locations. |
Press to add the Pexip management node or press Skip to finish later.

When the Pexip cluster has been added, you will automatically proceed to a summary of the Pexip cluster. Click to proceed to the next step.
3. Add call control clusters
If you have separate call control, Cisco VCS/Expressway or CUCM, here is where to add it. If you don’t have anything to add or want to finish later, press Skip.
Add VCS/Expressway Cluster
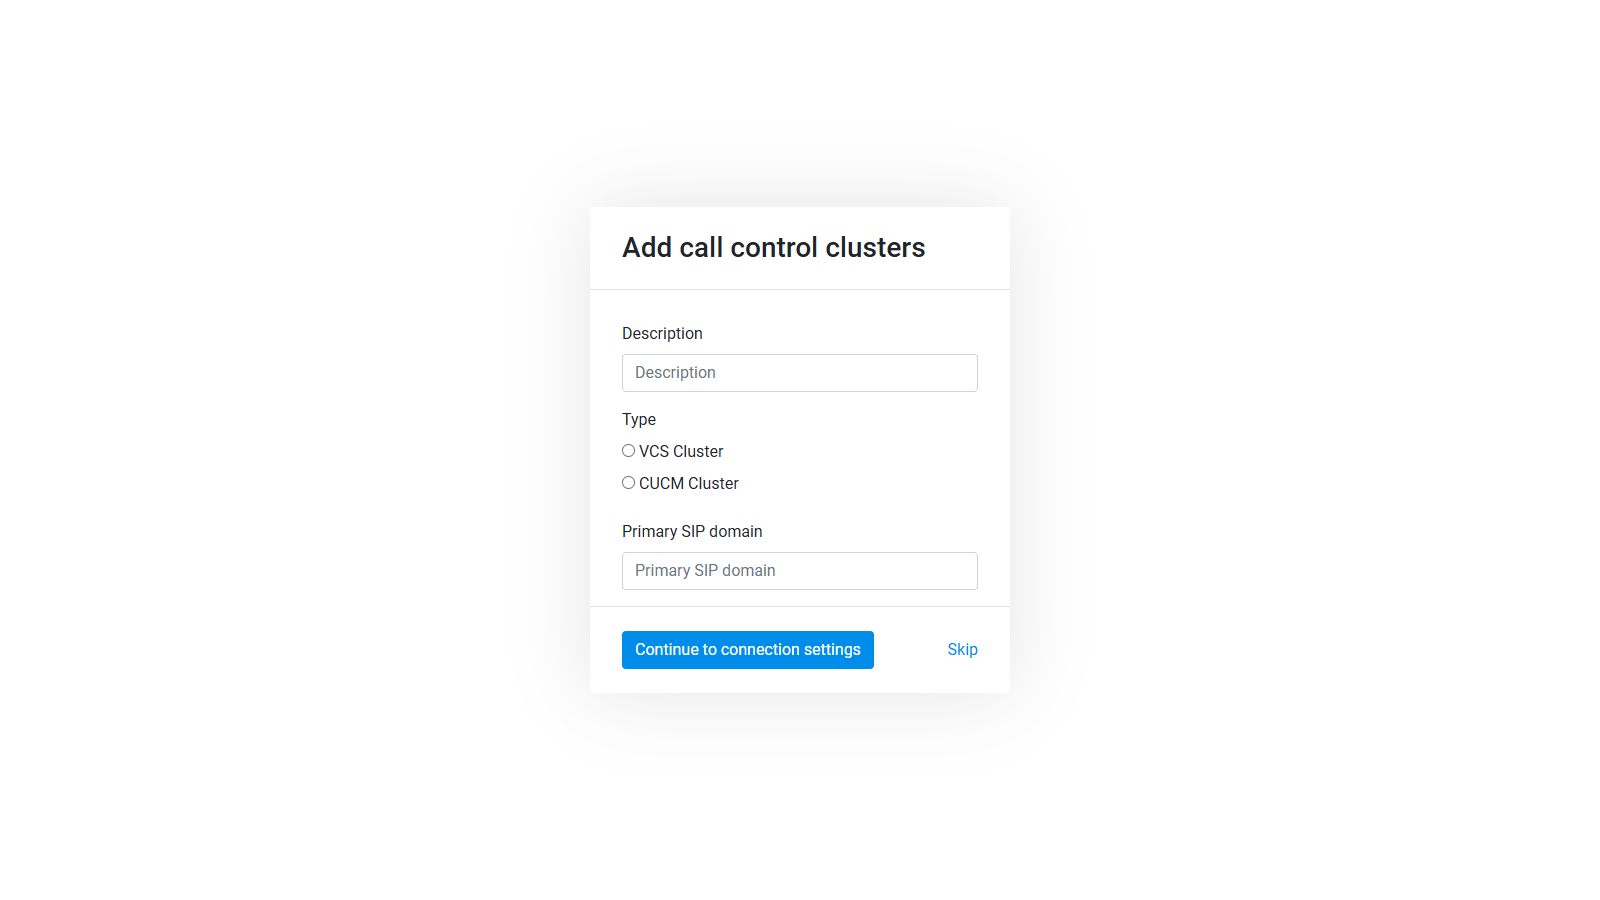
| Option | Description |
|---|---|
| Description | Enter a description for the call control cluster . |
| Type | Select the type of cluster to add: VCS/Experssway or CUCM |
| Primary SIP domain | Enter the primary SIP domain that is used. E.g. video.example.com |
Click , or press Skip to skip or finish later.

| Option | Description |
|---|---|
| Description | Enter a description for the call control server . |
| IP | Enter the IP address of the call control server, e.g. 192.168.0.1 or: |
| DNS Name | Enter the full DNS Name of the call control server, including custom port if needed. E.g. expressway-c.example.com:444 |
| Opt. separate api-ip/host | If you have network separation for API calls, so that traffic will go through a separate IP if you want to add firewall rules or the like. Enter the IP including custom port. E.g. 192.168.0.1:445 |
| Verify SSL certificates | Verifies the trust between servers with SSL certificates. |
| Username | Enter the Username of an Administrator account with API access, and both read and write privileges. |
| Password | Enter the password of the username above. |
Click
to add the VCS/Expressway server, or press Skip to skip or finish later.
If more than 1 VCS/Expressway is set up in the cluster, the installer will find other servers to be added to the cluster and automatically fill in the information needed to add them. Continue adding them manually until all servers in the cluster have been added.
After finishing your first cluster, you will be sent back to the start to be able to add more call control clusters if available. When you have added all call control clusters, press Skip to proceed.
Add CUCM Cluster
| Option | Description |
|---|---|
| Description | Enter a description for the call control cluster . |
| Type | Select the type of cluster to add: VCS/Experssway or CUCM |
| Primary SIP domain | Enter the primary SIP domain that is used. E.g. video.example.com |
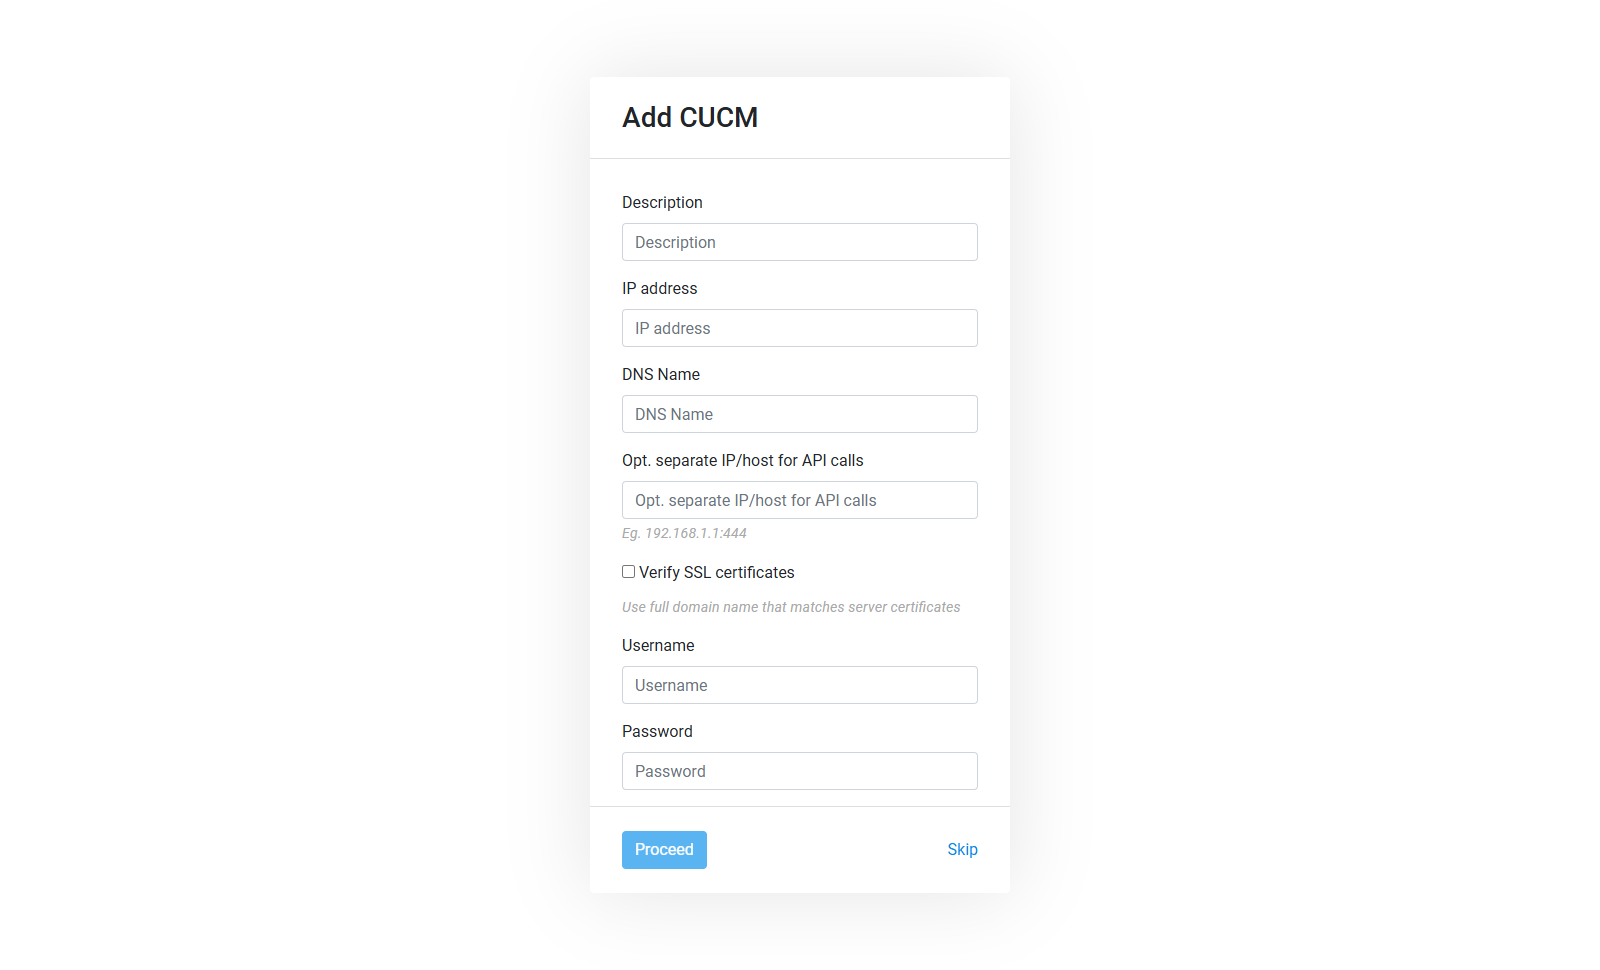
| Option | Description |
|---|---|
| Description | Enter a description for the call control server . |
| IP | Enter the IP address of the call control server, e.g. 192.168.0.1 or: |
| DNS Name | Enter the full DNS Name of the call control server, including custom port if needed. E.g. expressway-c.example.com:444 |
| Opt. separate api-ip/host | If you have network separation for API calls, so that traffic will go through a separate IP if you want to add firewall rules or the like. Enter the IP including custom port. E.g. 192.168.0.1:445 |
| Verify SSL certificates | Verifies the trust between servers with SSL certificates. |
| Username | Enter the Username of an Administrator account with API access, and both read and write privileges. |
| Password | Enter the password of the username above. |
Click
to add the CUCM server, or press Skip to skip or finish later.
After finishing your first cluster, you will be sent back to the start to be able to add more call control clusters if available. When you have added all call control clusters, press Skip to proceed.
4. Choose password

| Option | Description |
|---|---|
| New password | Choose a password for the user “mividas_fallback”. Please document this password. |
| New password confirmation | Type the password again to verify it. |
Click to finish the setup. You can now proceed to manage and configure video conferencing functions within the platform.