Table of contents
1. Mividas Meeting Portal
Mividas Meeting Portal is our product to enable easy scheduling of video meetings directly via the end user’s web browser.
In this section, we assume that you are already working on a working installation of Mividas Meeting Portal, if not, please see the installation documentation before proceeding.
- For a quick overview and more information on what Mividas Meeting Portal is all about, please visit our homepage.
- Release notes for Mividas Meeting Portal can be found here.
- Release notes for Mividas Outlook add-in can be found here.
1.1. Installation and upgrades
The Mividas Meeting Portal installation and deployment process involves three main steps:
- Mividas Virtual Machine (VM): You first need to deploy the Mividas Installer virtual machine to your network. Ensure the VM is deployed and running. If not, refer to the VM deployment documentation.
- Mividas Installer Setup: Mividas Installer must be set up correctly and your license key activated. Refer to the Mividas Installer documentation if needed. After entering your license key, the Mividas Installer displays all product modules accessible with your license. The installation of Mividas Meeting Portal can proceed as a stand-alone installation or alongside other Mividas products.
- Install the Mividas Meeting Portal module: Continue below to install and deploy the Mividas Meeting Portal product module from the Mividas Installer.
Configuration
On the Mividas Installer start screen, click under Mividas Meeting Portal to start configuration before deployment. Choose Mividas Meeting Portal, which will open up the configuration fields below.
Main domain name for management web interface
| Option | Description |
|---|---|
| Configure Hostname/FQDN | Enter the hostname/FQDN for your installation. Must be a valid DNS record. |
| Select existing certificate | Choose one of your previously uploaded certificates to be used for the installation. |
| Opens up a window of the installer certificate management, where you can upload certificates and more. |
Dial info and presentation
| Option | Description |
|---|---|
| Site title for this installation | Set a titel on this installation, often same as organisation name. |
| H323 Gateway IP | If an external H323 gateway exists, this will be displayed next to SIP address as 123.123.123.123##99999 for room number 9999. |
User and login settings
| Option | Description |
|---|---|
| Example login username | Default domain to be appended to usernames to match video rooms in MCU. Usually, the user JID domain for Cisco Meeting Server and the email domain for Pexip Infinity. |
| Video default user-domain | The default domain must be appended to usernames to match video rooms in MCU. Usually, the user JID domain for Cisco Meeting Server and the email domain for Pexip Infinity. |
Note: User/Login related settings. See separate tabs for LDAP- and SAML-related settings
Locale settings
| Option | Description |
|---|---|
| Default language | Set the preferred language for the system. Mividas Meeting Portal uses the browser’s language setting if available; otherwise, it defaults to the language set here. |
| Timezone | Set the preferred time zone for the system. |
Outgoing Email (SMTP) Settings
Configure SMTP details for email notifications and invitations. If you configured this during the initial Installer setup, fields will be pre-filled but can be modified as needed.
| Option | Description |
|---|---|
| Display-name of sender | Enter the name to appear as the email sender. |
| Sender email-address | Enter the email address for outgoing messages (typically a no-reply address). |
| SMTP relay server hostname | Specify the SMTP server’s hostname. |
| TLS mode | Choose your preferred TLS mode. |
| Port | Specify the SMTP server port. |
| Username | Enter the SMTP username. |
| Password | Enter the SMTP password. If no password is needed, enter a hyphen. |
Optional settings
Book API settings
| Option | Description |
|---|---|
| External Mividas Core server domain name | If this Mividas Meeting Portal should be connected to a specific Mividas Core installation, please enter the Mividas Core server domain name here. In case of single server installation, leave this blank. |
| API key | API key to use from Mividas Meeting Portal to Mividas Core |
| Default customer shared key | Use this key to connect a scheduled meeting to a specific customer in Mividas Core |
| Disable dynamic customer shared key | Dynamic value from e.g. LDAP-attribute/ou will never be used |
OIDC (OpenID Connect) provider settings
| Option | Description |
|---|---|
| Enable | Enable OIDC provider support. |
| Select existing certificate | Select any already uploaded certificate to use with OIDC. |
| Click to open a new window where you Manage certificates. | |
| Remove optional setting | Check this box and click save to remove the settings. |
LDAP authentication settings
| Option | Description |
|---|---|
| Server | Enter the hostname of the current LDAP or AD server to use by default. Use “fqdn:389” to use a specific port. |
| Service account DN/username | Here you enter the path to the account to be used as a service account. The path is often unique to your particular organization. |
| Password | Enter the password for your LDAP or AD server. The field will get empty after pressing save. |
| Use LDAPS-connection | Connect to the server using SSL-based LDAPS-connection (port 636 by default). Make sure you have added any custom CA-certificates to make verification work. |
| Ignore TLS/SSL verification errors | Ignore TLS CA verification. TLS over regular LDAP port 389 may be used even if LDAPS is not enabled so unless you have added custom CA certificates for verification login may fail. |
| Disable referral chasing | Referrals occur when the queried server doesn’t have the requested information but points the client to another server that might. The client can then “chase” these referrals to retrieve the needed data. |
| Base dn | Specify where in the tree the initial search for results should begin. |
| User filter | Here you choose how users are filtered out and displayed. |
| End user group DN | Specify which group in the tree that will have access to the system and be able to use the product. |
| Admin group DN | Specify which group in the tree will have elevated admin rights in the system, which opens up additional settings and functions for the logged-in user. |
| Superuser group DN | Specify which group in the tree that will give members superuser status (highest). Use this with caution as these users will have full control over the system and should only be assigned to users with high technical knowledge. |
| Customer attribute | For dynamic multi-tenant Mividas Meeting Portal use. User LDAP-object attribute that contains customer shared keys, e.g. "customerAttribute". |
| Organisation membership attribute | Comma-separated list of user LDAP-object attributes that contains the users place in the organization (for fine organization level statistics). E.g. "topLevelOrganization,secondsLevelOrganization" |
| Username attribute | Attribute to use as ID/owner for scheduled meetings. Default SIP-domain will be added if none is included. Structure: [dap_fieldname[/search/replace]. Example: email/example.com/video.example.com |
| Enable local accounts | Allow logging in to users added to the local user database. |
External database server (beta)
You can choose to run your own database server, instead of the bundled one.
| Option | Description |
|---|---|
| Hostname | Enter the Hostname/FQDN or IP of the database server. |
| Username | Enter the database username. |
| Password | Enter the database password. If no password is needed, enter a hyphen. |
| Authentication type | Choose authentication type. |
| TLS mode | Choose what level of TLS is needed. |
| Create new user/database autmatically for each component | Allows for the creation of a new database for each installation. Mostly useful for service providers to keep customer data in separate databases. |
External Redis server (beta)
You can choose to run your own Redis server, instead of the bundled one.
| Option | Description |
|---|---|
| Protocol | Choose the protocol for the communication. |
| Hostname | Enter the Hostname/FQDN or IP of the Redis server. |
| Username | Enter the Redis username. |
| Password | Enter the Redis password. If no password is needed, enter a hyphen. |
| Use as background task broker | All background task messages will be handled by Redis instead of RabbitMQ. |
SAML SSO settings
| Option | Description |
|---|---|
| Entity URI to pass to SAML server | This will normally be the address to the product you are setting this up for, e.g. https://core.example.com
Ensure this name is exactly the same as configured in idp configuration as “Identifier” for the Relaying Party Trust! |
| URL to autoconfig metadata XML-file | The URL that is used for the product to automatically get the metadata XML-file.
Example for ADFS: https://<ADFS server FQDN>/FederationMetadata/2007-06/FederationMetadata.xml
Example for Keycloak: https://<Keycloak server FQDN>/auth/realms/<REALM>/protocol/saml/descriptor |
| Offline idP metadata XML | This is only needed if auto configuration is not used. Paste the iDP metadata XML in the text field. |
| Offline SP metadata XML | This is only needed if auto configuration is not used. Paste the SP metadata XML in the text field. |
| Select existing certificate | Choose one of you previously uploaded certificates to be used for encryption and signing of requests. |
| Sign SSL-certificate | If you have not yet uploaded a certificate that can be selected in the previous step, choose a Full chain PEM-formatted certificate bundle to upload. |
| Sign private key | Choose the private key of the above chosen certificate to upload. |
| Username claim | SAML Claim to use for creating the username. For Cisco Meeting Server installations, this should correspond to the username in CMS (jid).
Structure: <saml_claim_name>[/<search>/<replace>]. Example: email/example.org/video.example.org |
| Group/role/memberOf SAML claim | SAML Claim where you get the Group/role/memberOf to determine if the login is for a regular user, administrator or Superuser. E.g. OU=Groups,DC=example,DC=com |
| Group/role claim value required for regular users | Enter the path for the group/role that is required for regular users. E.g. CN=regular-users,OU=Groups,DC=example,DC=com |
| Group/role claim value required for admin-users | Enter the path for the group/role that is required for admin-users. E.g. CN=admin-users,OU=Groups,DC=example,DC=com |
| Group/role claim value required for superuser-users | Enter the path for the group/role that is required for superusers-users. E.g. CN=superusers-users,OU=Groups,DC=example,DC=com |
| Customer SAML claim | SAML Claim used in multi-tenant installations, to determin if the login is for a specific Customer |
| Enable single log out (SLO) | Single Logout (SLO) results in all user sessions being terminated simultaneously for the browser that initiated the logout. Closing all user sessions prevents unauthorized users from accessing resources at the Mividas products (SPs). |
| Enable local accounts | Allow logging in using username/password (using backend admin or API) with local accounts. |
| Enable debug-mode | Print more information including SAML Claims in logs, good for troubleshooting. |
SMS settings
| Option | Description |
|---|---|
| Provider | Choose your SMS provider. Currently available: Brevo, Twilio, GatewayAPI, MoSMS and Email. |
| Username | Enter the username of the account at your provider. |
| Password | Enter the password for the username above. If no password is needed, enter a hyphen. |
| Sender | The name of the sender. |
| Default country code | The default country code for your outgoing SMS. |
Save configuration
When you have filled in everything needed for your installation, or just want to save your progress, you need to save theese settings. Do so by clicking in the bottom left corner.
Deployment
Select Version and Deploy
After everything is configured it is time to deploy Mividas Meeting Portal. Choose the Mividas Meeting Portal version from the drop-down list ![]() , then click
. A terminal window will display the installation progress. Once completed, reload the page to verify the correct version.
, then click
. A terminal window will display the installation progress. Once completed, reload the page to verify the correct version.
portal_epm:  Running  15/18
portal_epm:  Running  15/18
portal_epm:  Running  16/18
portal_epm:  Running  18/18
Finished
Reload
Update settings post-deployment
Modify Settings Post-Deployment
To update settings after deployment, select Mividas Meeting Portal from the start screen and click
. Adjust settings as needed, save changes, and redeploy by clicking
.
Following these steps, you can complete the Mividas Meeting Portal configuration and deployment while retaining the flexibility to update settings as requirements evolve.
Upgrade
Before upgrading
Before upgrading, we always recommend that you:
- Check your platform health and fix any current alerts affecting your installation.
- Check that you have disk space available.
- Take a snapshot of your installation in your hypervisor.
Upgrading
To upgrade, click
next to Mividas Meeting Portal from the start screen. Select the version you wish to upgrade to in the drop-down list ![]() , and then click
.
, and then click
.
1.2. Onboarding
When you log in to your Mividas Meeting Portal installation for the first time, the onboarding wizard will automatically launch to guide you through the essential configuration steps. This manual is intended for installations where the Mividas Meeting Portal is set up on a separate instance.
Prerequisites
Before beginning your Mividas Meeting Portal onboarding, confirm that:
- Mividas Installer installation: Ensure that your Mividas Installer is up and running. Refer to VM Deployment if needed.
- Mividas Meeting Portal installation: Ensure that your installation is up and running. If needed, refer to Mividas Meeting Portal Installation and Upgrade.
Onboarding wizard
When you visit the Mividas Meeting Portal for the first time, you are welcomed by the onboarding wizard.
1. Start

Click to proceed.
2. Choose password

Enter and confirm a new password for user “mividas_fallback”. Please document this password. After you have entered it twice, click to proceed.
3. Settings

| Option | Description |
|---|---|
| Custom logo | Upload a custom logo that will be shown in Mividas Meeting Portal. PNG or SVG. Will be resized to fit in 35px height. |
| Favicon | Upload a custom favicon that will be shown for Mividas Meeting Portal. Square, PNG or SVG. Recommended size 64×64 or 128×128. |
| Bright theme | Check this if you want to use a brighter theme within Mividas Meeting Portal. |
| Hide recording for Outlook addin | Hides the recording button within the Outlook addin. |
| URL user portal | URL to portal/support info about changing users’ passwords. |
| Support e-mail | Enter a support email address that will be visible for users. |
| Support phone | Enter a support phone number that will be visible for users. |
| Support ticket URL | Enter a URL that users can click on to open a support ticket. |
| Documentation URL | Enter a URL that users can click on to read documentation. |
| SIP address for test calls | Enter a SIP URI that users can use for test calls, e.g. [email protected] |
When you are done, click , or click Skip to enter this information later.
Connect Mividas Meeting Portal to Mividas Core
When the Mividas Core and Mividas Meeting Portal are not installed on the same instance, even if they are on the same virtual machine, you have to connect them to each other. Until this is fixed, Mividas Meeting Portal will display an error message.

1. Connect Mividas Meeting Portal to Mividas Core
In the Mividas Installer, where Mividas Meeting Portal is installed, click on Installation in the top menu. There, next to the Mividas Meeting Portal installation, click on followed by .
Under Optional Settings, click on Book API settings.
| Option | Description |
|---|---|
| External Mividas Core server domain name | Enter the FQDN of the Mividas Core installation you wish to connect to, e.g. core.example.com |
| API key | Copy and paste this API Key temporarily in a separate text document, or leave this tab open during configuration. You will need it in the next steps while configuring in the Mividas Core. |
| Default customer shared key | Copy and paste this Default customer shared key temporarily in a separate text document, or leave this tab open during configuration. You will need it in the next steps while configuring in the Mividas Core. |
| Disable dynamic customer shared key | Dynamic value from e.g. LDAP-attribute/ou will never be used |
Click . You will now have to deploy these changes, so click on on the screen you got taken to after yo saved.
If you copied the information temporarily to another document, you can close this tab/window. If not, after the deploy have finished, you can navigate back by clicking and then Book API settings.
2. Configure Mividas Core
Log in to Mividas Core, click Admin and then Backend admin. There, in the menu to the left, locate Scheduling portal API keys and click Add next to it.

| Option | Description |
|---|---|
| Name | Give your API key a name |
| Key | Paste the API key from Mividas Meeting Portal, that you either copied or left open in another tab/window. |
| Limit to customer | Select customer/customers that will be using this Mividas Meeting Portal. |
Click .
Then, locate Customers in the menu to the left and click on it.

On the page you just opened, click on the customer name in the list.
Locate the Customer Keys on the page. Paste the Default customer shared key from the Mividas Meeting Portal, that you either copied or left open in another tab/window.

After you have pasted the key, click in the bottom right corner.
3. Confirm the connection
You can now confirm that the connection works. Do so by logging in to Mividas Meeting Portal. The previous error message that was visible there should now be gone, and you should be able to book your first meeting.
FAQ
Here are some frequently asked questions (FAQs) to help you find the answers you’re looking for.
Please see SAML/SSO for Microsoft ADFS User guide for details.
1.3. Dashboard
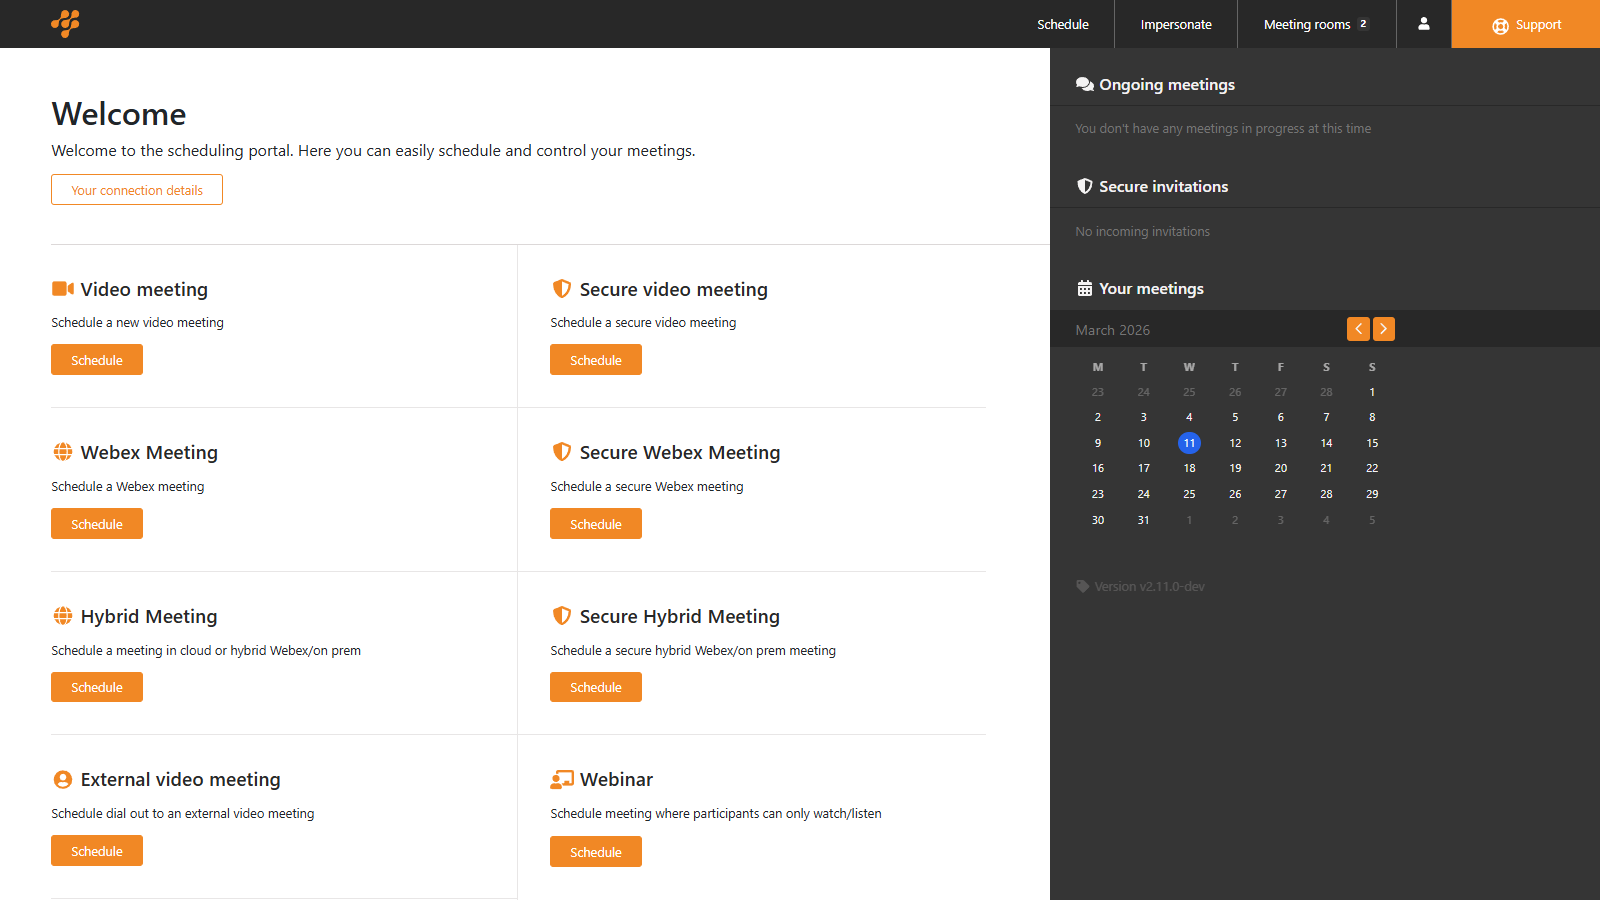
After logging in, you will be presented with the Mividas Meeting Portal’s dashboard. This is where you schedule different types of meetings and view your upcoming, ongoing, and past meetings.
Left side menu
Scheduling block
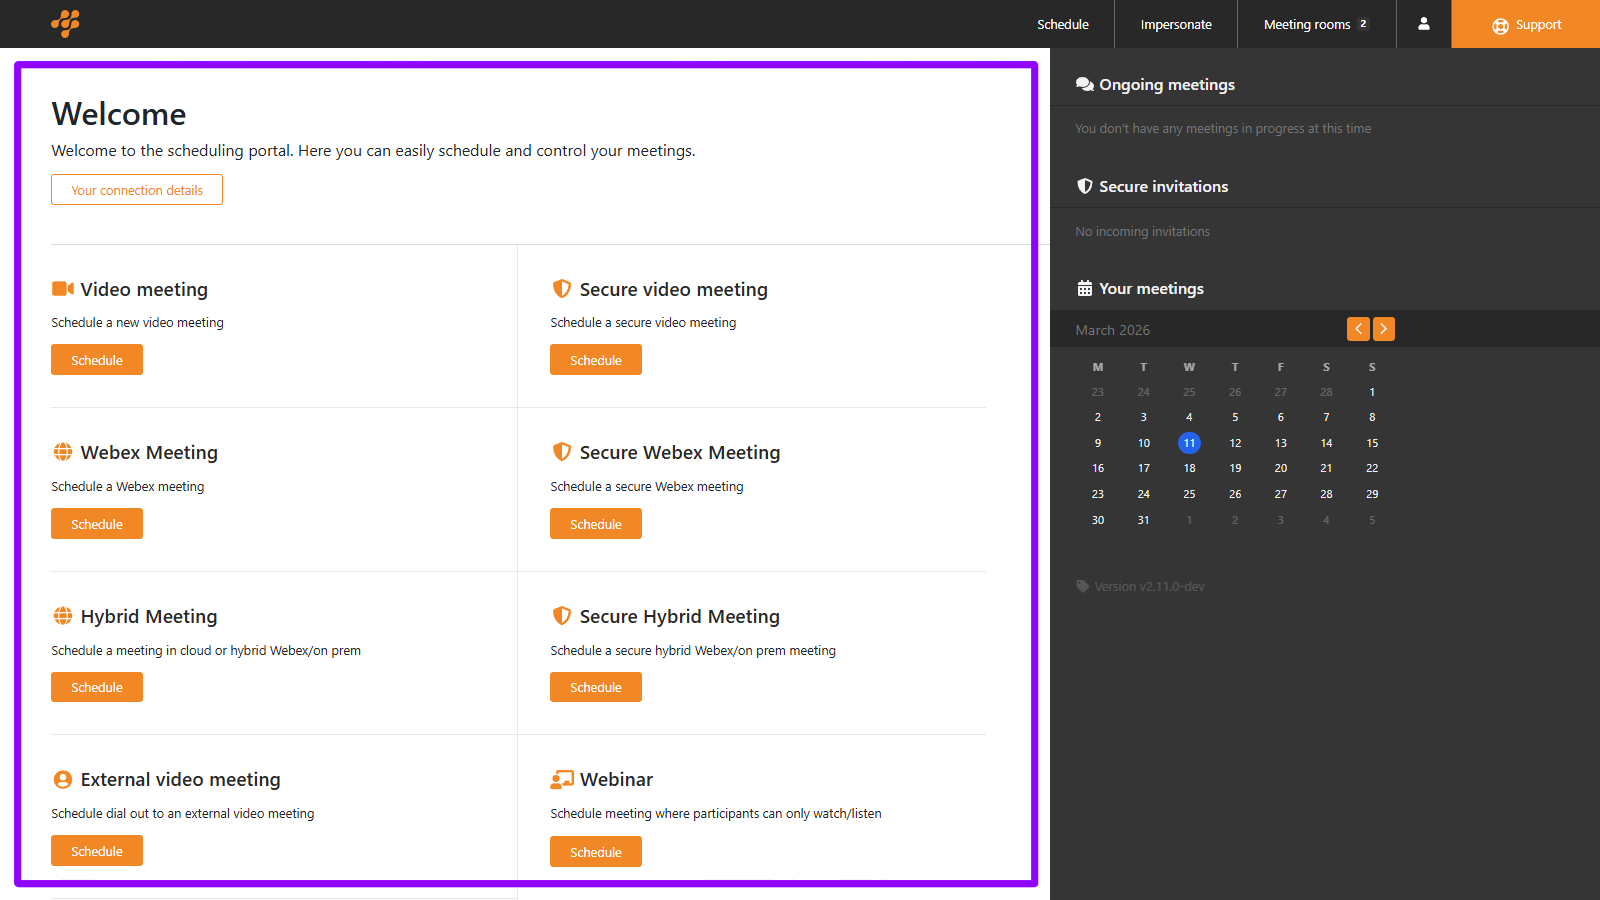
The first part of this dashboard contains a welcome message, followed by a list of all currently available meeting types you have configured for scheduling. All of these are customizable, and the examples shown in this guide are only examples.
| Option | Description |
|---|---|
| This welcome message is visible to everyone who logs in to the Mividas Meeting Portal. | |
| 1 | Displays the connection details of your private static meeting room. |
| Schedule a video meeting. | |
| Schedule a secure video meeting. | |
| Schedule a Webex meeting. | |
| Schedule a secure Webex meeting. | |
| Schedule a hybrid meeting. | |
| Schedule a secure hybrid meeting. | |
| Schedule an external video meeting. | |
| Schedule a webinar. | |
| Schedule a meeting in an existing meeting room. |
1 Only visible if a personal meeting room was created when your user was created in the video platform.
Meeting list
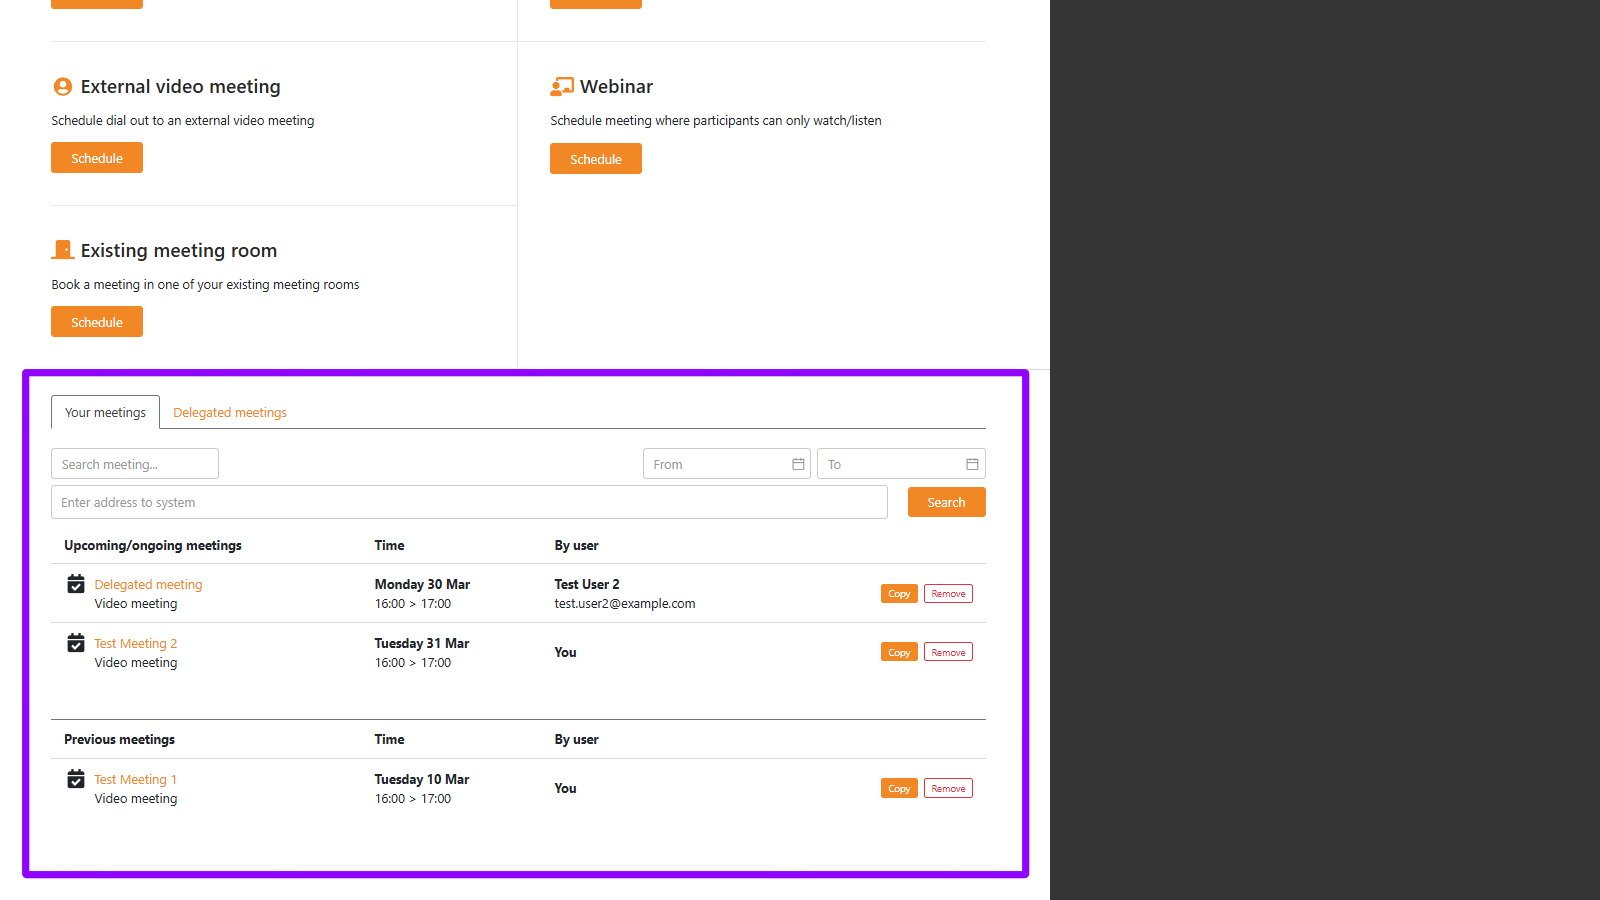
Below the scheduling block, you can find a list of all upcoming and previous meetings.
Your meetings
| Option | Description |
|---|---|
| Search for a meeting. | |
| Filter your results by start date and time. | |
| Filter your results by end date and time. | |
| Enter the address of a system to search for meetings that the system is a part of. | |
| Click to search. | |
| Upcoming/ongoing/previous meetings | Displays information about the meeting:
Meeting title – Displays the title of the meeting. Clicking on the meeting title takes you to the meeting information page. |
| Time | Displays the meeting date and time. |
| By user | Displays who scheduled this meeting. If not You, it will display the user’s name and e-mail. |
| Allows you to make a copy of this meeting. | |
| Allows you to cancel a meeting or a recurring series of meetings. |
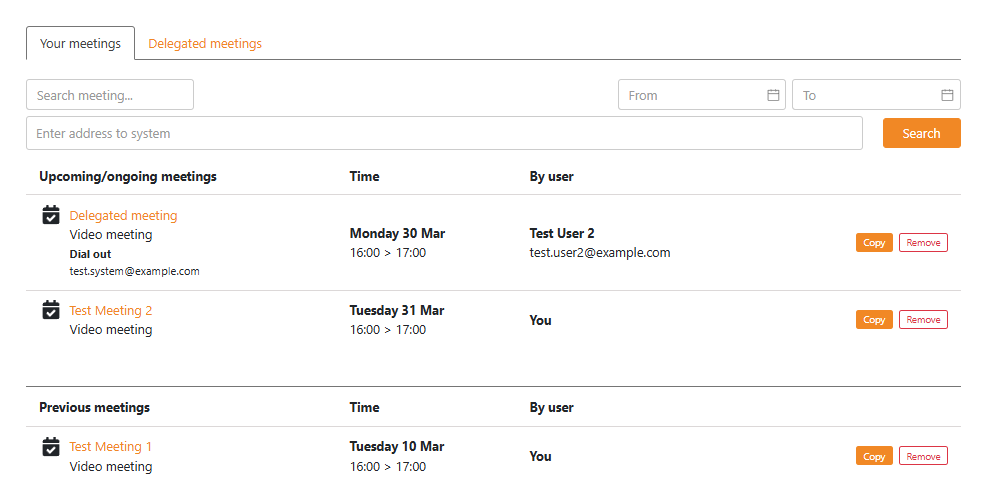
Delegated meetings
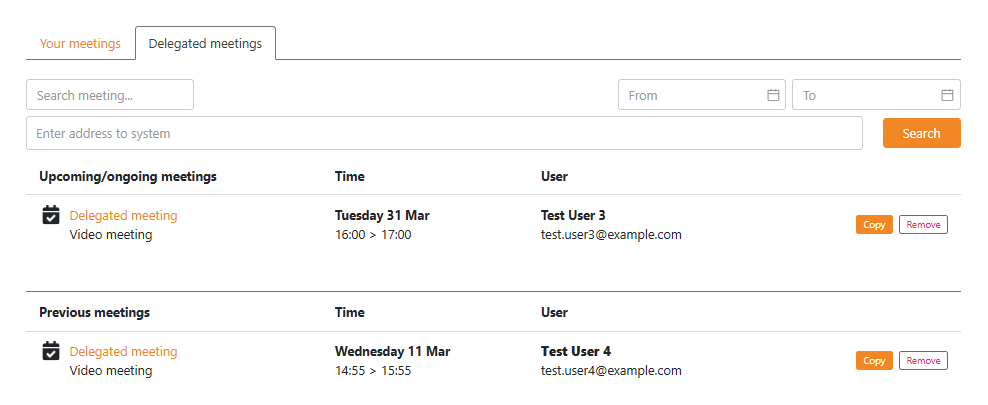
Here you can see all the meetings you have scheduled for other users.
| Option | Description |
|---|---|
| Search for a meeting. | |
| Filter your results by start date and time. | |
| Filter your results by end date and time. | |
| Enter the address of a system to search for meetings that the system is a part of. | |
| Click to search. | |
| Upcoming/ongoing/previous meetings | Displays information about the meeting:
Meeting title – Displays the title of the meeting. Clicking on the meeting title takes you to the meeting information page. |
| Time | Displays the meeting date and time. |
| User | Displays the name and e-mail of the user you have scheduled the meeting for. |
| Allows you to make a copy of this meeting. | |
| Allows you to cancel a meeting or a recurring series of meetings. |
Right side menu
The menu on the right side of this page contains information about ongoing and upcoming meetings, as well as displaying delegation invites. A test link can also be displayed to allow users to test their computers before a meeting.
User delegation
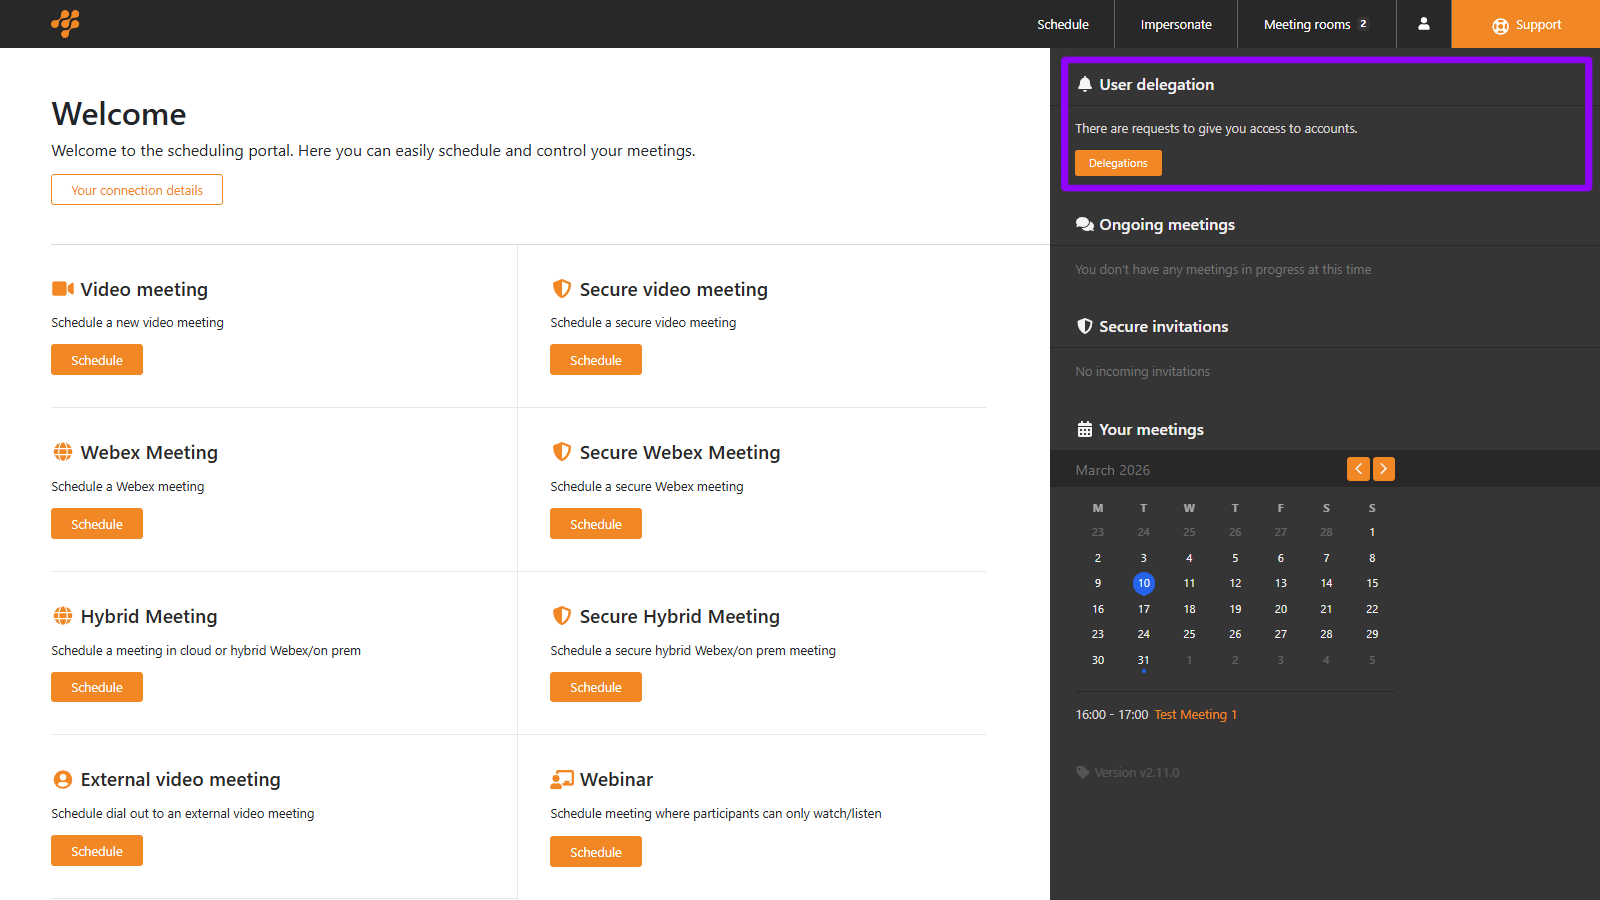
If someone has invited you to schedule meetings on their behalf, you will see a notification here. If there are no active invites, this section will be hidden.
Ongoing meetings
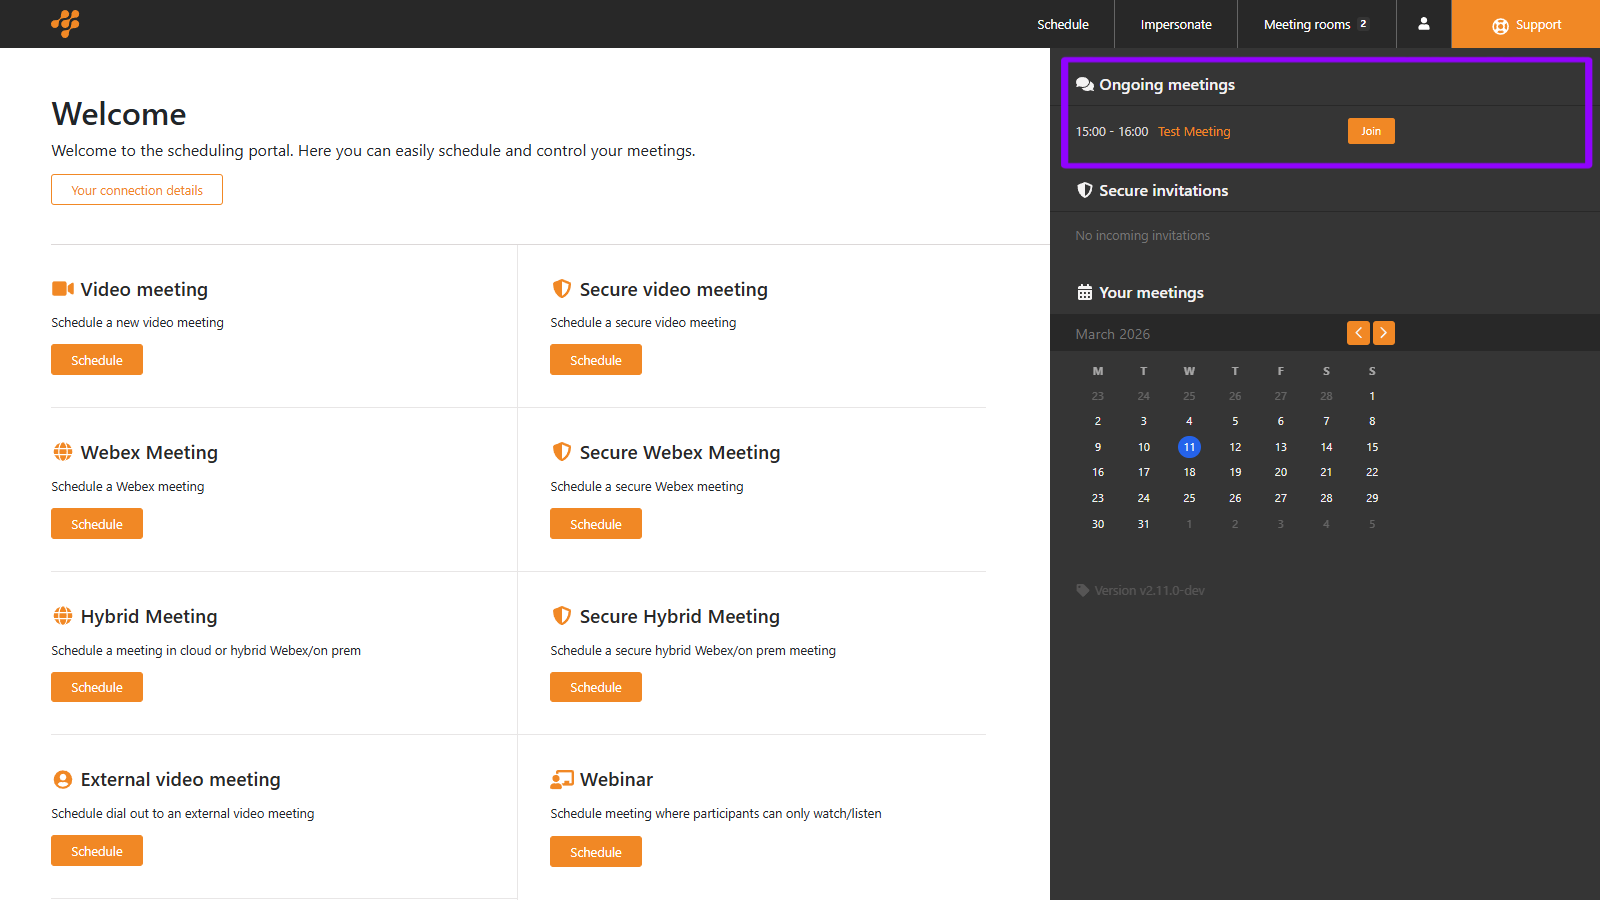
If you have any ongoing meetings, they will be displayed here, including the meeting time and name. Clicking the meeting name takes you to the meeting information page.
Secure invitations

If you have any active Secure meeting invitations, they will be visible here, including the meeting time, name, and who invited you.
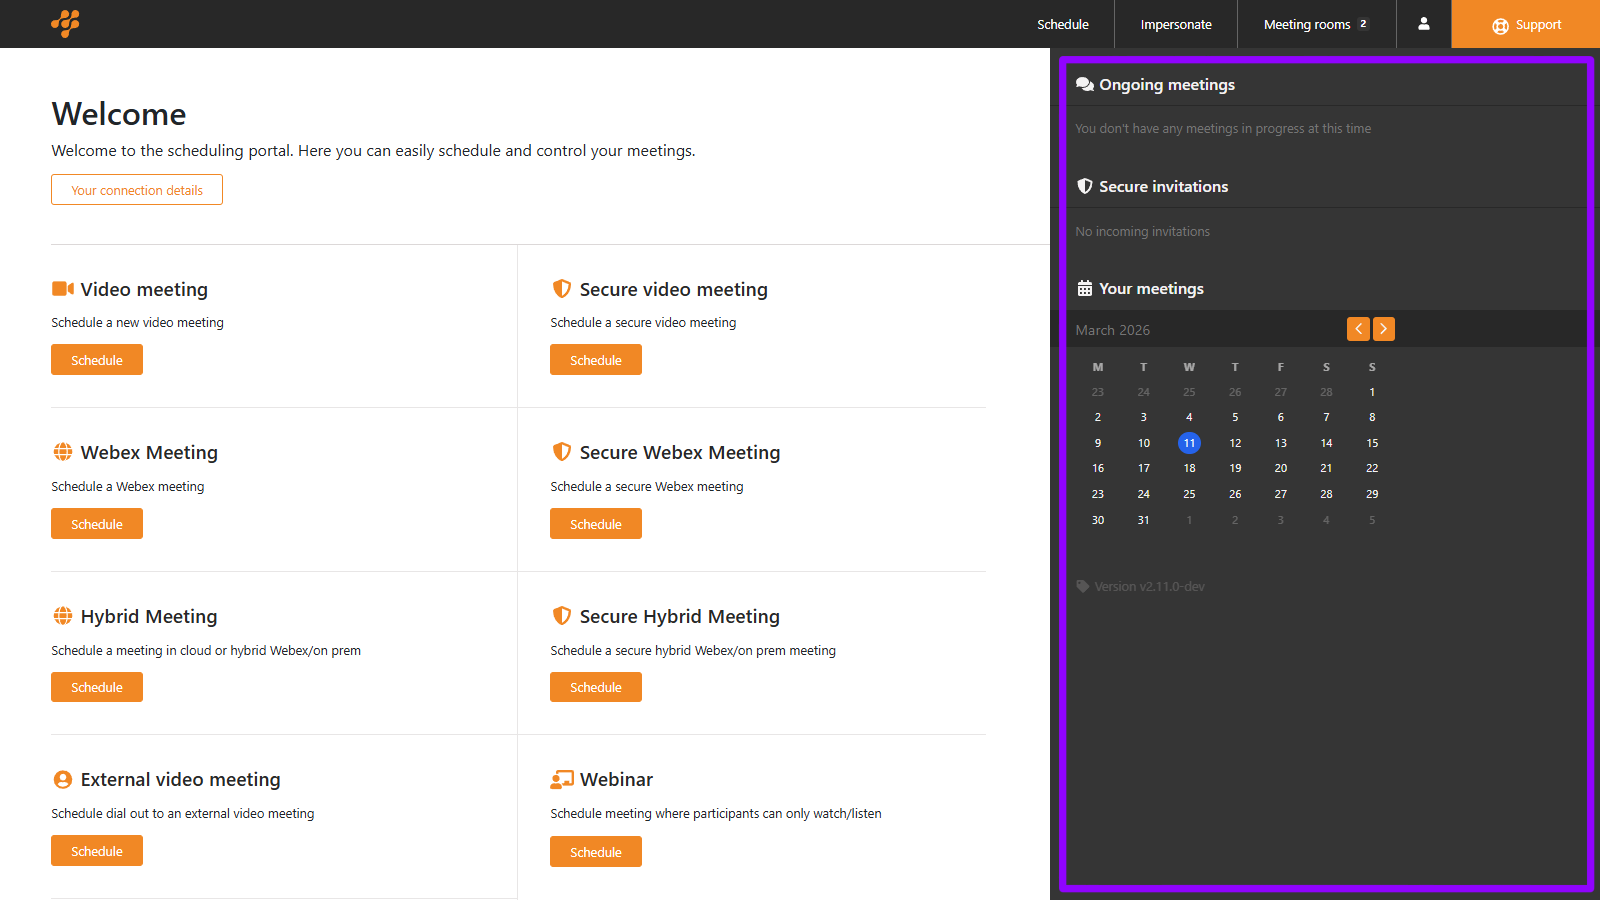
Your meetings
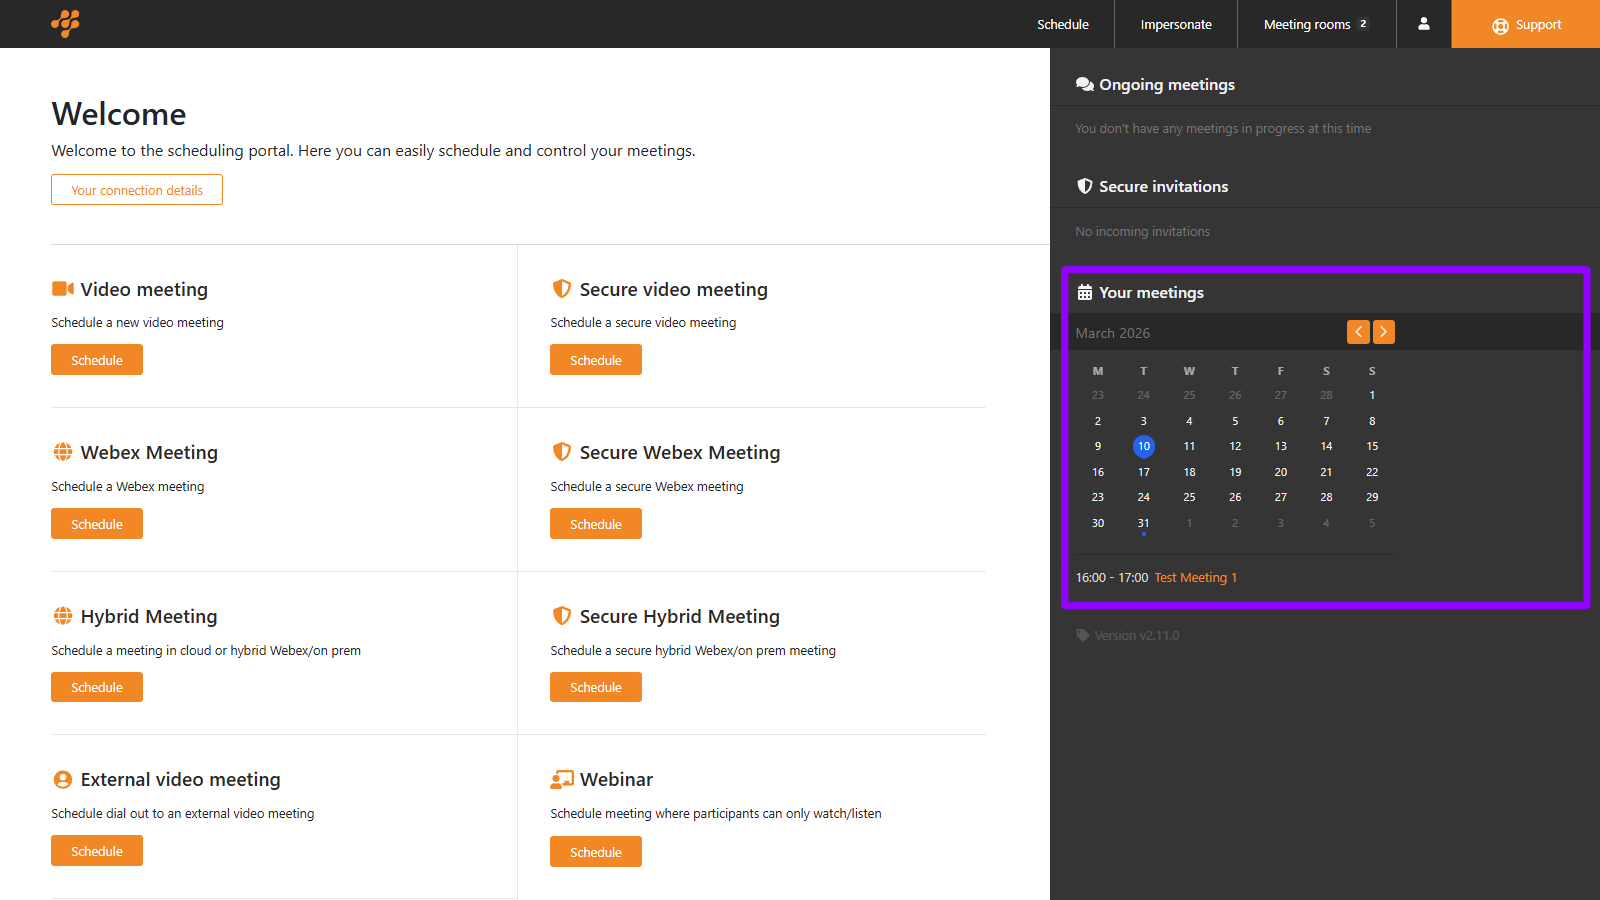
Displays your meetings in a calendar view, along with a list of meetings for the selected day below it. A small blue dot indicates that you have a meeting scheduled that day. Clicking a meeting’s name in the list takes you to the meeting information page.
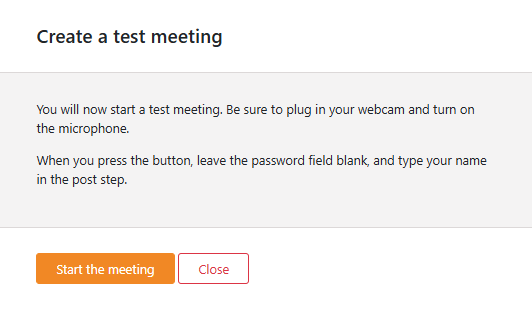
Test meeting
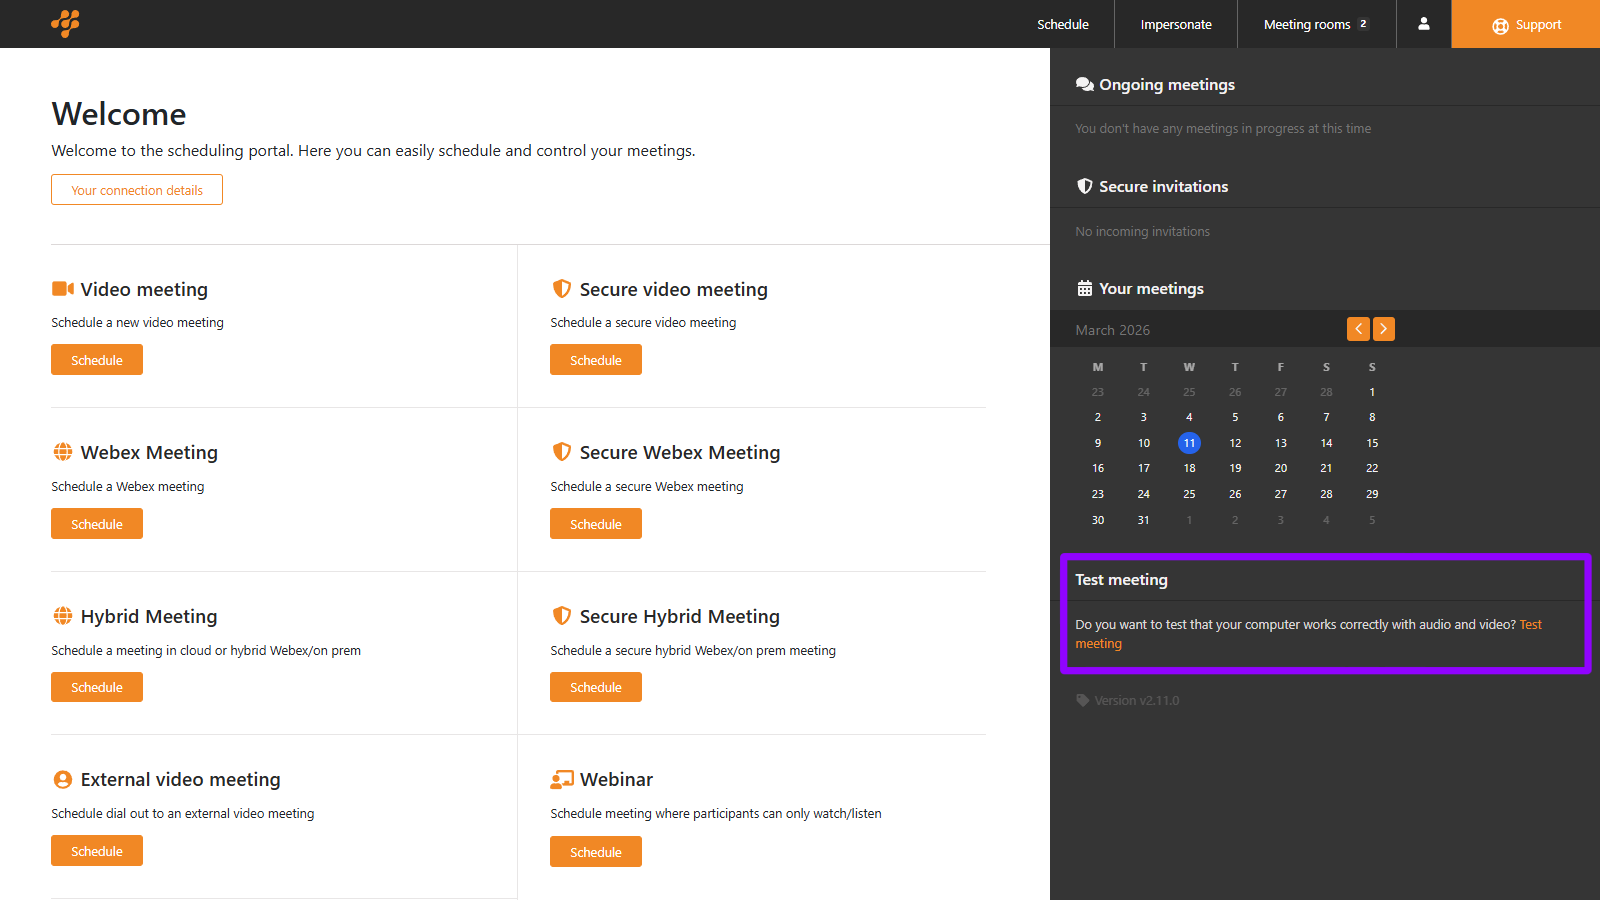
This displays you with a link you can use to test your computer’s video and audio. Clicking the link opens a pop-up with more information.
Whiteglove scheduling
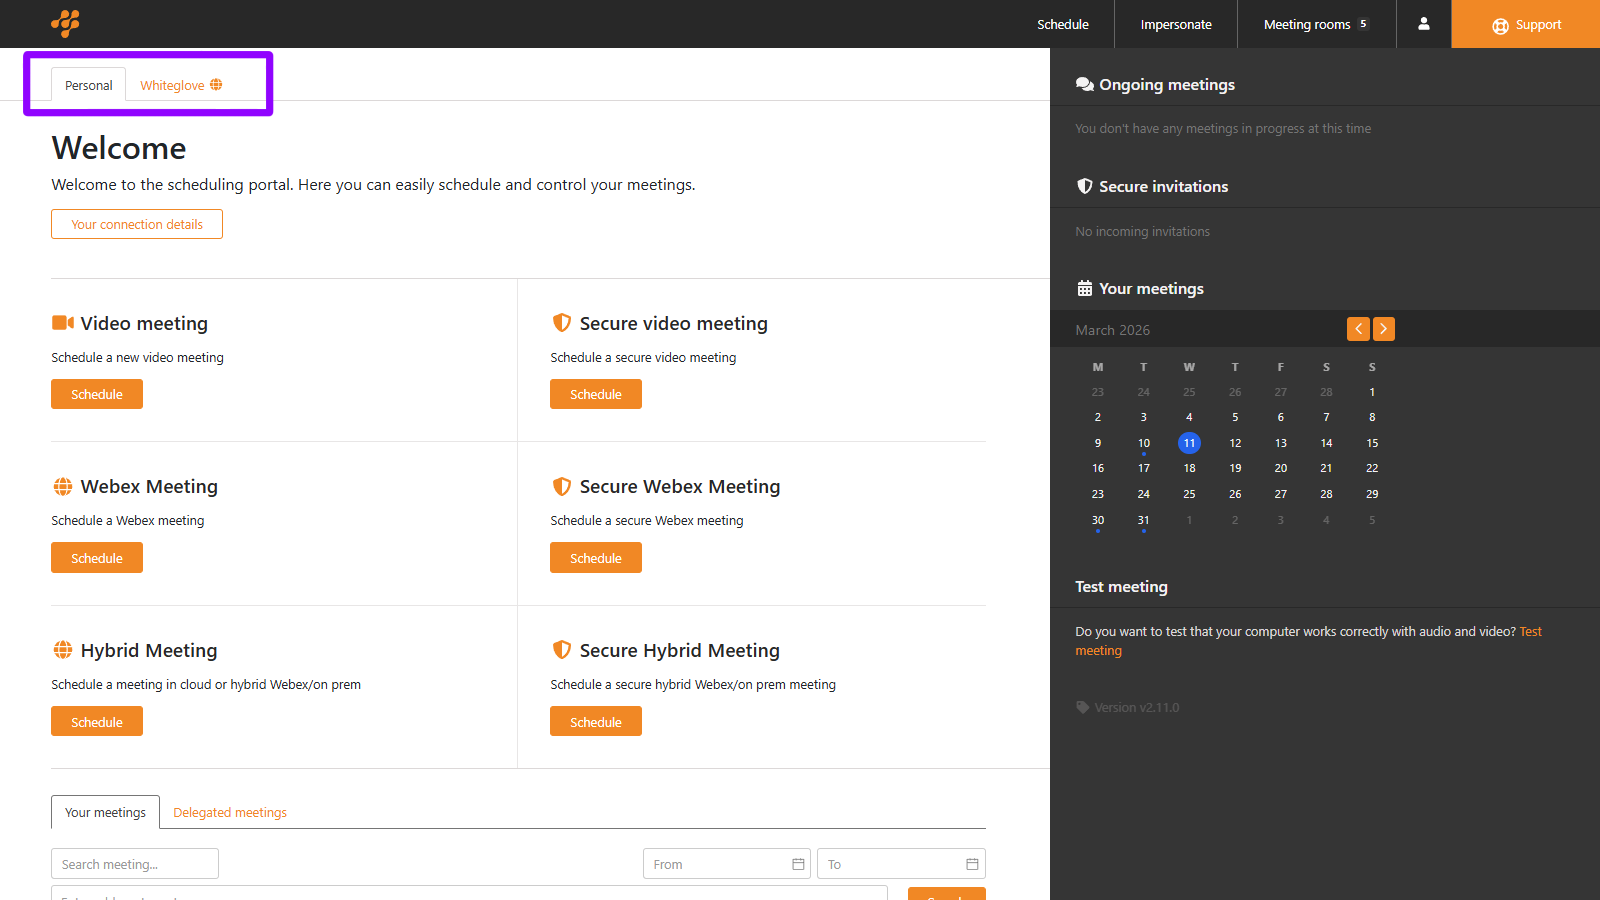
When whiteglove functionality is configured, admin users (staff) and above will see the tabs shown in the picture above. The names of the tabs can, of course, be changed.
Personal
When this tab is active, everything will work as normal, as this is the default scheduling mode in the Mividas Meeting Portal. You handle your own meetings, and the people you have been delegated to handle.
Whiteglove
When this tab is active, you can schedule meetings for any user in your system. This includes all different meeting types presented on the scheduling dashboard.
Scheduling
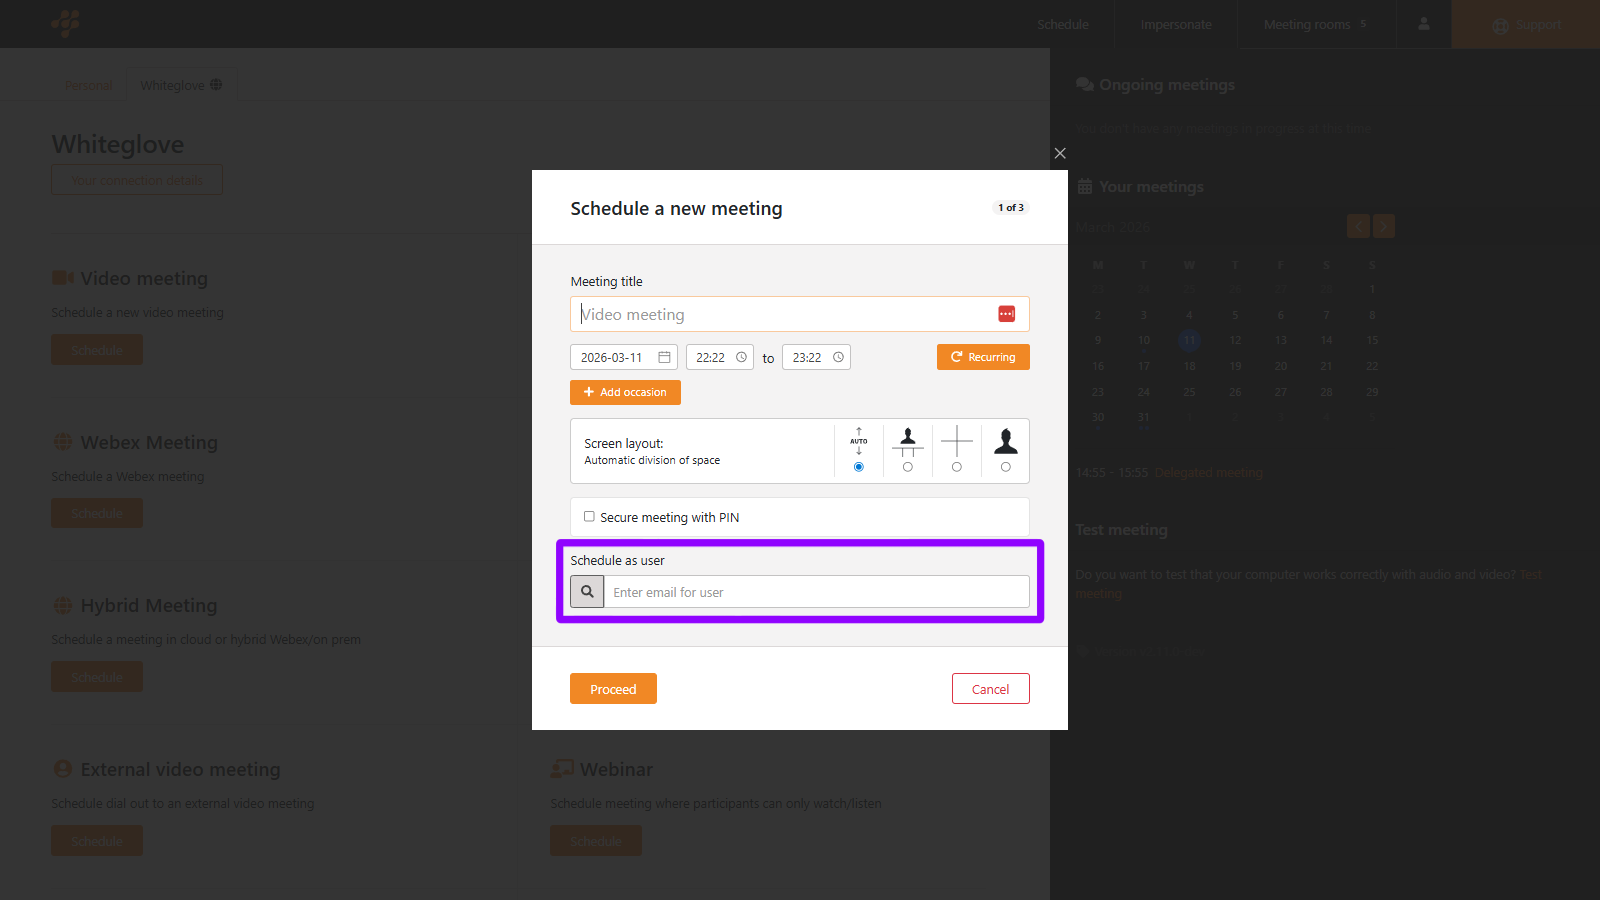
Now, when you click any button to schedule a meeting, a new field will appear at the bottom of the form on the first page. Here you can search for any user in your system and schedule a meeting as them.
Meeting list

| Option | Description |
|---|---|
| Search for a meeting. | |
| Filter your results by start date and time. | |
| Filter your results by end date and time. | |
| Enter the address of a system to search for meetings that the system is a part of. | |
| Click to search. | |
| Upcoming/ongoing/previous meetings | Displays information about the meeting:
Meeting title – Displays the title of the meeting. Clicking on the meeting title takes you to the meeting information page. Meetings that are not yours or are not scheduled by you have the link disabled for privacy reasons. |
| Time | Displays the date and time of the meeting. |
| For user | Displays who the meeting was scheduled for. If not Yourself, it will display the user’s name and e-mail. |
| Allows you to make a copy of this meeting. | |
| Allows you to cancel a meeting or a recurring series of meetings. |
1.4. Schedule meetings

On the Mividas Meeting Portal’s dashboard, you will see an overview of all the available meeting types for booking. These may vary depending on your organization’s needs and configurations.
Schedule meetings
Video meeting

| Option | Description |
|---|---|
| Enter a title for your meeting. | |
| Select a date, start time and end time of the meeting. | |
| Make this a recurring meeting. | |
 |
If you choose to make a recurring meeting, here you set the recurrence. |
| Adds another occasion for the meeting. | |
 |
Select between pre-configured layouts for your meeting. |
 |
Choose to protect your meeting with a PIN code. |
 |
Choose to enable a moderator PIN. The moderator is needed for the meeting to start. |
Click to continue or click to cancel.

| Option | Description |
|---|---|
 |
Enter the email address of a person you wish to invite as a guest. |
| Remove this row. | |
| Add a new row to add more guests. | |
 |
The subject of the invite. Will be filled in by your template settings but can be modified here. |
 |
The content of the invite. Will be filled in with your template settings but can be modified here. |
Click to continue or click to skip this step.

| Option | Discription |
|---|---|
Enter the address to one or more systems you wish to invite. E.g. 123.234.12.4##111 or [email protected]. |
Adds the system(s) to the meeting and proceeds or click to skip this step.
Webinar

| Option | Description |
|---|---|
| Enter a title for your meeting. | |
| Select a date, start time and end time of the meeting. | |
|
Select between pre-configured layouts for your meeting. |
|
Displays the guest PIN code. |
|
Displays the moderator PIN. The moderator is needed for the webinar to start. |
| Enable participant registration | Enable this if you would like your participants to register for the webinar before participating. Everyone you invite will receive a link to a registration page. You can also share this link outside of Mividas, e.g., put the registration link on your website. After someone fills in the registration form, they will receive an e-mail with information on how to take part of the webinar. |
| Notify me when participants sign up | Get a notification e-mail when someone registers for the webinar. |
Click to continue or click to cancel.

| Option | Description |
|---|---|
|
Enter the email address of a person you wish to invite as a moderator. |
| Remove this row. | |
| Add a new row to be able to add more moderators. | |
|
The subject of the invite. Will be filled in by your template settings but can be modified here. |
|
Add a new row to add more moderators. |
Click to continue or click to skip this step.

| Option | Description |
|---|---|
|
Enter the email address of a person you wish to invite to register. If you did not choose to enable registration, this will be replaced with a regular invitation instead. |
| Remove this row. | |
| Add a new row to be able to add more guests. | |
|
The subject of the invite. Will be filled in by your template settings but can be modified here. |
|
The content of the invite. Will be filled in by your template settings but can be modified here. |
Click to continue or click to skip this step.

If you did not choose to enable registration, this step will be skipped.
| Option | Description |
|---|---|
|
The subject of the invite. Will be filled in by your template settings but can be modified here. |
|
The content of the invite. Will be filled in by your template settings but can be modified here. |
Click to continue or click to skip this step.

| Option | Discription |
|---|---|
Enter the address to one or more systems you wish to invite. E.g. 123.234.12.4##111 or [email protected]. |
Adds the system(s) to the meeting and proceeds or click to skip this step.
CIP meeting

| Option | Description |
|---|---|
| Enter a title for your meeting. | |
| Select a date, start time and end time of the meeting. | |
| Make this a recurring meeting. | |
|
If you choose to make a recurring meeting, here you set the recurrence. |
Click to continue or click to cancel.
Care meeting

| Option | Description |
|---|---|
| Enter a title for your meeting. | |
| Select a date, start time and end time of the meeting. | |
| Make this a recurring meeting. | |
|
If you choose to make a recurring meeting, here you set the recurrence. |
Click to continue or click to cancel.
Secure meeting

This guide for Secure meeting will not include SMS verification. To learn about that, see SMS meeting.
| Option | Description |
|---|---|
| Enter a public title for your meeting. This appears in the invite before the users authenticate. | |
| Enter a private title for your meeting. This appears after the the users authenticate. | |
| Select a date, start time and end time of the meeting. | |
|
Select between pre-configured layouts for your meeting. |
| Make this a recurring meeting. | |
|
If you choose to make a recurring meeting, here you set the recurrence. |
| Type of verification to use for moderators | Choose between your configured verification methods. 1. SSO login in Mividas Identify or Mividas Meeting Portal. 2. Log in with eID via Mividas Identify. 3. Verify person at eID login. 4. SMS invitation with verification code. |
| Type of verification to use for participants | Choose between your configured verification methods. 1. SSO login in Mividas Identify or Mividas Meeting Portal. 2. Log in with eID via Mividas Identify. 3. Verify person at eID login. 4. SMS invitation with verification code. |
Click to continue or click to cancel.

| Option | Description |
|---|---|
 |
Write an agenda or instructions for moderators of the meeting. |
Click to continue or click to skip this step.

Moderators, by email
| Option | Description |
|---|---|
 |
Enter the name and email address of a person(s) you wish to invite as moderator(s). |
| Remove this row. | |
| Add a new row to be able to add more guests. | |
| Prevent multiple people from using the same invitation code | Check this to prevent multiple people from using the same invitation code. |
| The subject of the invite. Will be filled in by your template settings but can be modified here. | |
 |
The content of the invite. Will be filled in by your template settings but can be modified here. |
Click to continue or click to skip this step.
Moderators, via another program
| Option | Description |
|---|---|
| Prevent multiple people from using the same invitation code | Check this to prevent multiple people from using the same invitation code. |
|
The content of the invite. Will be filled in by your template settings but can be modified here. |
| Click to create the invite or click to skip this step. | |
 |
Click to copy the invite, which you can then paste in your chosen program. |
Click to move forward or click to skip this step.

| Option | Description |
|---|---|
|
Write a public agenda or instructions for the meeting. |
Click to continue or click to skip this step.

Participants, by email
| Option | Description |
|---|---|
| – By email | |
 |
Enter the name(s), identification, and email addresses of people you wish to invite as guest(s). |
| Remove this row. | |
| Add a new row to be able to add more guests. | |
| Prevent multiple people from using the same invitation code | Check this to prevent multiple people from using the same invitation code. |
| The subject of the invite. Will be filled in by your template settings but can be modified here. | |
 |
The content of the invite. Will be filled in by your template settings but can be modified here. |
Click to continue or click to skip this step.
Participants, via another program
| Option | Description |
|---|---|
| Enter a personal identification number that will be verified, such as a Social Security number, user ID, or another unique identifier. | |
| Enter the name of the person you wish to invite as a guest to the meeting. | |
| Prevent multiple people from using the same invitation code | Check this to prevent multiple people from using the same invitation code. |
|
The content of the invite. Will be filled in by your template settings but can be modified here. |
| Click to create the invite or click to skip this step. | |
|
Click to copy the invite, ready to paste in your chosen program. |
Click to move forward or click to skip this step.
Meeting with e-ID

This guide for meeting with e-ID will not include SMS verification. To learn about that, see SMS meeting.
| Option | Description |
|---|---|
| Enter a public title for your meeting. This appears in the invite before the users authenticate. | |
| Enter a private title for your meeting. This appears after the the users authenticate. | |
| Select a date, start time and end time of the meeting. | |
|
Select between pre-configured layouts for your meeting. |
| Make this a recurring meeting. | |
|
If you choose to make a recurring meeting, here you set the recurrence. |
| Type of verification to use for moderators | Choose between your configured verification methods. 1. SSO login in Mividas Identify or Mividas Meeting Portal. 2. Log in with eID via Mividas Identify. 3. Verify person at eID login. 4. SMS invitation with verification code. |
| Type of verification to use for participants | Choose between your configured verification methods. 1. SSO login in Mividas Identify or Mividas Meeting Portal. 2. Log in with eID via Mividaas Identify. 3. Verify person at eID login. 4. SMS invitation with verification code. |
Click to continue or click to cancel.

| Option | Description |
|---|---|
|
Write an agenda or instructions for moderators of the meeting. |
Click to continue or click to skip this step.

Moderators, by email
| Option | Description |
|---|---|
| – By email | |
|
Enter the name(s), identification, and email addresses of people you wish to invite as moderator(s). |
| Remove this row. | |
| Add a new row to be able to add more moderators. | |
| Prevent multiple people from using the same invitation code | Check this to prevent multiple people from using the same invitation code. |
| The subject of the invite. Will be filled in by your template settings but can be modified here. | |
|
The content of the invite. Will be filled in by your template settings but can be modified here. |
Click to continue or click to skip this step.
Moderators, via another program
| Option | Description |
|---|---|
| Prevent multiple people from using the same invitation code | Check this to prevent multiple people from using the same invitation code. |
|
The content of the invite. Will be filled in by your template settings but can be modified here. |
| Click to create the invite or click to skip this step. | |
|
Click to copy the invite, which you can then paste in your chosen program. |
Click to move forward or click to skip this step.

| Option | Description |
|---|---|
|
Write a public agenda or instructions for the meeting. |
Click to continue or click to skip this step.

Participants, by email
| Option | Description |
|---|---|
| – By email | |
|
Enter the name and email address of a person(s) you wish to invite as guest(s). |
| Remove this row. | |
| Add a new row to be able to add more guests. | |
| Prevent multiple people from using the same invitation code | Check this to prevent multiple people from using the same invitation code. |
| The subject of the invite. Will be filled in by your template settings but can be modified here. | |
|
The content of the invite. Will be filled in by your template settings but can be modified here. |
Click to continue or click to skip this step.
Participants, via another program
| Option | Description |
|---|---|
| Enter a personal identification number that will be verified, such as a Social Security number, user ID, or another unique identifier. | |
| Enter the name of the person you wish to invite as a guest to the meeting. | |
| Prevent multiple people from using the same invitation code | Check this to prevent multiple people from using the same invitation code. |
|
The content of the invite. Will be filled in by your template settings but can be modified here. |
| Click to create the invite or click to skip this step. | |
|
Click to copy the invite, ready to paste in your chosen program. |
Click to move forward or click to skip this step.
SMS meeting

This guide for SMS meeting will cover only verification via SMS.
| Option | Description |
|---|---|
| Enter a public title for your meeting. This appears before the users sign in. | |
| Enter a private title for your meeting. This appears after the the users authenticate. | |
| Select a date, start time and end time of the meeting. | |
|
Select between pre-configured layouts for your meeting. |
| Make this a recurring meeting. | |
|
If you choose to make a recurring meeting, here you set the recurrence. |
| Type of verification to use for moderators | Choose between your configured verification methods.
|
| Type of verification to use for participants | Choose between your configured verification methods.
|
Click to continue or click to cancel.

| Option | Description |
|---|---|
|
Write an agenda or instructions for moderators of the meeting. |
Click to continue or click to skip this step.

| Option | Description |
|---|---|
 |
Enter the name(s), mobile phone number, and email addresses of people you wish to invite as moderator(s). |
| Remove this row. | |
| Add a new row to be able to add more moderators. | |
| The SMS that will be sent. Will be filled in by your template settings but can be modified here. | |
 |
The content of the invite, sent via email? Will be filled in by your template settings but can be modified here. |
Click to continue or click to skip this step.

| Option | Description |
|---|---|
|
Write a public agenda or instructions for the meeting. |
Click to continue or click to skip this step.

| Option | Description |
|---|---|
|
Enter the name(s), mobile phone number, and email addresses of people you wish to invite as guest(s). |
| Remove this row. | |
| Add a new row to be able to add more guests. | |
| The SMS that will be sent. Will be filled in by your template settings but can be modified here. | |
|
The content of the invite, sent via email. Will be filled in by your template settings but can be modified here. |
Click to continue or click to skip this step.
Existing meeting room

| Option | Description |
|---|---|
| Enter a title for your meeting. | |
| Select a date, start time and end time of the meeting. | |
| Make this a recurring meeting. | |
|
If you choose to make a recurring meeting, here you set the recurrence. |
| Adds another occasion for the meeting. | |
| Select an existing meeting room for the meeting. |
Click to continue or click to cancel.

| Option | Description |
|---|---|
| Search fo a user to add as a moderator. | |
| Enter the email addresses of people you wish to invite as a moderator. | |
| Remove this row. | |
| Add a new row to add more moderators. | |
|
The subject of the invite. Will be filled in by your template settings but can be modified here. |
|
The content of the invite. Will be filled in by your template settings but can be modified here. |
Click to continue or click to skip this step.

| Option | Description |
|---|---|
| Search fo a user to add as a participant. | |
| Enter the email addresses of people you wish to invite as a participant. | |
| Remove this row. | |
| Add a new row to add more participants. | |
|
The subject of the invite. Will be filled in by your template settings but can be modified here. |
|
The content of the invite. Will be filled in by your template settings but can be modified here. |
Click to continue or click to skip this step.
External video meeting

| Option | Description |
|---|---|
| Enter a public title for your meeting. This appears before the users sign in. | |
| Select a date, start time and end time of the meeting. | |
| Make this a recurring meeting. | |
|
If you choose to make a recurring meeting, here you set the recurrence. |
 |
Enter the SIP address and/or the WebRTC URL for the meeting. |
Click to continue or click to cancel.

| Option | Description |
|---|---|
 |
Enter the address to one or more systems you wish to invite. E.g. 123.234.12.4##111 or [email protected]. |
Click to continue or click to skip this step.
1.5. Manage

Manage another user’s calendar to schedule meetings on their behalf. For example, this feature can be used by a booking service or an assistant.
Search user

| Option | Description |
|---|---|
| Search for a user. | |
| Applies your search parameters. | |
| User | Displays the name of the user. |
| Displays the email of the user. | |
| Start to control Mividas Meeting Portal as the selected user. |
Search via meeting

| Option | Description |
|---|---|
| Search for a meeting by name. | |
| Select the start and end, date and time for the filter. | |
| Enter the address of a system to search for. | |
| Applies your search parameters. | |
| Upcoming/ongoing/previous meetings | Displays the name of the meeting together with its date and time. |
| Dial out | Displays if there are/were automatic dial-outs in the meeting. |
| User | Displays the name and email of the owner of the meeting. |
| Start to control Mividas Meeting Portal as the owner of the selected meeting. |
Control the other user

When you are controlling another user, a red frame will appear around the portal interface. At the top, it will display the user’s name. When you are done controlling, click at the top.
1.6. Meeting rooms

From this view, you can manage your static meeting rooms and create new ones, provided you are permitted to do so under company policy.
| Option | Description |
|---|---|
| Add a static meeting room | |
| Search for a meeting room in the list. |
Add a static meeting room
CMS

| Option | Description |
|---|---|
| Enter the name for your meeting room. | |
| Select any meeting room template to use for the meeting room (If configured). Selecting a meeting room template changes which settings can be made in the form; it uses the template’s settings instead of letting you set them in the form. | |
| Enter a PIN code for regular participants. | |
| Enter a PIN code for moderators. | |
 |
Select between pre-configured layouts for your meeting room. |
| Access to meeting room members only | Check this to see if the meeting room should only be available for members. |
| Mute microphone for new participants | Check this to automatically mute new participants’ microphones upon connecting. |
| Require manual admission of participants from lobby | Check this to enable manual admission to the meeting by a moderator. Regular participants will be placed in a lobby until they are manually admitted. |
Click to create the meeting room or click to cancel.
Pexip

| Option | Description |
|---|---|
 |
Enter the name for your meeting room. |
| Select any meeting room template to use for the meeting room (If configured). Selecting a meeting room template changes which settings can be made in the form; it uses the template’s settings instead of letting you set them there. | |
 |
Enter a PIN code for regular participants. |
 |
Enter a PIN code for moderators. |
|
Select between pre-configured layouts for your meeting room. |
Click to create the meeting room or click to cancel.
Meeting room list

- Meeting rooms – Displays the meeting room name and, if available, the meeting type. Clicking on the name takes you to the meeting room dashboard.
- Room number – Displays the number to your meeting room.
- – Opens the “add meeting room” widget for you to edit the meeting.
- Allows you to delete the meeting room.
1.6.1. Meeting / Meeting room information
This page displays various settings for your meeting/meeting room. The options will vary depending on your settings, meeting platform, and the type of meeting/meeting room you have created.
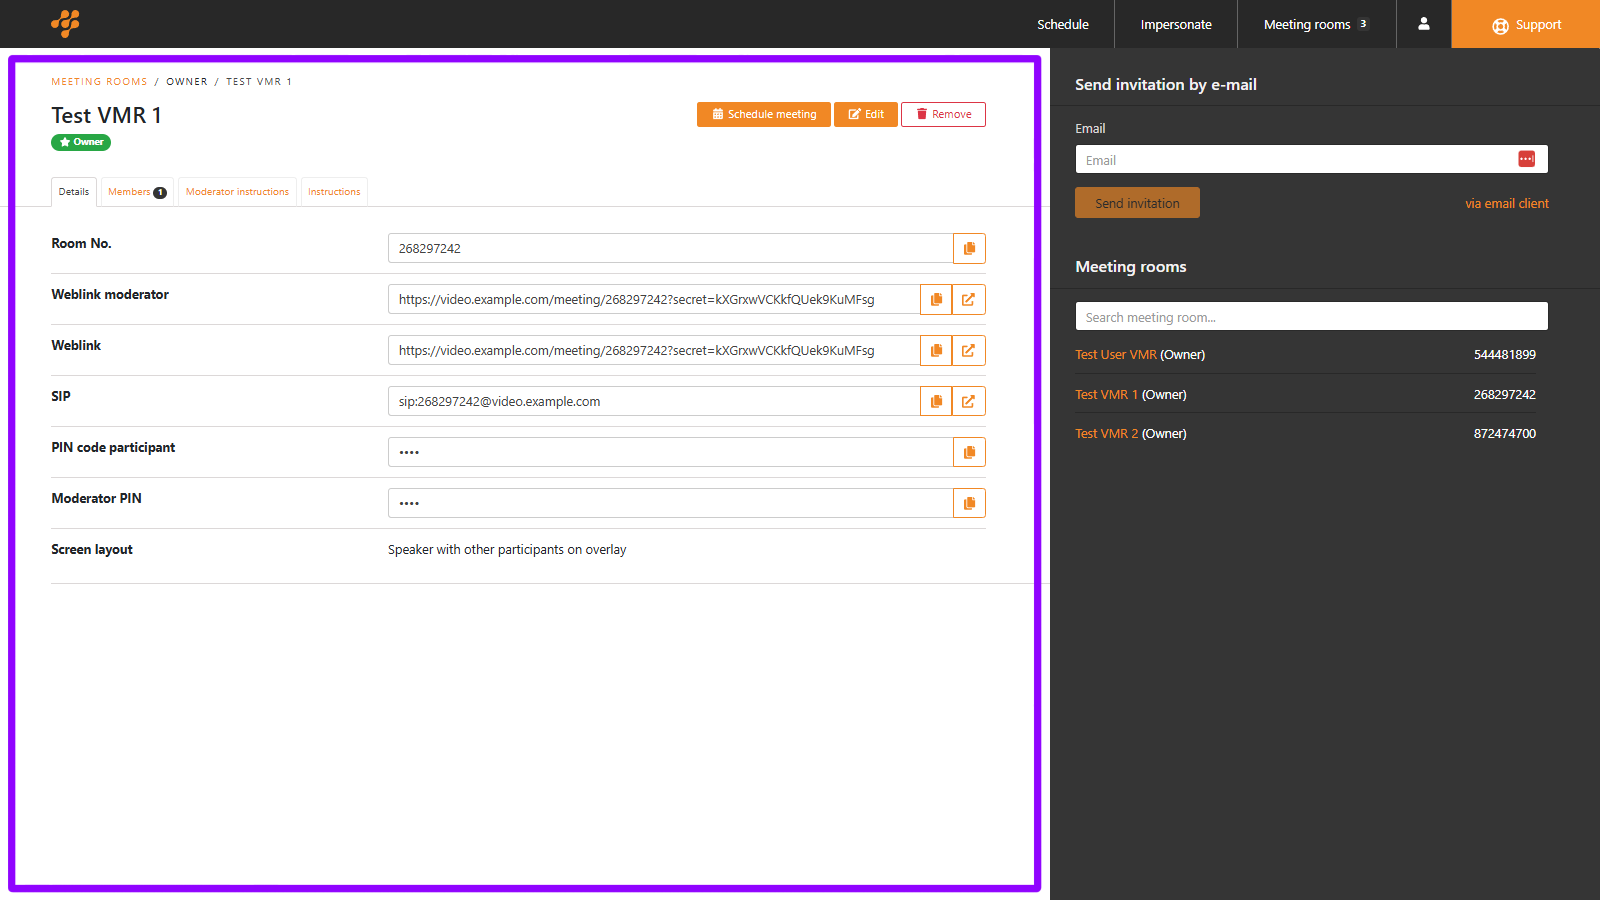
Static meeting room information
Left side menu
1 Only available for CMS.
Details
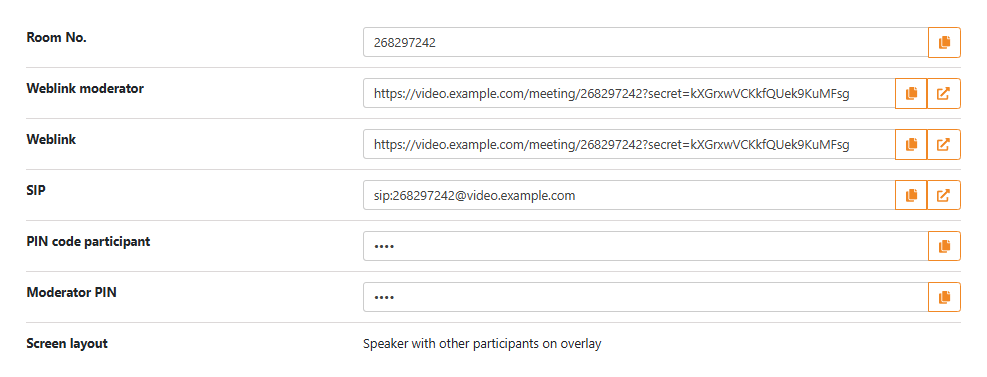
| Option | Description |
|---|---|
| Room No. | Displays the meeting room number. Click |
| Weblink moderator | Displays the weblink for moderators. Click |
| Weblink | Displays the weblink for participants. Click |
| SIP | Displays the SIP URI for moderators. Click |
| PIN code participant | Displays the PIN for participants, hover to reveal. Click |
| Moderator PIN | Displays the PIN for moderators, hover to reveal. Click |
| Screen layout | Shows the meeting room’s layout. |
Members
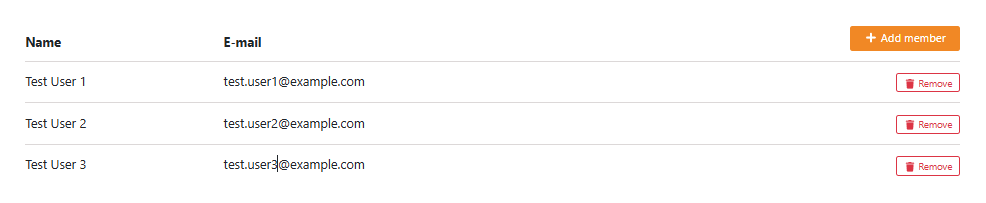
NOTE: Only available when using CMS for the meeting room.
Moderator instructions
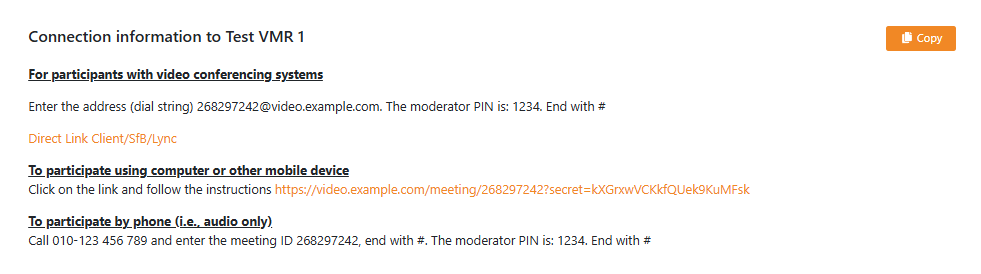
Displays the instructions and connection details for moderators, based on your templates.
| Options | Description |
|---|---|
| Click to copy the instructions. |
Instructions
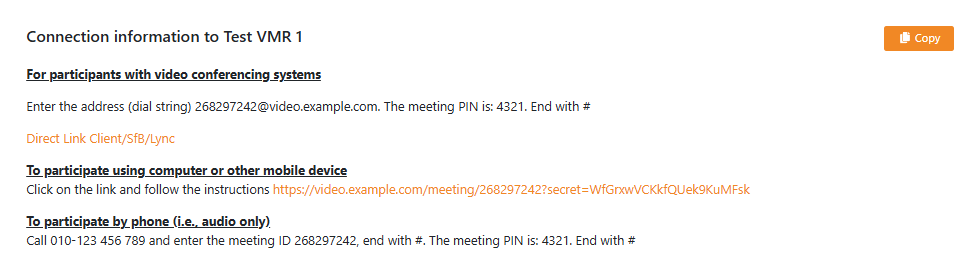
Displays the instructions and connection details for guests, based on your templates.
| Options | Description |
|---|---|
| Click to copy the instructions. |
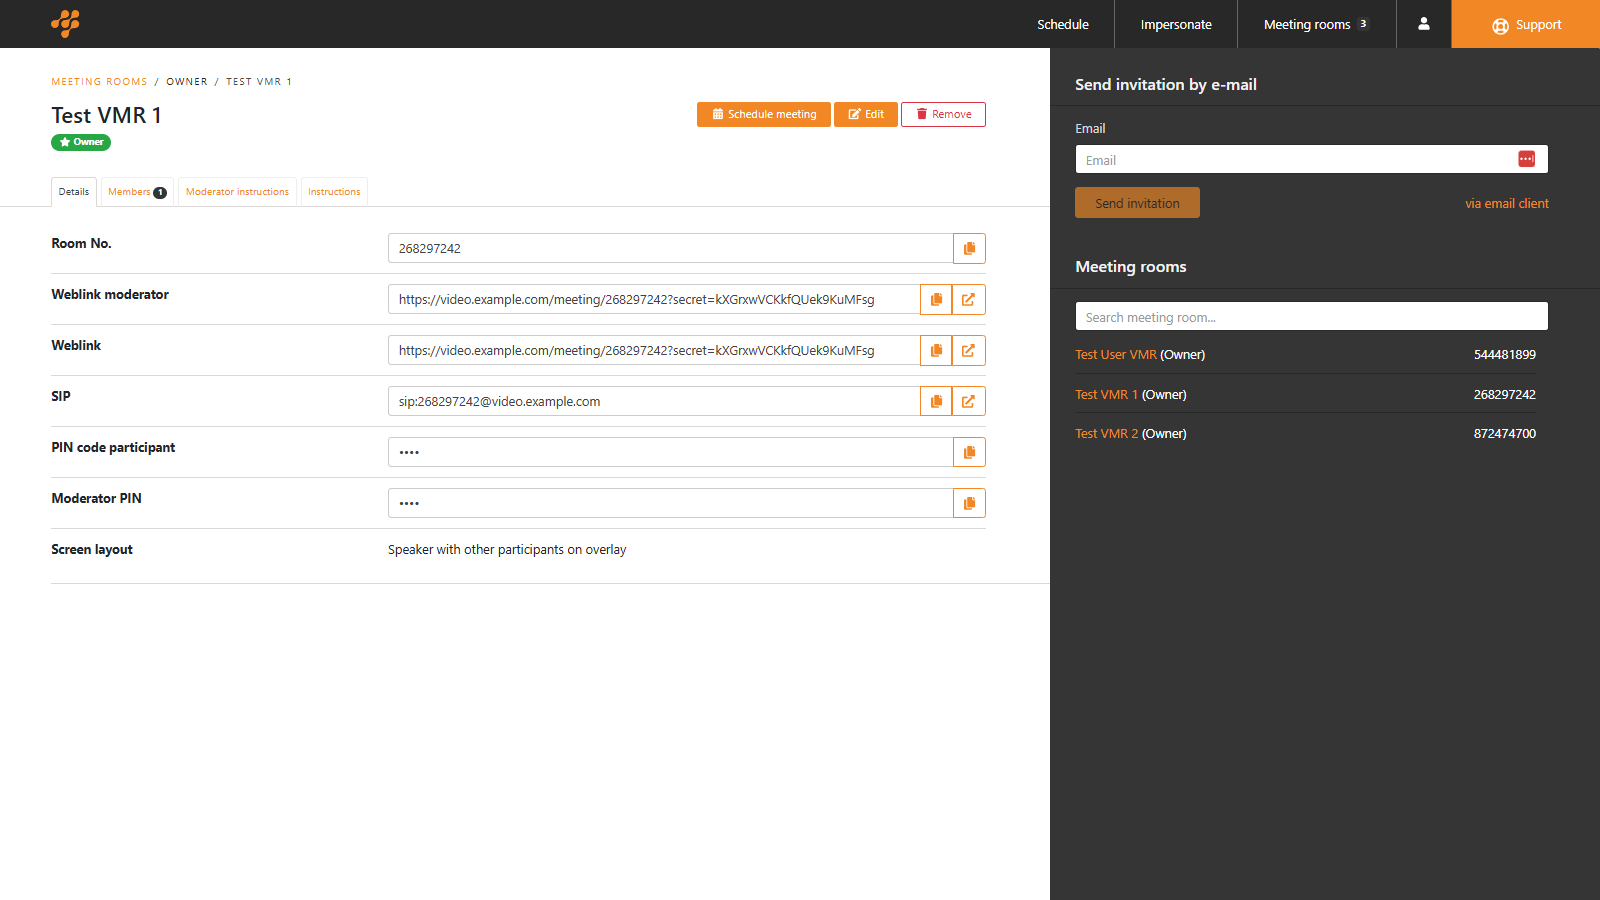
Right side menu
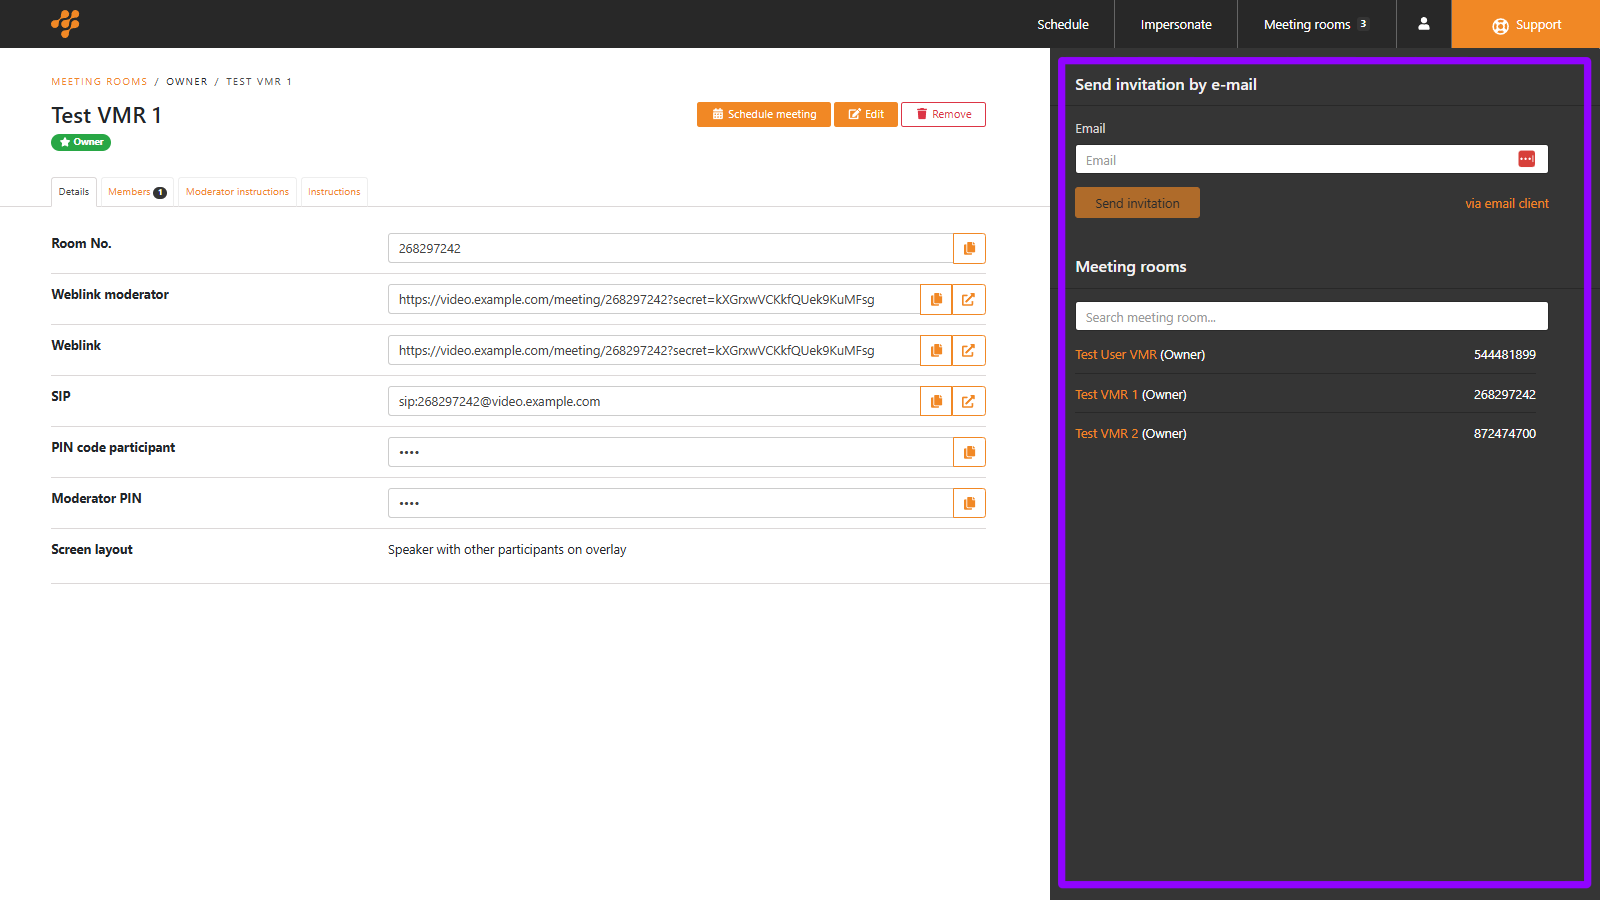
Send invitation by e-mail
| Options | Description |
|---|---|
| Enter the email of someone you wish to invite. | |
| Click to send the guest invitation to the address entered above. | |
| via email client | Opens your email client with the guest invite populated. |
Meeting rooms
| Options | Description |
|---|---|
| Search for a meeting room from the list below. Clicking the meeting room name in the list takes you to that room. |
Scheduled meeting information
Left side menu
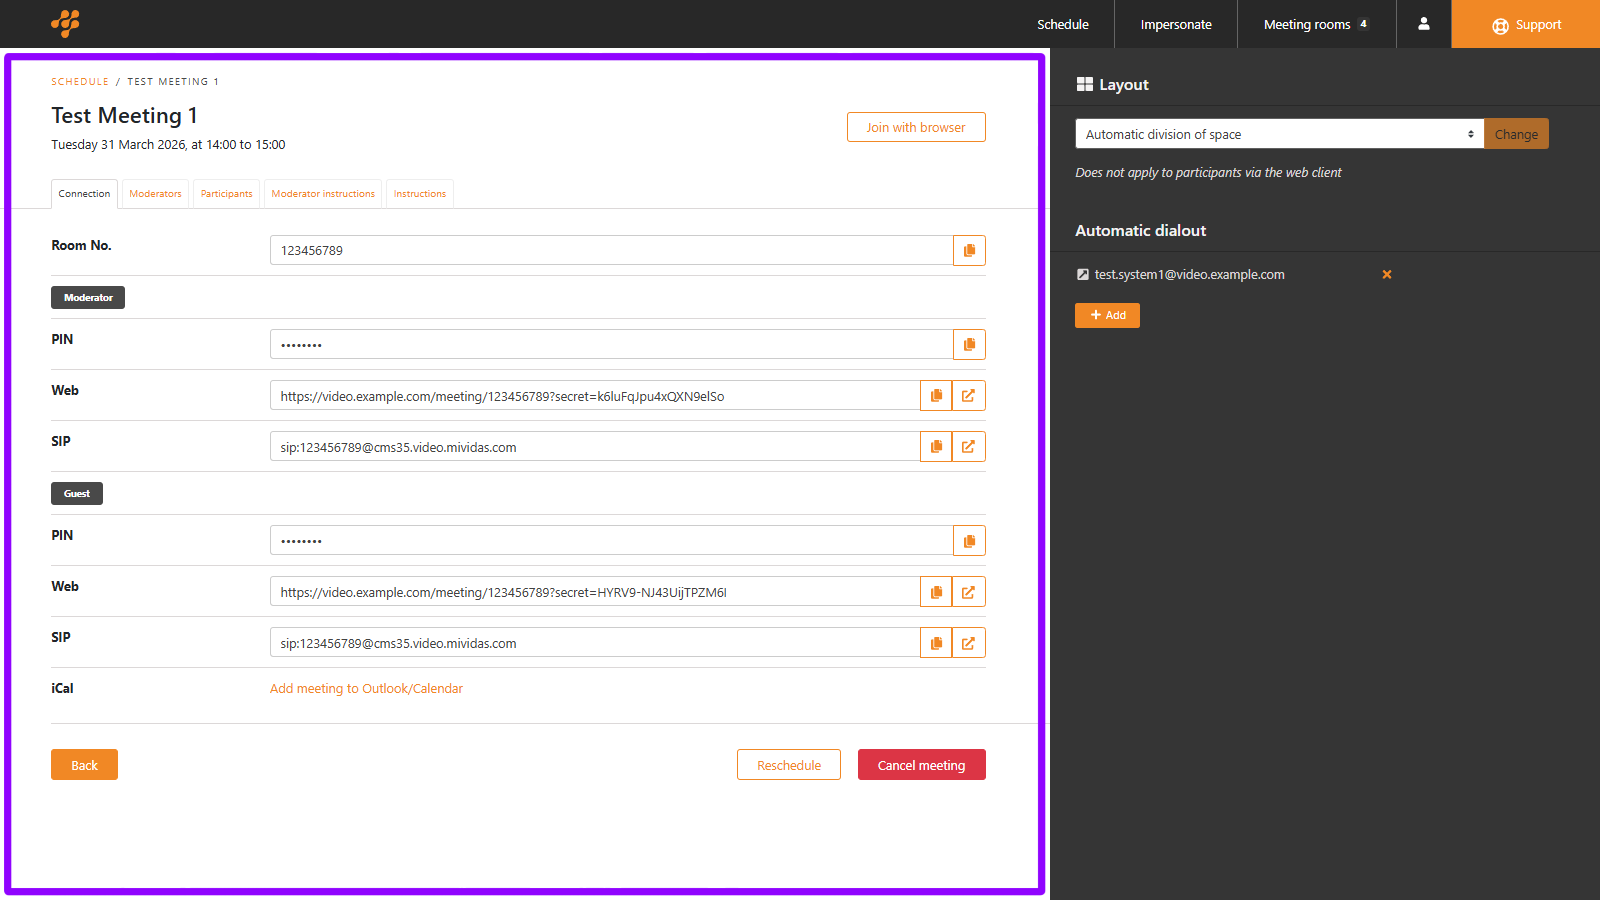
Connection
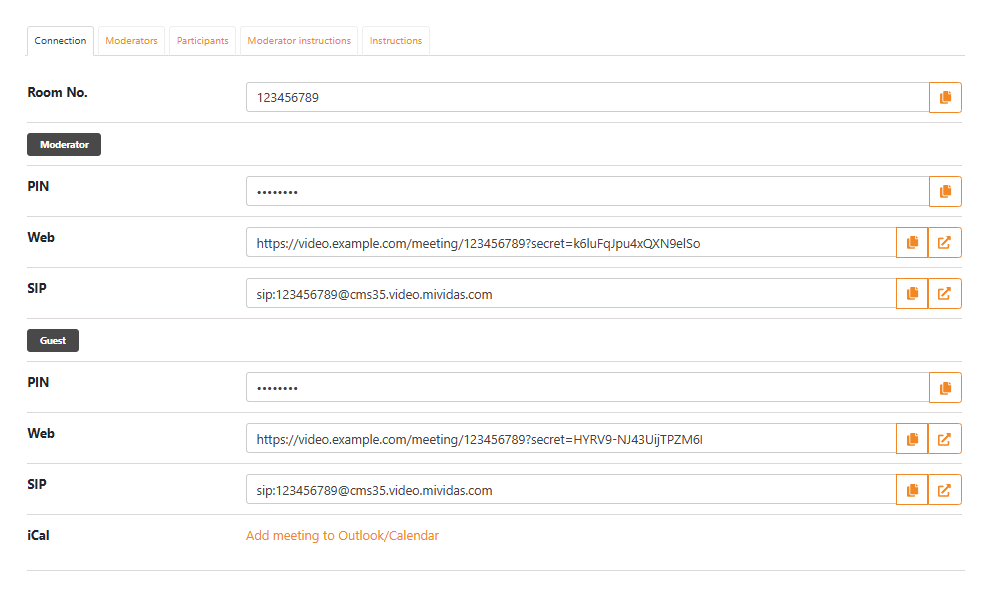
| Option | Description |
|---|---|
| Room No. | Displays the meeting room number. Click |
| Moderator / PIN | Displays the PIN for moderators. Click |
| Moderator / Web | Displays the weblink for moderators. Click |
| Moderator / SIP | Displays the SIP URI for moderators. Click |
| Guest / PIN | Displays the PIN for guests. Click |
| Guest / Web | Displays the weblink for guests. Click |
| Guest / SIP | Displays the SIP URI for guests. Click |
| iCal | Download the meeting as a .ics file for your calendar application. |
Moderators
This page displays all invited moderators for the meeting. It also allows you to add or remove moderators.

- ID – ID of this invite for troubleshooting purposes.
- E-mail – Displays the email address of the moderator.
- Time – The date and time of when the invitation was sent.
Participants
This page displays all invited participants for the meeting. It also allows you to add or remove participants.
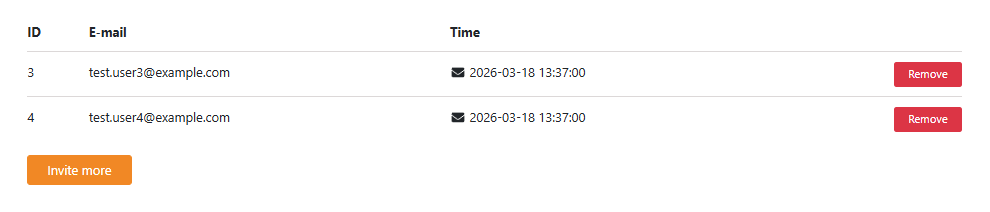
- ID – ID of this invite for troubleshooting purposes.
- E-mail – Displays the email address of the participant.
- Time – The date and time of when the invitation was sent.
Moderator instructions

Displays the instructions and connection details for moderators, based on your templates.
| Options | Description |
|---|---|
| Edit these instructions. | |
| Print these instructions. | |
| Download these instructions as a .ics file for your calendar application. | |
| Copy these instructions. |
Instructions
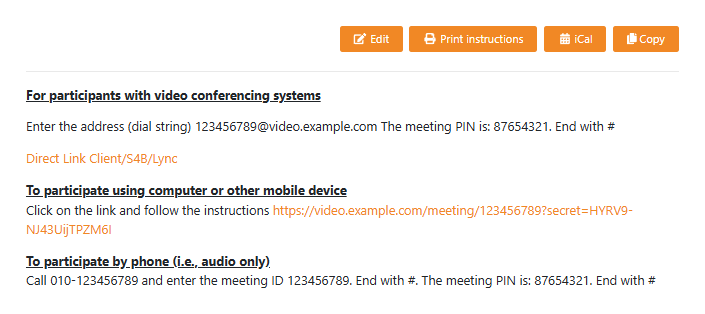
Displays the instructions and connection details for moderators, based on your templates.
| Options | Description |
|---|---|
| Edit these instructions. | |
| Print these instructions. | |
| Download these instructions as a .ics file for your calendar application. | |
| Copy these instructions. |
Right side menu

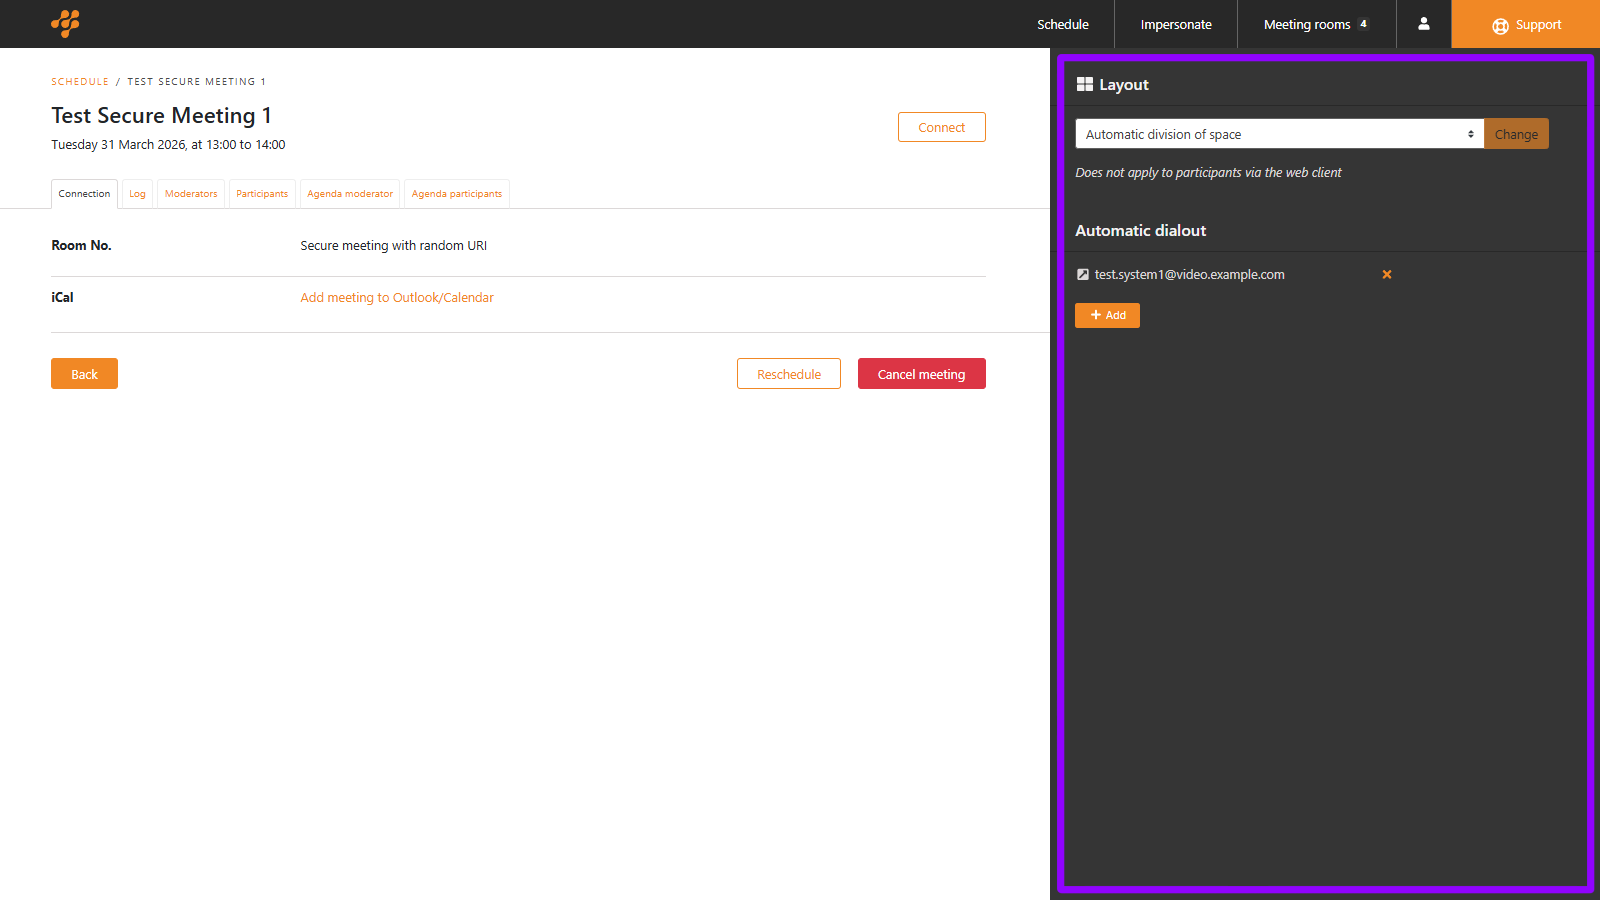
Layout
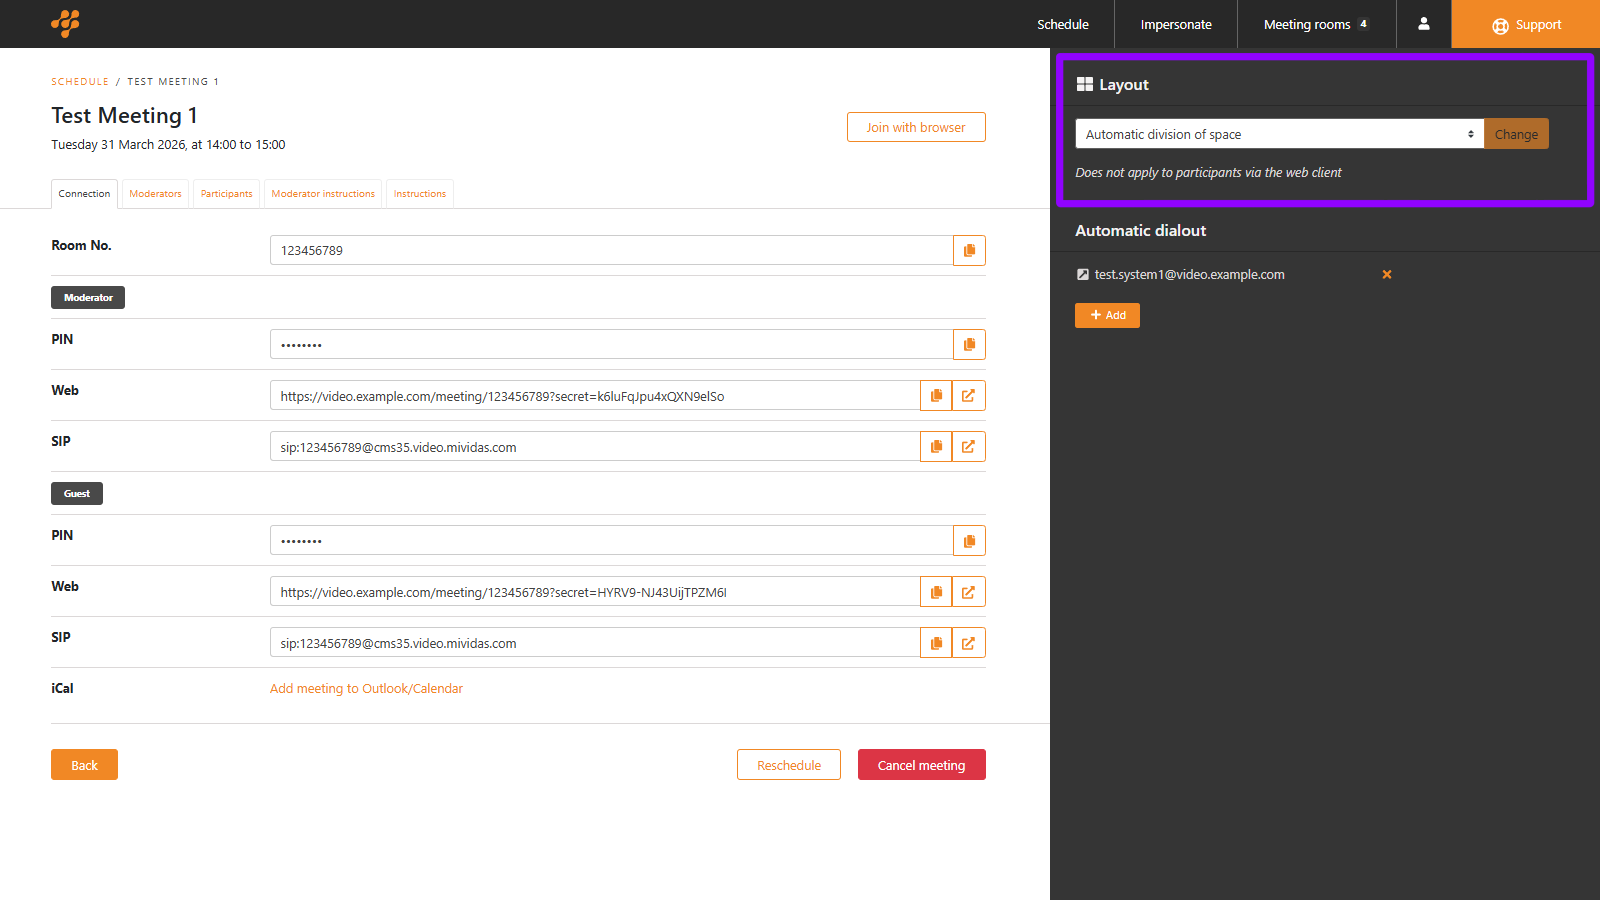
If you wish to change the layout of this meeting, select it here and click .
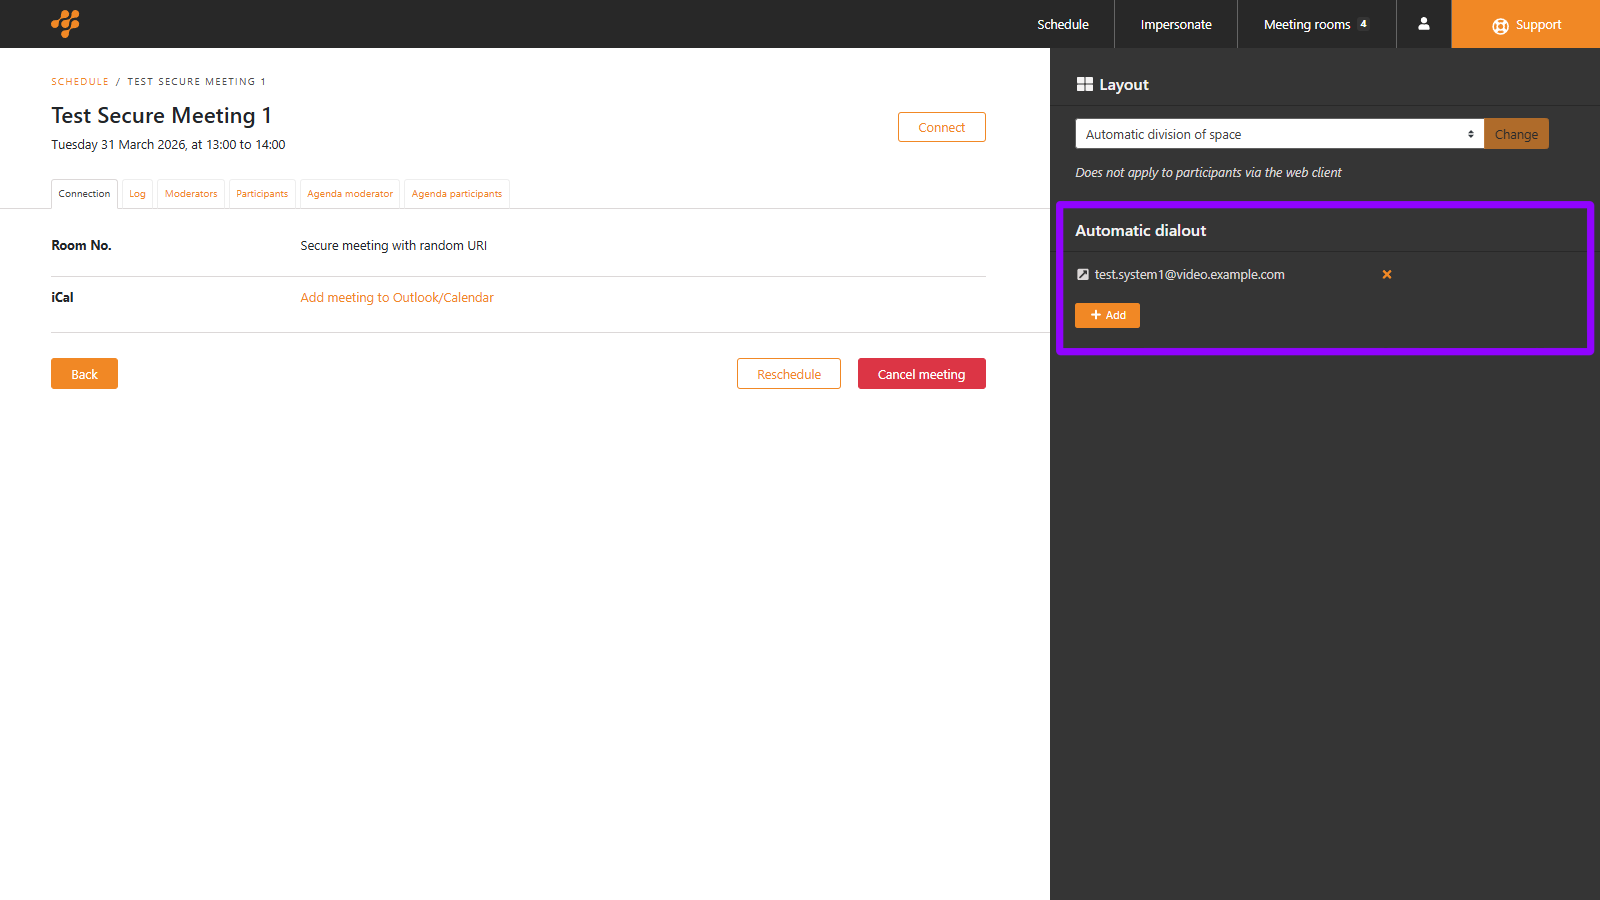
Automatic dialout
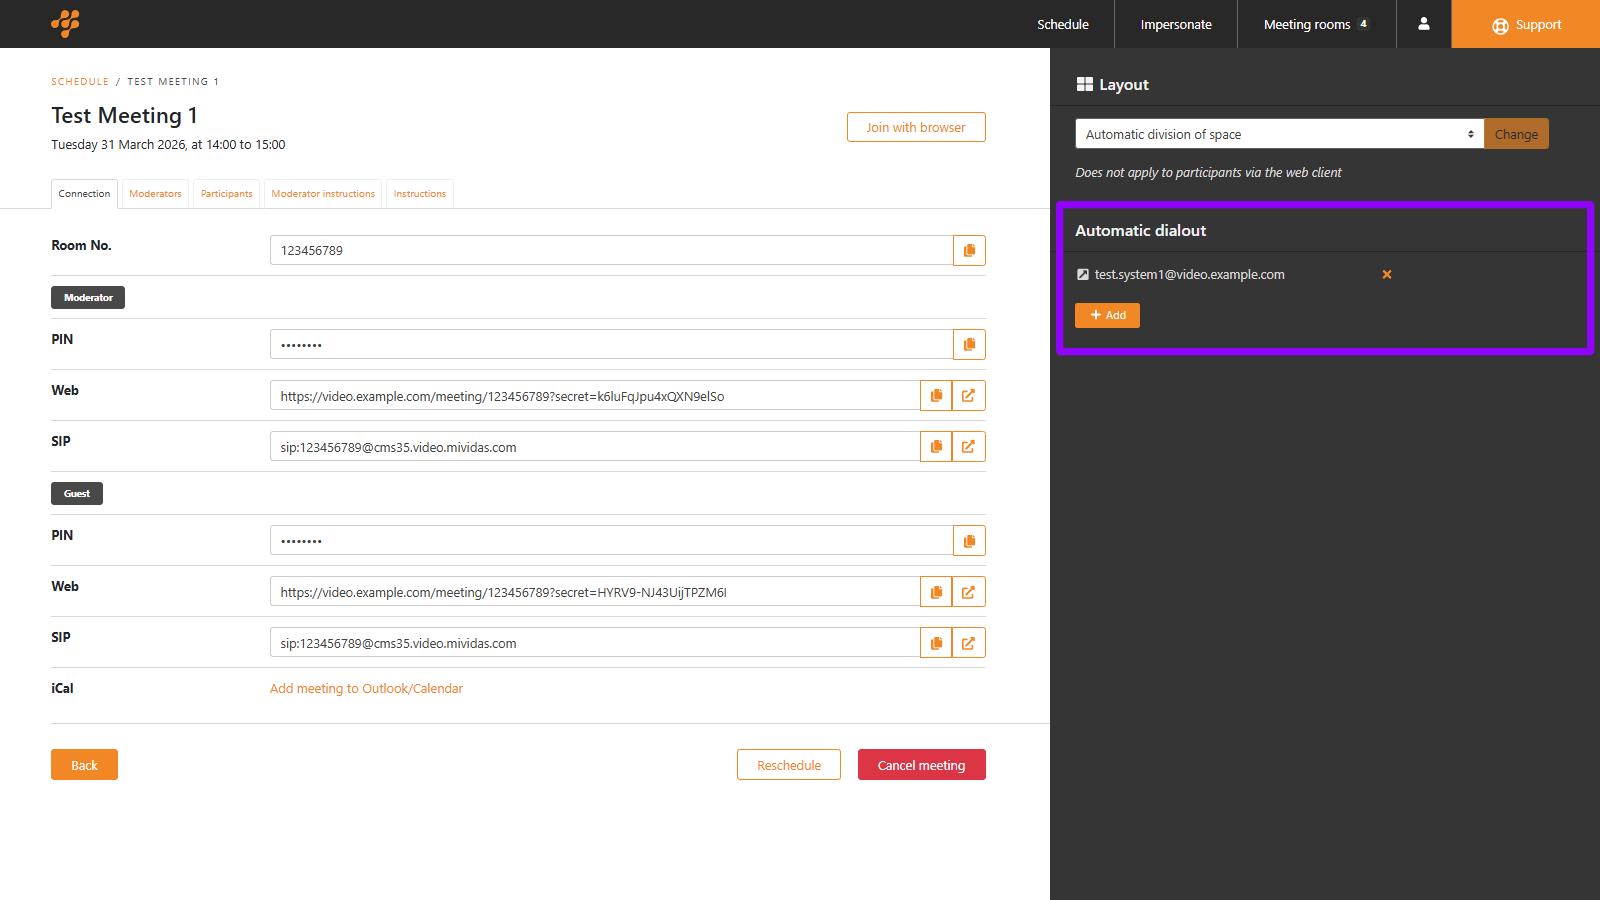
Displays system added to the meeting.
Scheduled secure meeting information
Left side menu
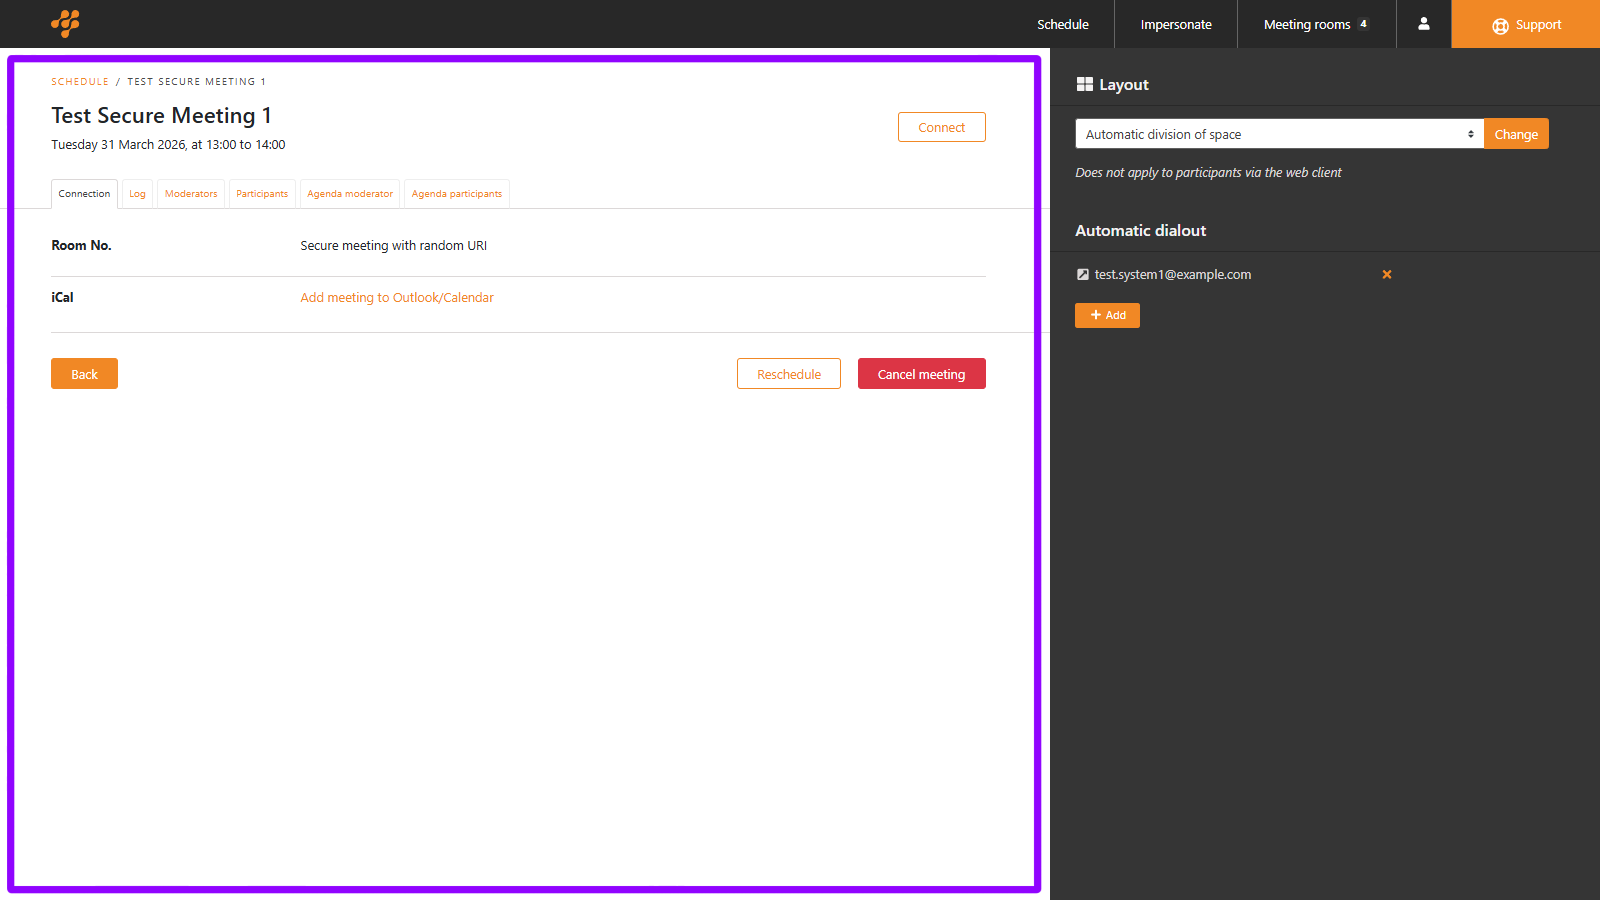
Connection

Secure meetings do not display any connection details; that is all handled by Mividas Identify.
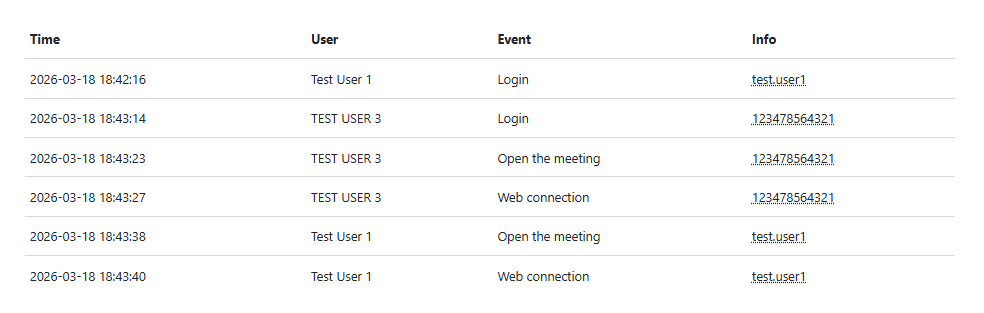
Log
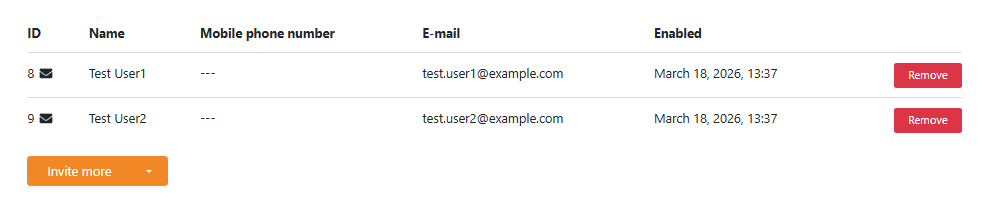
Moderators
| Options | Description |
|---|---|
| ID | ID of this invite for troubleshooting purposes. It can also display an icon showing the status of the invitation:
(
) – The email has been successfully forwarded to your email relay. Hovering the icon displays the date and time it was sent. |
| Name | Download details as a .ics file for your calendar application. |
| Mobile phone number | Displays the mobile phone number of the invited moderator, if any. Used only for SMS invitations and identifications. |
| The email address of the invited moderator. | |
| Enabled | The date and time when this meeting invitation was created. |
| Remove this invited moderator. | |
|
– Invite more moderators to the meeting, using the same identification method as when you created the meeting.
– Invite more moderators to the meeting, choosing another available identification method than when you created the meeting. |
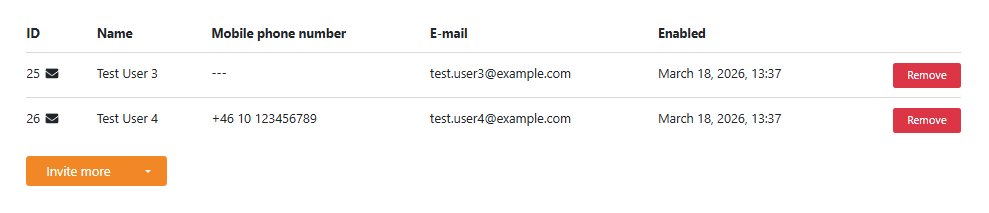
Participants
| Options | Description |
|---|---|
| ID | ID of this invite for troubleshooting purposes. It can also display an icon showing the status of the invitation:
(
) – The email has been successfully forwarded to your email relay. Hovering the icon displays the date and time it was sent. |
| Name | Download details as a .ics file for your calendar application. |
| Mobile phone number | Displays the mobile phone number of the invited participant, if any. Used only for SMS invitations and identifications. |
| The email address of the invited participant. | |
| Enabled | The date and time when this meeting invitation was created. |
| Remove this invited participant. | |
|
– Invite more participants to the meeting, using the same identification method as when you created the meeting.
– Invite more participants to the meeting, choosing another available identification method than when you created the meeting. |
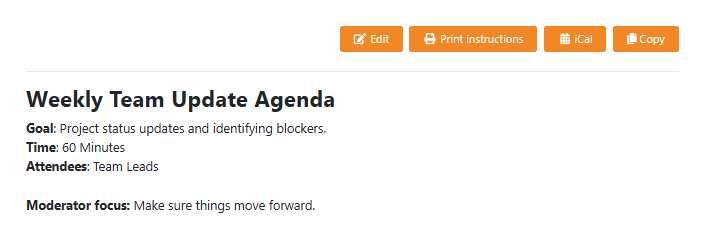
Agenda moderator
| Options | Description |
|---|---|
| Edit this agenda. | |
| Print this agenda. | |
| Download this agenda as a .ics file for your calendar application. | |
| Copy this agenda. |
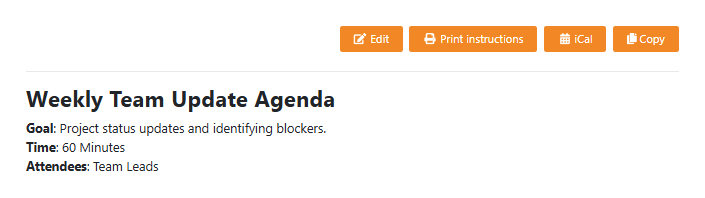
Agenda participants
| Options | Description |
|---|---|
| Edit this agenda. | |
| Print this agenda. | |
| Download this agenda as a .ics file for your calendar application. | |
| Copy this agenda. |
Right side menu
Layout

If you wish to change the layout of this meeting, select it here and click .
Automatic dialout
Displays system added to the meeting.
1.7. Settings
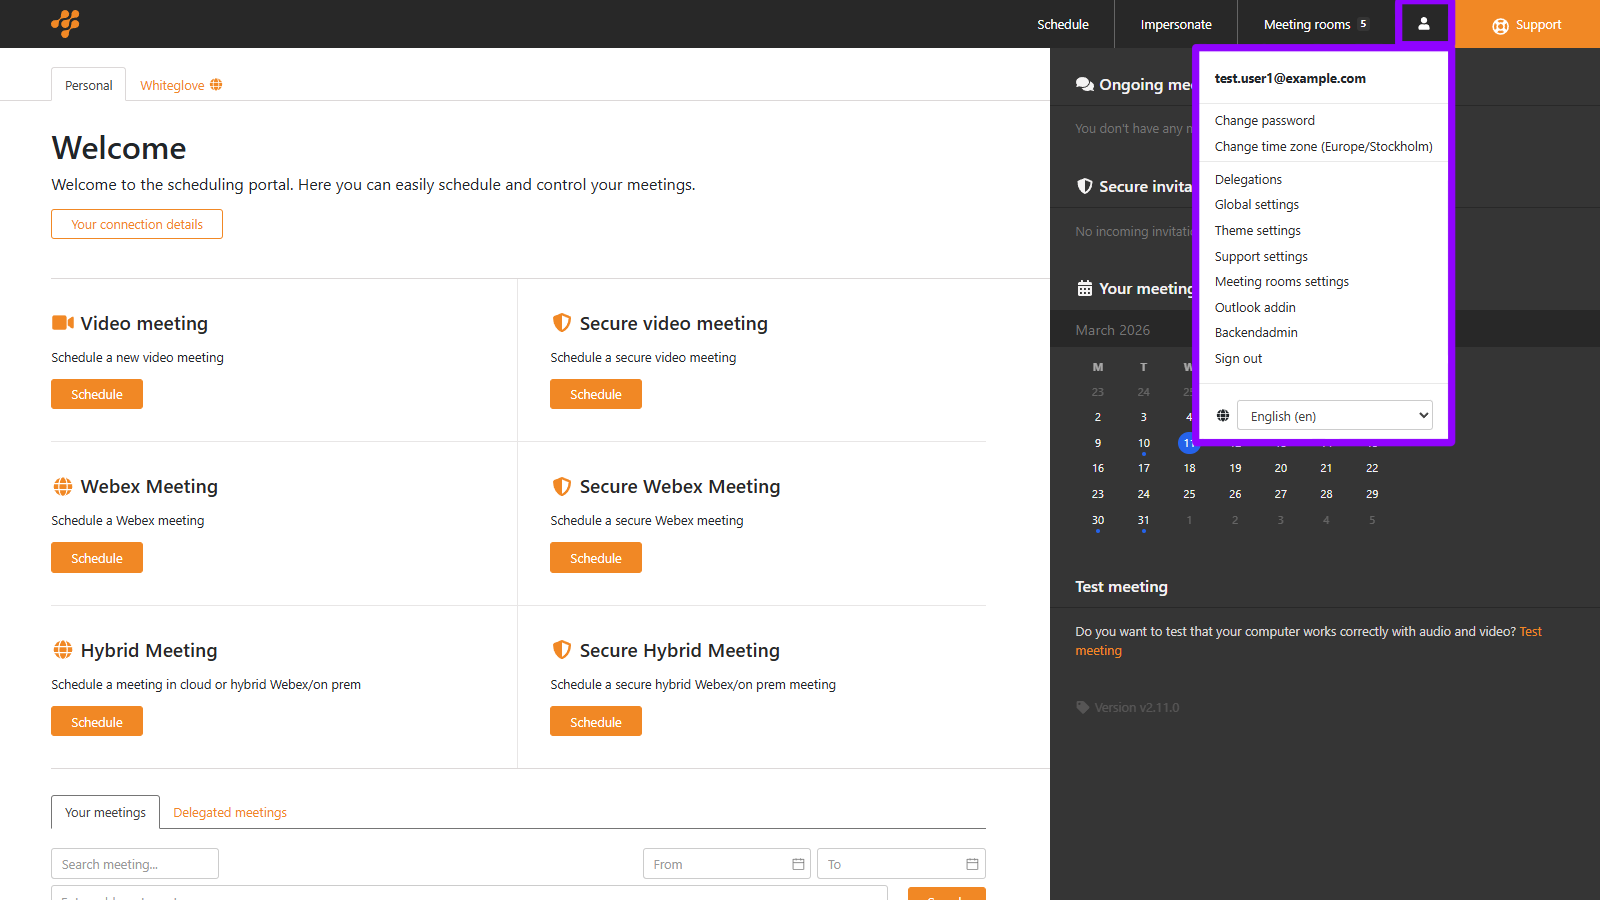
Under you can modify the Mividas Meeting Portal’s functions and customize its branding, including the Outlook add-in.
Change password
Allows you to change the password of your currently logged-in account, or takes you to a page or site that explains how to do it.
Change time zone
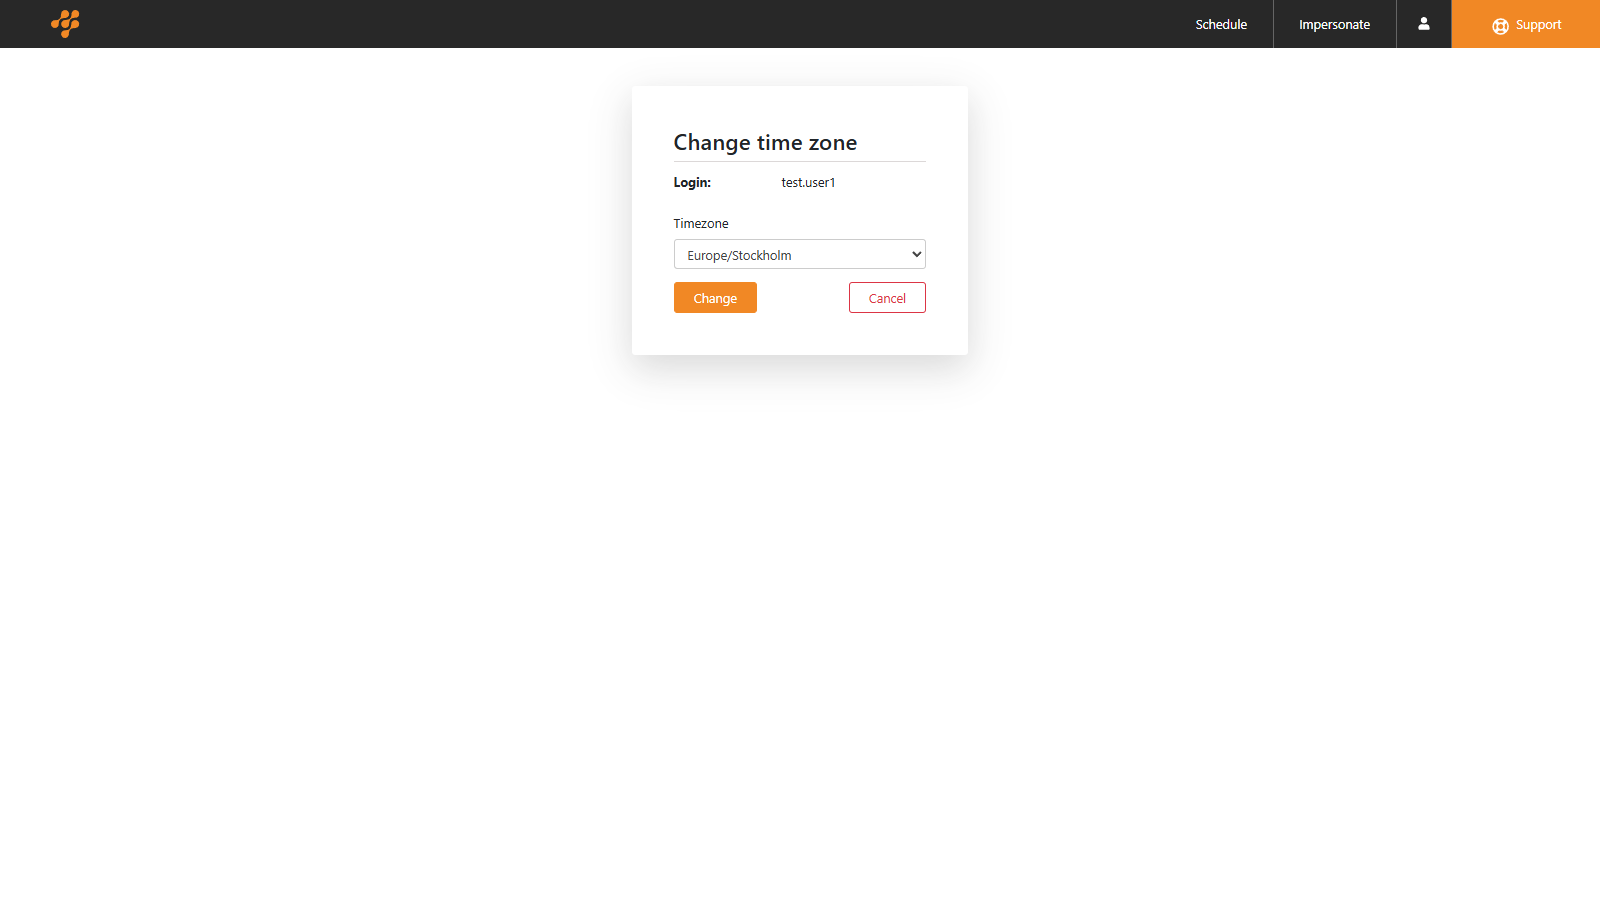
| Option | Description |
|---|---|
| Select your current time zone. | |
| Click to change to your selected time zone. | |
| Cancel the change of time zone. |
Delegations
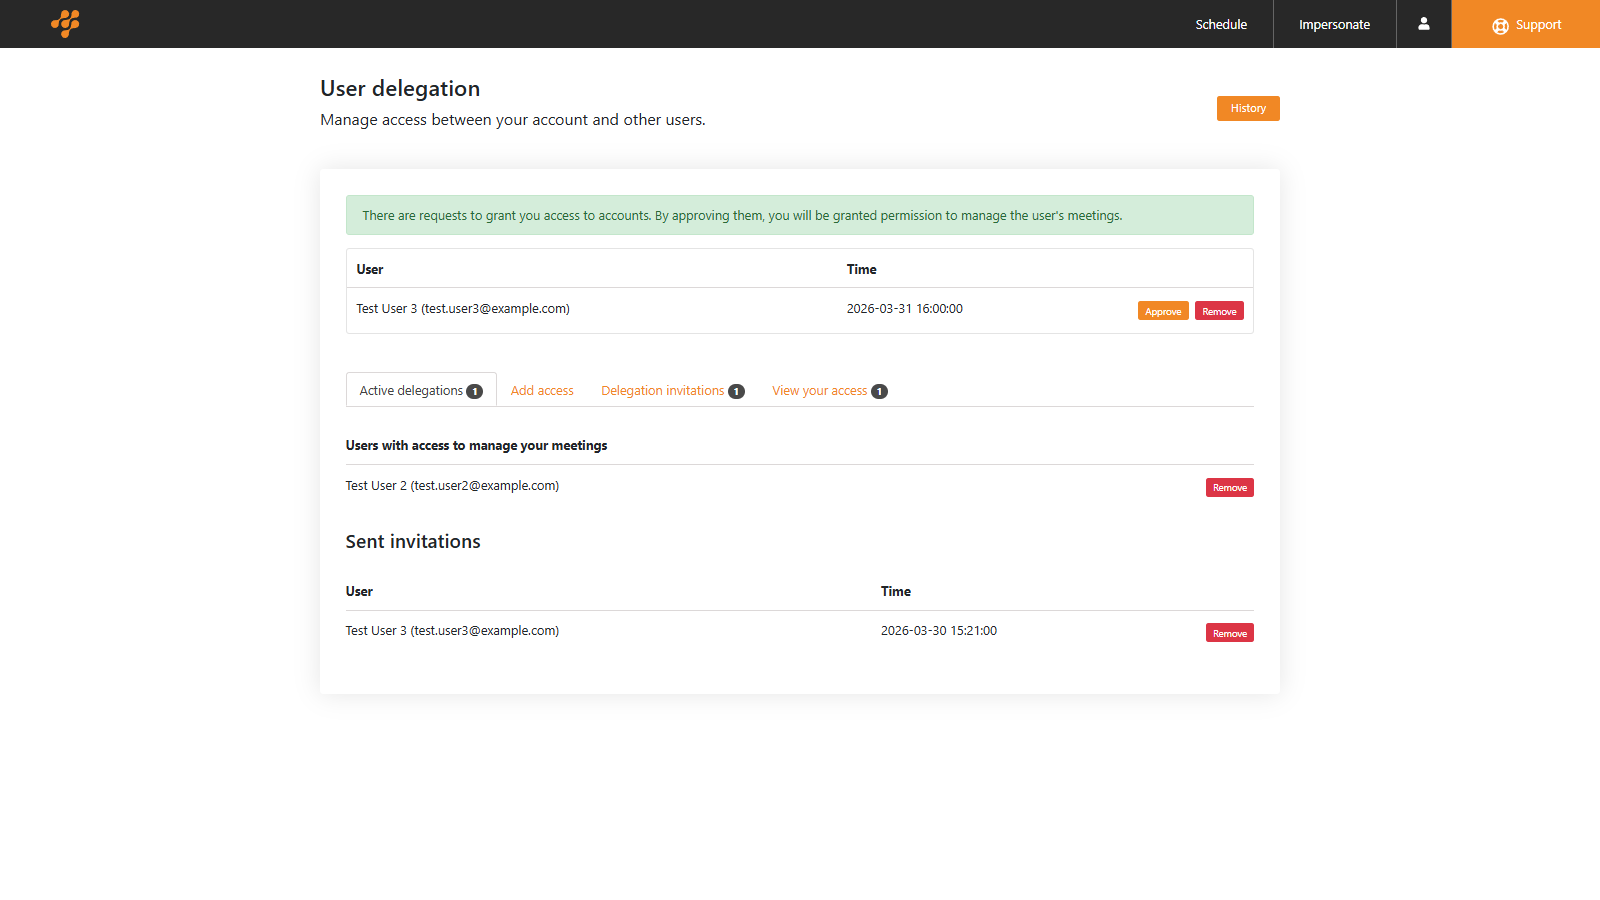
Delegations allow you to grant other users permission to manage your video meetings on your behalf. This is useful when assistants, colleagues, or team members need to schedule, change, or cancel meetings for you. The delegation system uses an invitation-based workflow with full audit tracking.
| Option | Description |
|---|---|
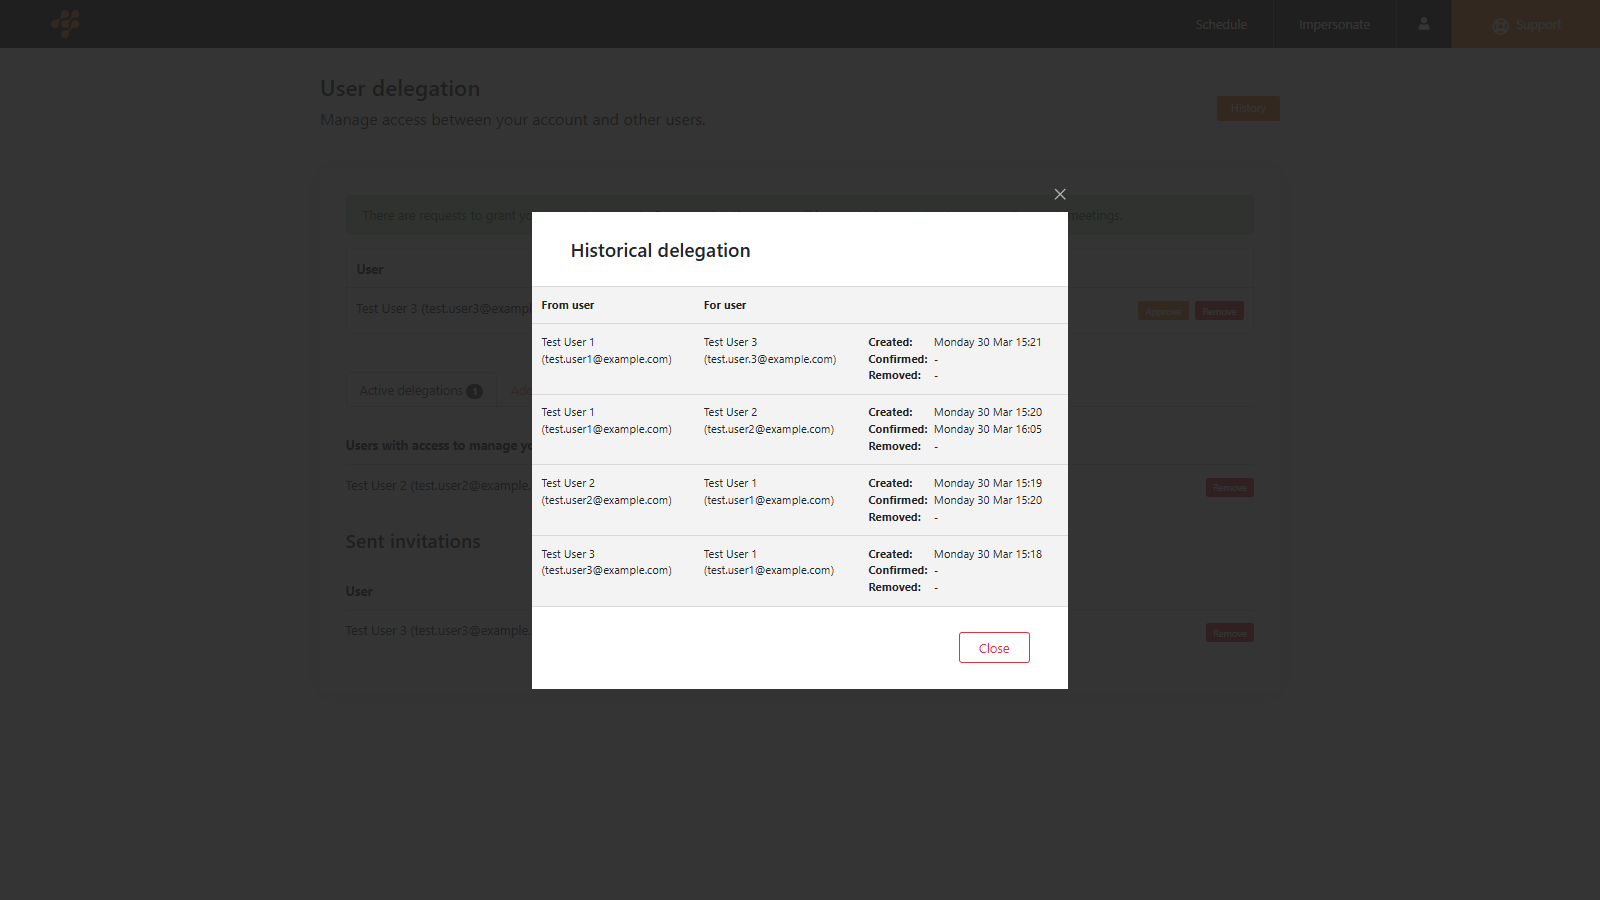
| Click to view you history of delegation events. |
Historical delegations
| Option | Description |
|---|---|
| From user | Displays the user who sent the delegation request, including their full name and e-mail address. |
| For user | Displays the user who received the delegation request, including their full name and e-mail address. |
| Created | Displays the day, date, and time the delegation request was created. |
| Confirmed | Displays the day, date, and time the delegation request was confirmed. |
| Removed | Displays the day, date, and time the delegation request was removed. |
Incoming request
If you have an incoming request to manage someone’s meetings, this will be shown at the top of the page:

| Option | Description |
|---|---|
| User | Displays the name and e-mail address of the person who sent the request. |
| Time | Displays the date and time for the received request. |
| Approve the request. | |
| Remove the request, declining it. |
Active delegations

Users with access to manage your meetings
List all users who have access to manage your meetings, including their full names and e-mail addresses. Click to remove that user’s access.
Sent invitations
List all users to whom you have sent an invitation to manage your meetings, but they have not yet accepted the request, including their full names and e-mail addresses. Click to remove that user’s invitation.
Add access

| Option | Description |
|---|---|
| Enter the name of the user you wish to serach for. | |
| Click to search. | |
| User | Displays the full name and their ID in the video platform. |
| Displays the email of the user. | |
| Click to send an invitation to that user. |
Delegation invitations

| Option | Description |
|---|---|
| User | Displays the full name and e-mail of the user. |
| Time | Displays the date and time of the sent invitation. |
| Remove the invitation. |
View your access
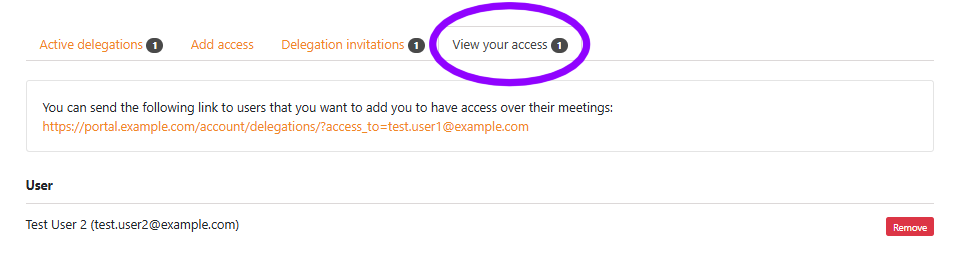
| Option | Description |
|---|---|
| User | Displays the full name and e-mail of the user you have access to. |
| Remove your access to this person. |
Global settings
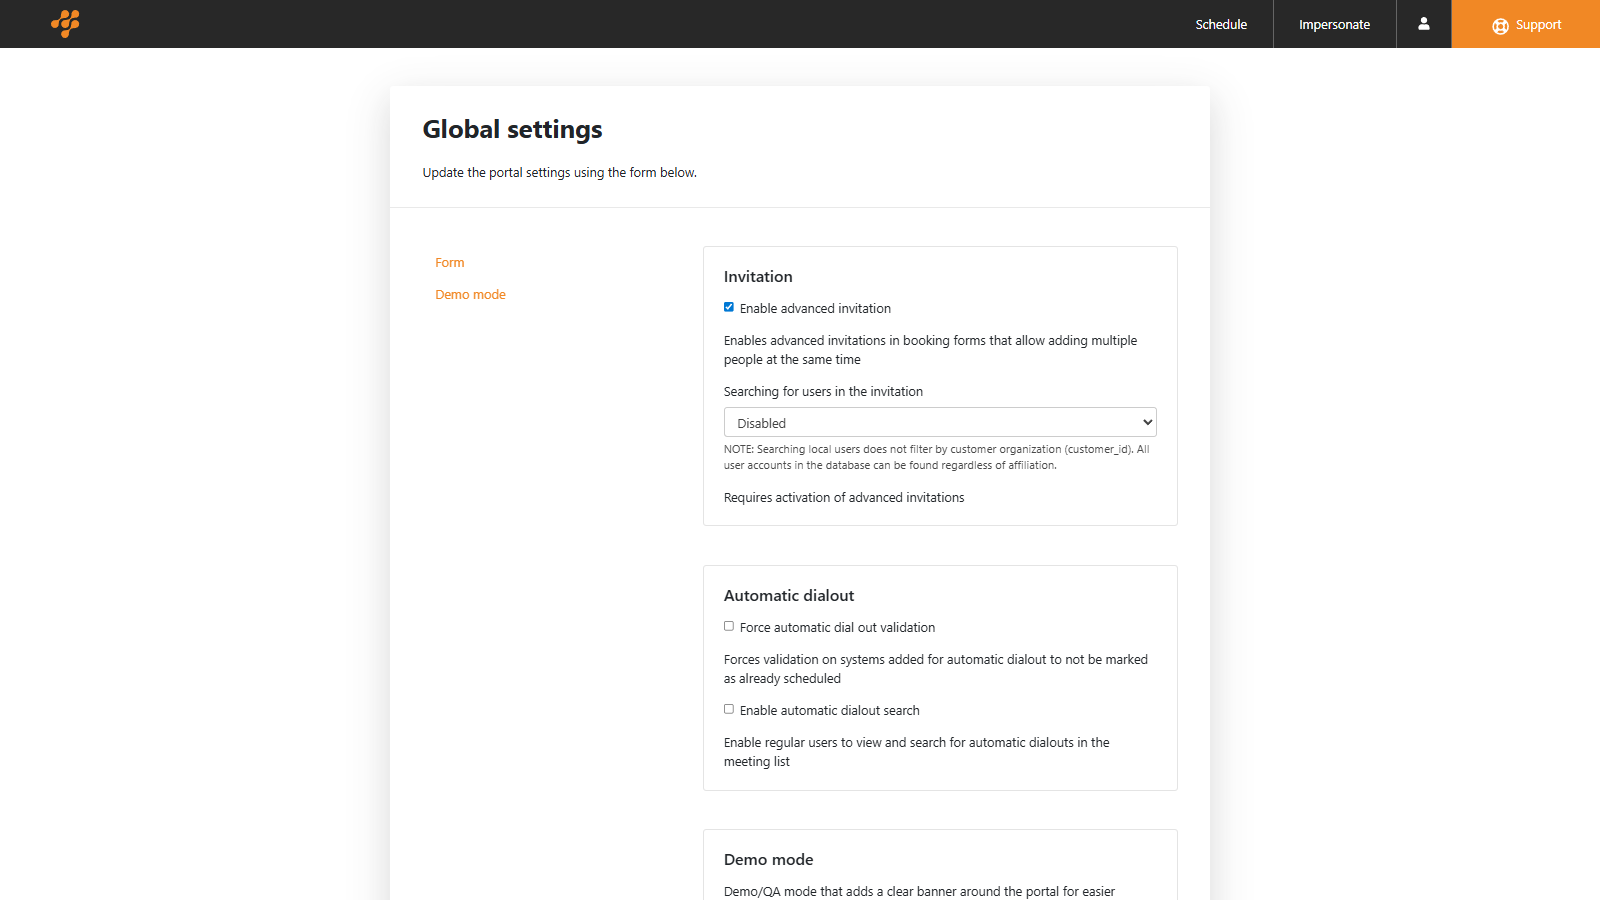
Invitation

| Option | Description |
|---|---|
| Enable advanced invitation | Enables advanced invitations in booking forms that allow adding multiple people at the same time. |
| Searching for users in the invitation 1 | Select how searching for users should work:
Disabled – User search is turned off. Users cannot search for other people when sending meeting invitations (default). |
- Requires activation of advanced invitations.
NOTE: Searching local users does not filter by customer organization (customer_id). All user accounts in the database can be found regardless of affiliation.
Automatic dialout

| Option | Description |
|---|---|
| Force automatic dialout validation | Forces validation on systems added for automatic dialout to ensure they are not already scheduled. |
| Enable automatic dialout search | Enable regular users to view and search for automatic dialouts in the meeting list. |
Demo mode

| Option | Description |
|---|---|
| Enable Demo/QA mode | Demo/QA mode that adds a clear banner around the Mividas Meeting Portal for easier version identification. |
| Demo banner text | Enter the text that you want to appear in the banner. |
| Demo banner color | Choose the color of the banner, in
hex format
. By default, the color is #FF0000. |
| Demo banner text color | Choose the color of the text within the banner, in
hex format
. By default, the color is #FFFFFF. |
Theme settings
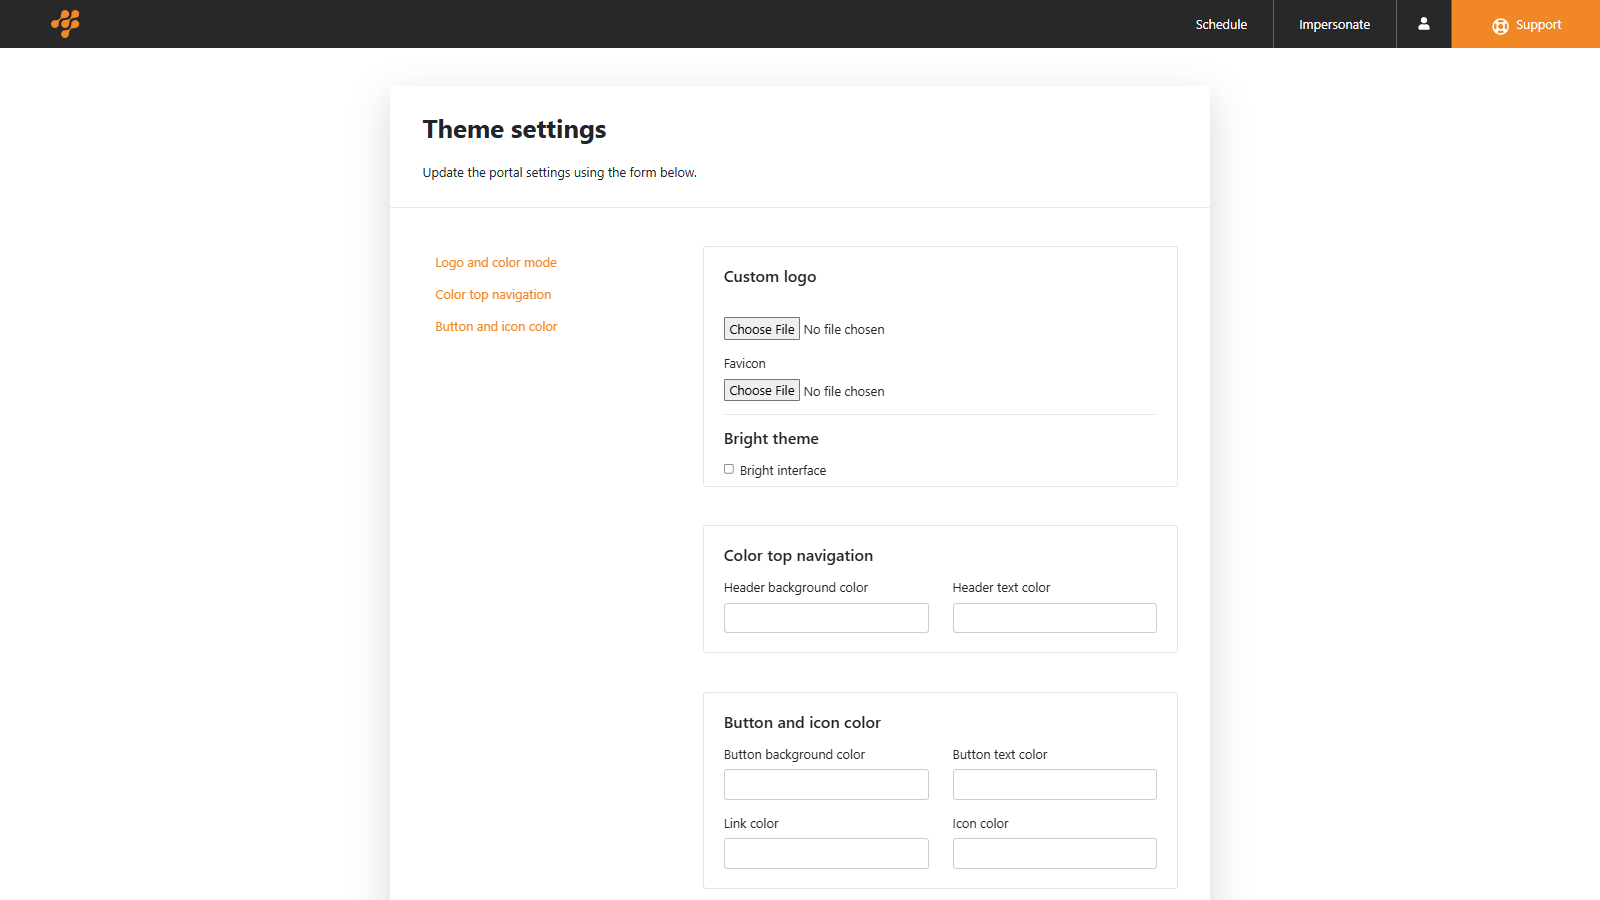
Custom logo
| Option | Description |
|---|---|
| Custom logo, choose file | Choose a file to upload as your custom favicon. PNG/SVG. Will be resized to fit 35px height |
| Custom favicon, choose file | Chose a file to upload as your custom favicon. PNG/SVG. Square icon, recommended size 64x64px or 128x128px |
| Bright interface | Changes the background of the right menu on the scheduling interface to a brighter background color. It also makes the top navigator background color white and its text black, unless you set a custom color for it below. |
Color top navigation

| Option | Description |
|---|---|
| Header background color | Choose the background color of the header, in
hex format
. By default, the color is #282828. |
| Header text color | Choose the color of the banner, in
hex format
. By default, the color is #FFFFFF. |
Button and icon color
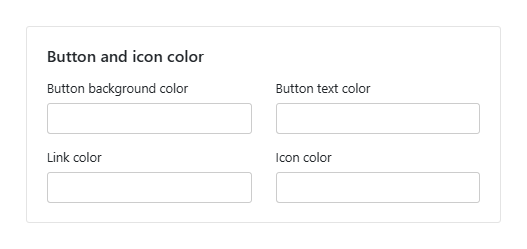
| Option | Description |
|---|---|
| Button background color | Choose the background color of the buttons, in
hex format
. This also includes the Support field at the top right corner. By default, the color is #F18825. |
| Button text color | Choose the text color of the buttons, in
hex format
. This also includes the Support field at the top right corner By default, the color is #FFFFFF. |
| Link color | Choose the text color of the links, in
hex format
. By default, the color is #F18825. |
| Icon color | Choose the color of the icons, in
hex format
. By default, the color is #F128825. |
To save any changes made, click at the bottom.
Support settings
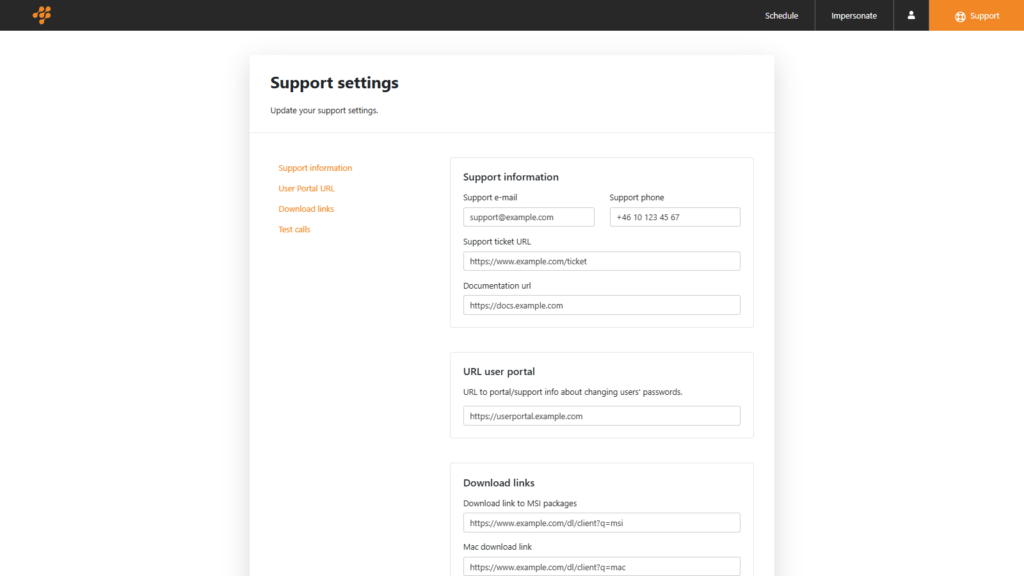
Support information

| Option | Description |
|---|---|
| Support e-mail | Enter the support e-mail that will be visible to users. |
| Support phone | Enter the support phone number that will be visible for users. |
| Support ticket URL | Enter a URL that users can click on to open a support ticket. |
| Documentation URL | Enter a URL that users can click on to read documentation. |
URL user portal

| Option | Description |
|---|---|
| URL user portal | Enter a URL to a page/site with information about changing users’ passwords. |
Download links

| Option | Description |
|---|---|
| Download link to MSI packages | Enter a URL to a MSI package for Windows users to download the video client (CMA). |
| Mac download link | Enter a URL to a file for Mac users to download the video client (CMA). |
| IOS download link | Enter a URL to a file for iOS users to download the video client (CMA). |
| Show download links | Check this box to show the download links on the right menu on the Schedule page. |
Test calls
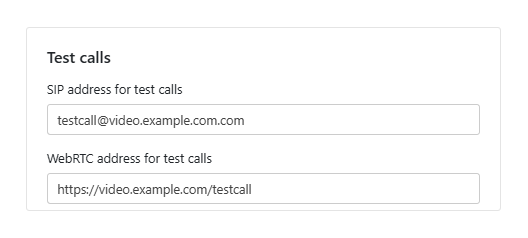
| Option | Description |
|---|---|
| SIP address for test calls | Enter a SIP URI that users can use for test calls, e.g. [email protected] |
| WebRTC address for test calls | Enter a URL that users can use for test calls over WebRTC, e.g. https://video.example.com/testcall |
To save any changes made, click at the bottom.
Meeting room settings
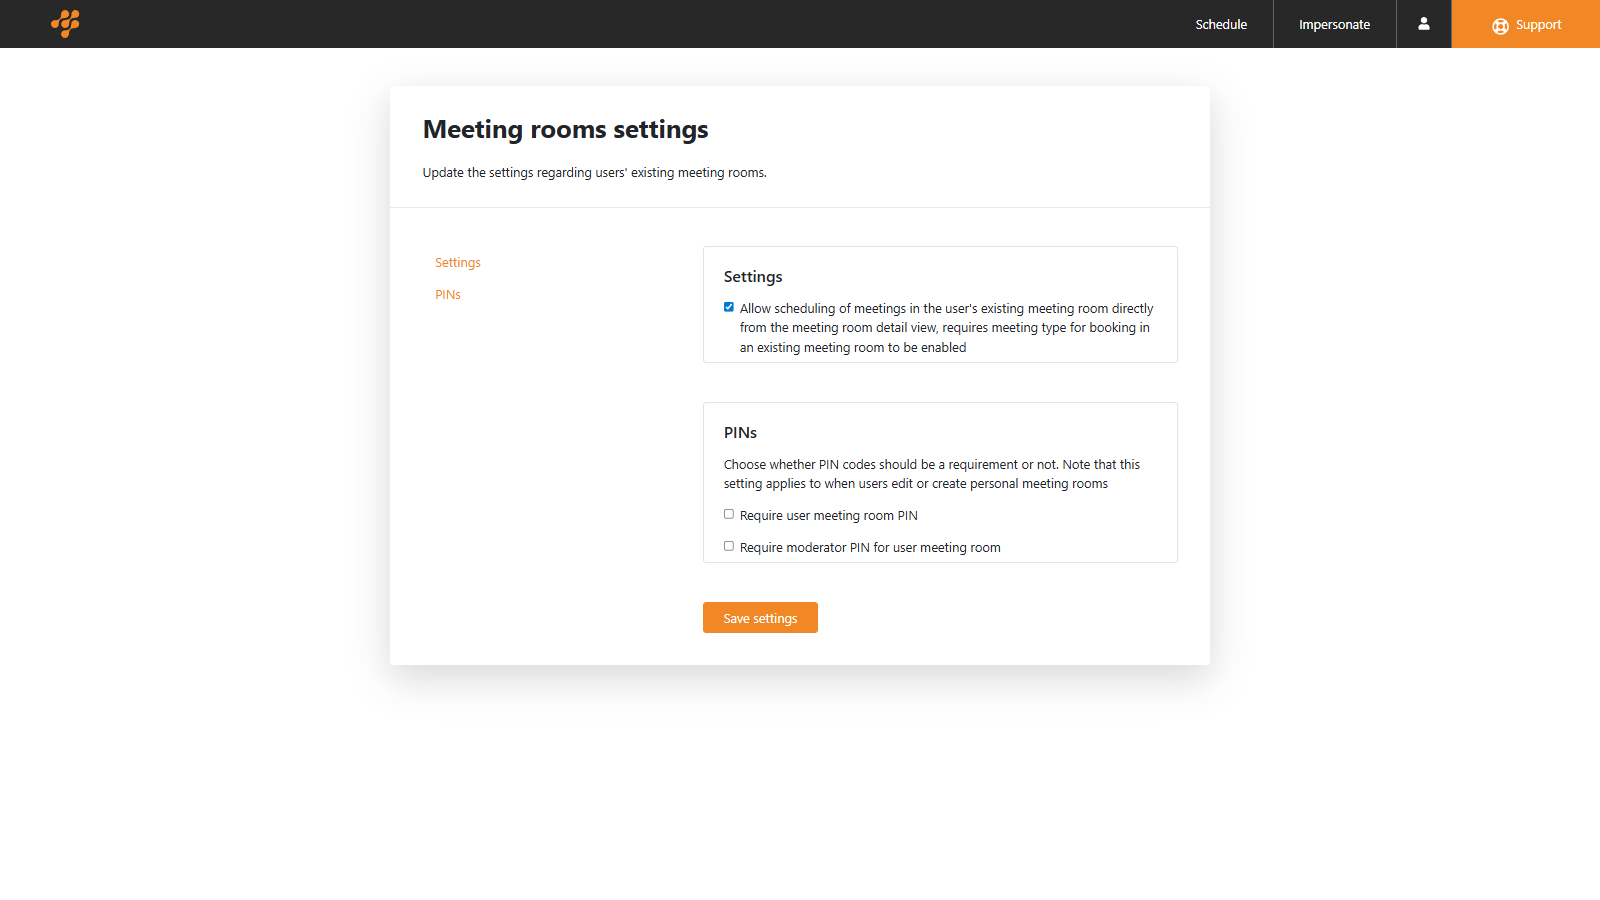
Settings

| Option | Description |
|---|---|
| Allow scheduling meetings in the user’s existing meeting room directly from the meeting room detail view, provided the meeting type for booking in an existing meeting room is enabled. |
PINs

| Option | Description |
|---|---|
| Require user meeting room PIN | Check this box to require a PIN code when a meeting is scheduled. Note that this also applies when users create or edit a personal meeting room. |
| Require moderator PIN for user meeting room | Check this box to require a moderator PIN code when a meeting is scheduled. Note that this also applies when users create or edit a personal meeting room. |
To save any changes made, click at the bottom.
Outlook addin

Installation instructions

For Office 365, use the direct link for central deployment: Integrated Apps
Watch instructions from microsoft for options on installation. There is the possibility of both testing locally on a single computer and central deployment.
If your administrator enabled Mividas Outlook addin, you’ll be able to access your manifest file below.
Menu-based selection in Outlook
| Option | Description |
|---|---|
| manifest.xml | Click to download your manifest.xml-file based on the settings below: |
| Enable single booking | Enables booking of an ordinary video meeting. |
| Enable booking in existing meeting rooms | Enables booking in an existing meeting room(VMR). |
Predetermined choice
Use the respective link below to activate only one type of booking.
| Option | Description |
|---|---|
| manifest_simple.xml | Allows only booking of an ordinary video meeting. |
| manifest_static.xml | Allows only booking in an existing meeting room(VMR). |
To save any changes made, click at the bottom.
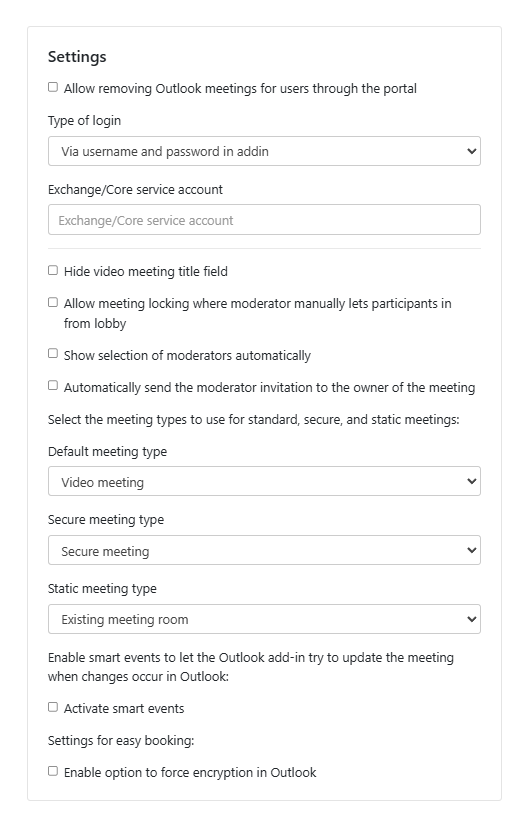
Settings
| Option | Description |
|---|---|
| Allow removing Outlook meetings for users through the portal | Allows users to remove meetings created in Outlook from Mividas Meeting Portal. |
| Type of login | Choose how the users should sign in:
– Via username and password in addin |
| Exchange/Core service account | This will automatically add a person/service account to the invite list to be able to filter meetings in the future |
| Hide video meeting title field | Hides the title/name field in the booking form. The meeting title will be taken from the Outlook calendar event subject instead. |
| Allow meeting locking | Shows the auto-lock option. When a meeting is locked, the moderator must manually admit each participant from the lobby. |
| Show moderator selection automatically | When enabled, the moderator selection panel is always expanded, prompting users to select which attendees should serve as moderators. When disabled, users must manually open the moderator selection. Enabled by default. |
| Automatically send moderator invitation to meeting owner | Automatically adds the meeting organizer as a moderator. |
| Default meeting type | Select the meeting type to use for meetings. |
| Secure meeting type | Select the meeting type to use for secure meetings. |
| Static meeting type | Select the meeting type to use for static meetings. |
| Activate smart events | Enable smart events to let the Outlook add-in try to update the meeting when changes occur in Outlook.
Note: Changing this parameter requires the addin to be redeployed. |
| Enable option to force encryption in Outlook | If this setting is enabled, a checkbox will appear in the Add-In, allowing users to enforce encryption for the meeting. For Cisco Meeting Server: If selected when scheduling a meeting in Outlook Add-In, the needsActivation parameter in the callLegProfile will be set to "require".If not selected, needsActivation will be set to "optional".For Pexip: If selected when scheduling a meeting in Outlook Add-In, the "Media encryption" will be set to "Required".If not selected, the "Media encryption" will be set to "Use global setting:" (Platform > Global Settings). |
To save any changes made, click at the bottom.
Branding

| Option | Description |
|---|---|
| Outlook icon title | The label shown on the add-in button in Outlook. |
| Heading easy booking | The label on the Simple booking button. |
| Heading for booking in static meeting rooms | The label on the Static room booking button. |
| Header to display connection information | The label shown to attendees (non-organizers) for viewing connection information. |
| Override location (Django template) | This lets you customize the Location field in the calendar invitation (iCal) that is sent to participants. By default, the location is automatically set to the SIP dial-in address and meeting join URL. With this setting, you can replace it with a custom value.
The field accepts Django template syntax, meaning you can include dynamic meeting data using How it works: Example variables: Example result: |
| Upload icons | Upload an icon for use in Outlook. The format should be .png and it should be uploaded in 5 different sizes (16x16px, 32x32px, 64x64px, 80x80px, 128x128px). |
To save any changes made, click at the bottom.
Backend admin
Takes you to the backend admin page.
1.8. Support

To reach the support information available for users, click on in the top right corner.
To see what information you can put here and edit those settings, check Support settings.
1.9. Backend admin

This page is accessible only to super users.
This section allows you to adjust various settings, including defining unique configurations for each meeting type and enforcing certain features based on the company’s policy. It provides an overview of all your current settings. Below is a short description of each part. For more information regarding settings under backend admin, please contact us at [email protected].
- Account – User accounts in the Mividas Meeting Portal. Lists all users, including their usernames, emails, and login timestamps. Accounts are created automatically when users log in via LDAP or SAML. This section is read-only — accounts cannot be created or edited from here.
- Account delegate -Account delegation records. Shows active delegations (who has granted access to whom) and delegation requests (pending invitations). Both are read-only for auditing purposes.
- Audit logs – Audit log of all user activity in the portal. Tracks logins, logouts, meeting bookings, invitations, settings changes, and API calls. Each entry records the username, IP address, action type, and timestamp. Read-only.
- Authentication and Authorization – User and Groups.
- Users: Lists all users added to the Mividas Meeting Portal.
- Groups: Not in use at the moment.
- Axes – A framework for tracking and limiting login attempts to enhance security by protecting against brute-force attacks. Often used to enforce restrictions like rate limits or account lockouts.
- Book admin API – API key management for the administrative import and management API. Create and manage API keys used by external systems to import meetings or manage accounts programmatically.
- Flatblocks – Lightweight content management blocks often used for inserting static or semi-static content into websites or applications. These blocks are customizable and reusable across different parts of a system.
- Meeting -Lists all meetings in the Mividas Meeting Portal.
- Meeting types – Meeting type definitions. Configure the different types of meetings available to users (e.g., video meetings, secure meetings, webinars). Each type controls which booking steps are shown, PIN requirements, icons, display order, and advanced behavior via JSON settings. See the detailed information here.
- Section – Organizational sections for multi-provider and white-glove setups. Each section can connect to a different video infrastructure backend and override meeting type settings.
- Secure meeting – Secure meeting configuration. Manage global secure meeting settings and secure meeting types (with identity verification methods).
- Webhook – A mechanism for triggering real-time, automated notifications or actions in response to events within a system, typically by sending an HTTP POST request to a specified endpoint.
For more information regarding settings under Backend admin, please get in touch with [email protected]